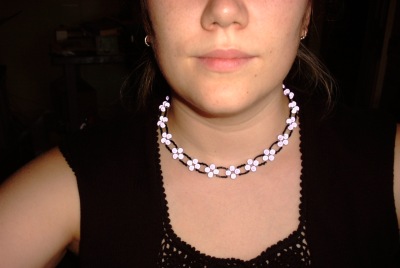
Look what I made! I was feeling so crappy when I was home sick Monday that I decided to make myself something pretty to compensate. I started flipping through a bead magazine that Ma Snook recently sent me. There I found instructions to make this great “flower” necklace. I’m a sucker for these things, but I always feel ripped off when I pay some craft fair hippie ten bucks for one. It didn’t look too hard so I decided to give it a shot. I nipped round the corner to pick up the supplies and then plopped myself down on the couch. I wasn’t sure how it would turn out, but the end result is just gorgeous (if I do say so myself). The actual construction time was, like, 90 minutes, but that was with me watching Friends, Malcolm, and Millionaire at the same time. In other words, this is a super easy project even if you’re a total beginner.
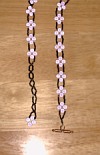 Technically the pattern is for a choker, but I can’t stand chokers. So I made mine a little bit longer, and since the beads weren’t too big it lays pretty flat on my chest. In the instructions below I’ll tell you where you can lengthen yours if you want. To the right you can see the back closure. It uses a “T-bar” which you then slip through one of the loops on the other side, which means it’s adjustable.
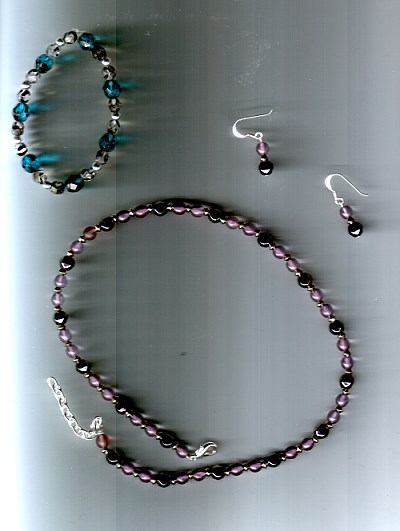
Okay, supplies. You need two types of beeds: teeny little “seed” beads (the black ones in my necklace), and bigger beads to use for the petals (the purple ones). Seed beads are those itty-bitty little round ones that you buy in bulk. My shop was actually out of black ones, so instead the ones I used are little chopped tubular ones. You really can’t tell the difference, so just get what’s available. The smallest amount my shop sells is 25 grams, which was way more than enough to do, like, five necklaces. I’d estimate you need a very small handful (and even that will probably leave some left over).
For the bigger beads, you can use whatever you want. Mine are called “Mysterious Beads” and each one is about the size of a small pea. Just keep in mind that they’re going to be clustered in groups of four, so the bigger beads you get the chunkier your necklace will be. Anything vaguely round will do. (The magazine shows examples with faceted glass crystals and freshwater pearls.) You need 88 of them to make the basic choker, but I just bought 100 since it was cheaper that way. I ended up using some of the extras to lengthen it, too.
Other than the beads, you need beading cord. You could probably get away with using fishing line, but I’d avoid sewing thread if possible (I don’t think it’s strong enough). Whatever you get, it needs to be extra-fine because it has to go through some beads twice. You also need a beading needle. My seed beads were too tiny for a sewing needle, so I had to get a special one. It’s basically just two pieces of thin wire connected at the ends (to create a very long “eye” for your cord). They should have some near where you buy the seed beads. You also need the “T-bar”, which is the metal rod with a ring on it that you connect to one end of the necklace. If you can’t find one you can probably make do with a normal necklace ring clasp (it just won’t look as pretty at the back). Lastly, you need a bit of clear nail polish. But hey, everybody’s got that, right?
Instructions:
- Pull out a length of about 3 yards of beading cord. Yep, that’s like nine feet. You basically start in the middle though and entwine the two ends as you go, so trust me, the length is necessary. Thread your needle on one end.
- String on four of your bigger beads and slide them all the way to the middle of your cord. Take the needle off and tie the two ends (yeah, they’re long, so don’t get ’em tangled!) in a “square knot”. Personally, I call it a “double knot”, if you know what I mean. This makes the little cluster at the end of the necklace without the T-bar.
- Thread your needle back on one end. Now, go back through the pearl that’s closest to the knot you just made (and the thread you’re holding). Basically you should have a cluster of four beads with two threads coming out opposite sides of one bead. Right? Right.
- Now go ahead and use your needle to string 55 seed beads on this thread. Count ’em out carefully. These will make the loops without flowers. When you’re done, take the needle off and thread it on the other thread.
- On this thread, string 6 seed beads. Now start counting along the length of 55 on the other thread. Take your needle and insert it back through the 7th bead pointing towards the end cluster. You’ll see that you’ve just made a loop! Tighten things up as best you can.
- Now you just repeat that last step 6 more times: add 6 seed beads, count 7 more along the other strand, go back through towards the start, and tighten. End by string 6 seed beads (so you’ve got some left on each strand).
- Remove your needle and switch it to the other strand. String 3 of your bigger beads and then 6 seed beads 21 times (i.e. 3 big, 6 little, 3 big, 6 little, etc.). Don’t worry, this will turn out way longer than your actual necklace will. By the time we’ve made the clusters though, it’ll be right. This is also the point where I decided to lengthen mine a bit, so I did the repeat 22 times. It’s up to you, really.
- Okay, switch the needle back to the “empty” thread. Go back through the first (loose) big bead on the other thread pointing back towards the start. String 1 more big bead, and then go through the 3rd big bead on the other thread pointing back towards the start. You’ve just made a flower cluster! (It sounds complicated, but once you’ve got the strands you’ll see how it comes together.) Now string 6 more seed beads.
- That last step builds each loop of the body of the necklace, so now all you have to do is repeat it. Keep doing it until you’ve gone through the last big bead on the first strand. String six seed beads.
- You should have six seed beads on each strand. We’re ready to finish this sucker off! First you’ve got to tighten the beadwork, which for me meant I picked it up by the two strands and kinda let gravity help. Then tie the two cords together with another square (double) knot. Now string 4 more seed beads and then go through the ring on your T-bar (or your necklace clasp). Go back down through the 4 seed beads and tighten. Tie another square (double) knot. Go back through the closest 6 seed beads and tie a single knot before the first big bead. Go through the pearl and tie another single knot. Repeat on the other side. Cross the threads through the bottom big bead and snip. Dab a little clear nail polish on your knots and let them dry.
That’s it! Sounds complicated but really there are only a couple tricks and once you know them the rest is easy. Let me know if any of you give it a try!