Subtitle: Why is your face like that?!
You will recall that earlier this year I trialled several different free mask patterns, and I had some trouble finding one that the Snook deemed comfortable. We ended up just going with the ragmask for him, but it does smush his beard and leave him with unsightly Mask Face whenever he takes it off. Since then, I’ve seen several examples of BEARD MASKS, and now that my sewing machine is here (and we’re going into more lockdown), it seemed like a good time to try one.
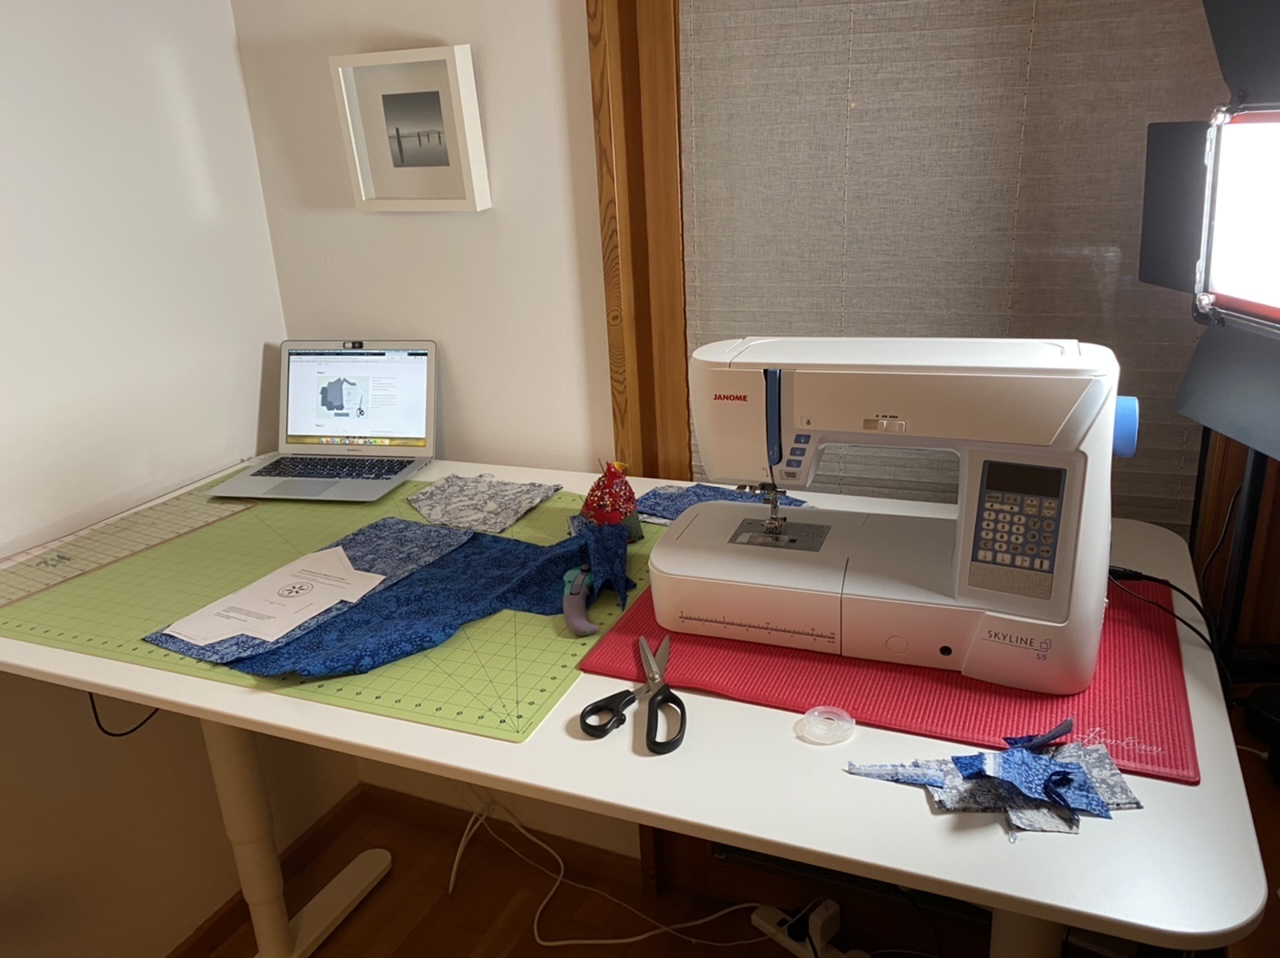
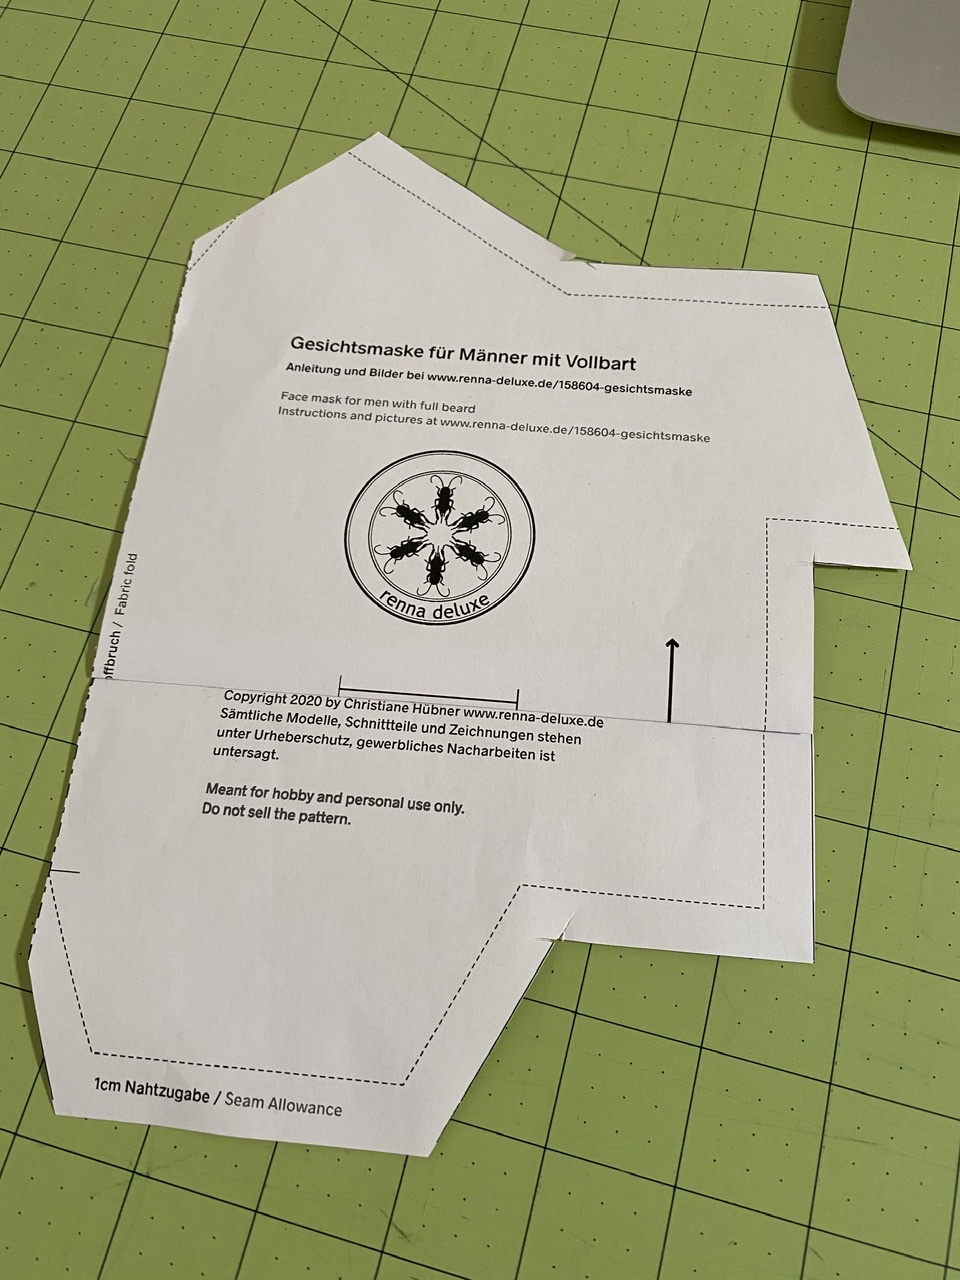
I selected this pattern from German designer Christiane Hübner, which seemed simple enough. For fabric, I ordered a pack of paisley samples from Amazon and used those for the outer layer, with some scrap blue fabric for the interior. Feeling confident, I printed out the pattern and whipped up a pair of masks… only to run into disaster.
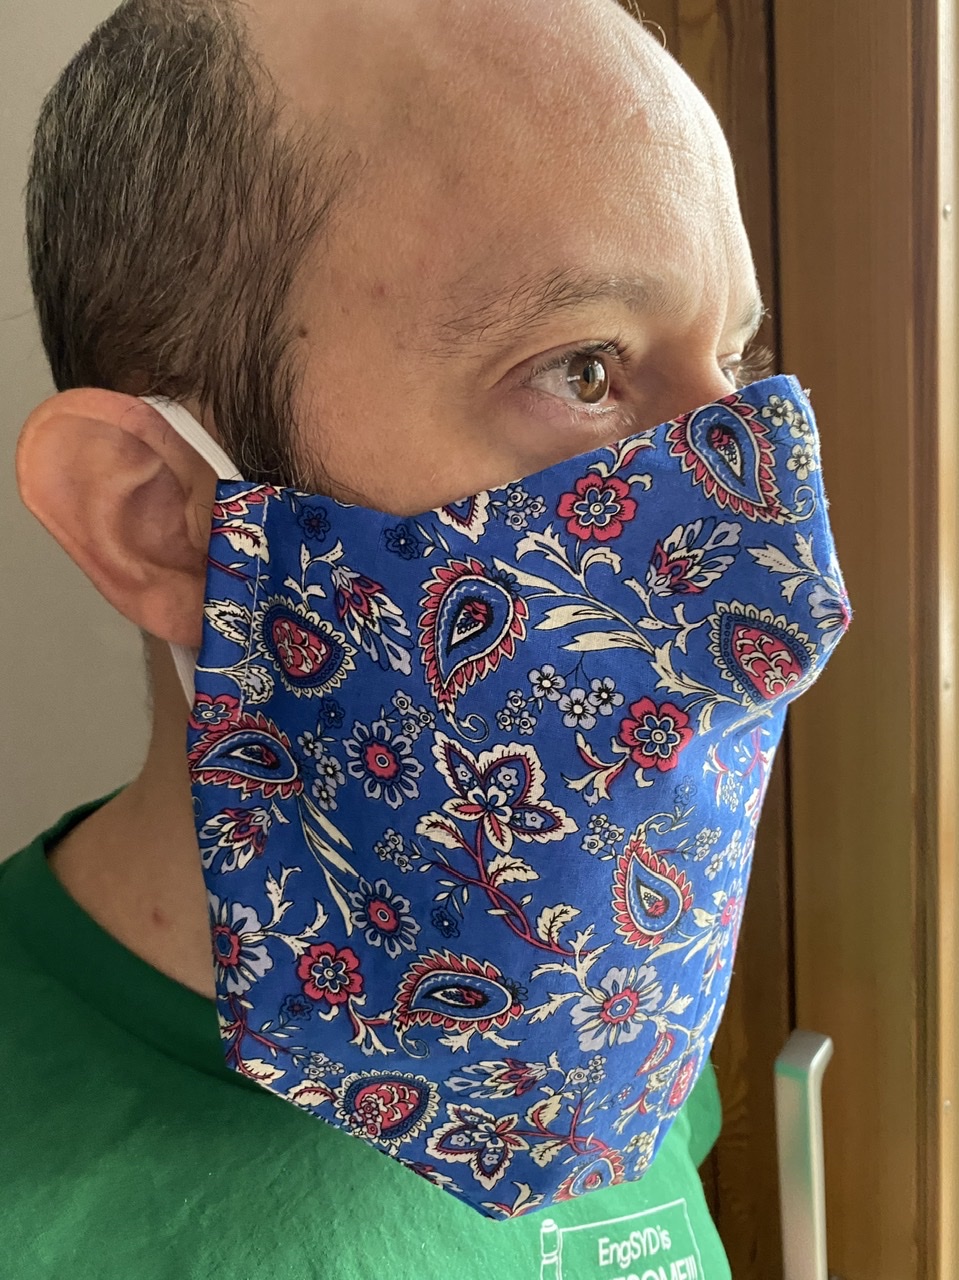
WTF. It’s standing way up off his nose. I was perplexed. “It’s like your ears are too high or something?” Even with a wire inserted for the nose, it refused to sit properly. It was also too long for his particular beard length, and if he lowered his chin even a little, it pushed the mask up into his eyes again. We pinched and prodded, and it seemed like maybe some additional darts in the cheek area would help?
Okay, back to the drawing board. I started by completely unpicking both masks and ironing the fabric. The easy change was to shorten the pattern by folding it up to take about an inch of length out. Then I recut the pieces for the first mask and made two additional small darts about an inch to either side of the nose. Once it was all back together, I took it down to the client for a fitting.
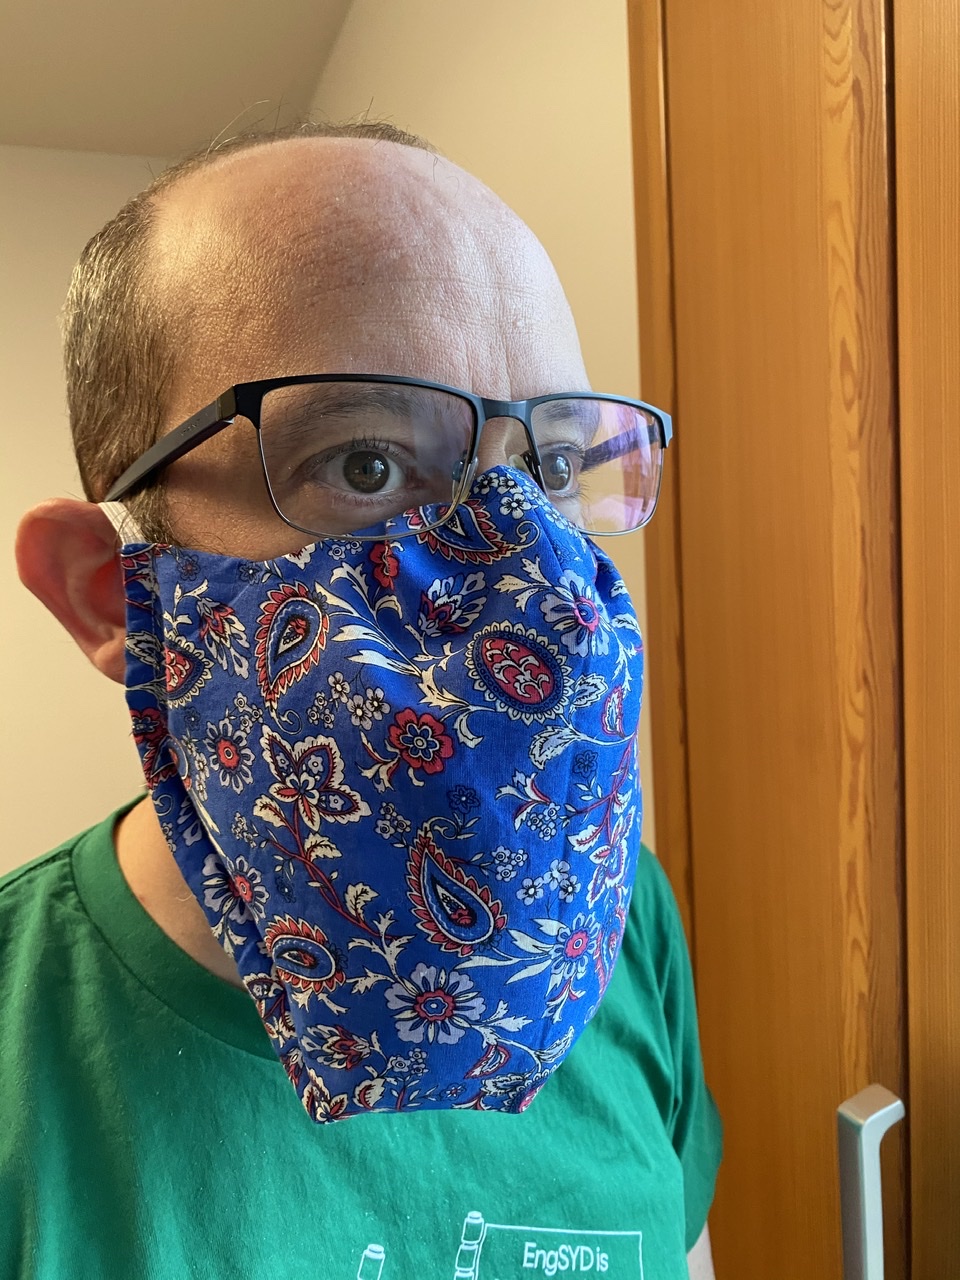
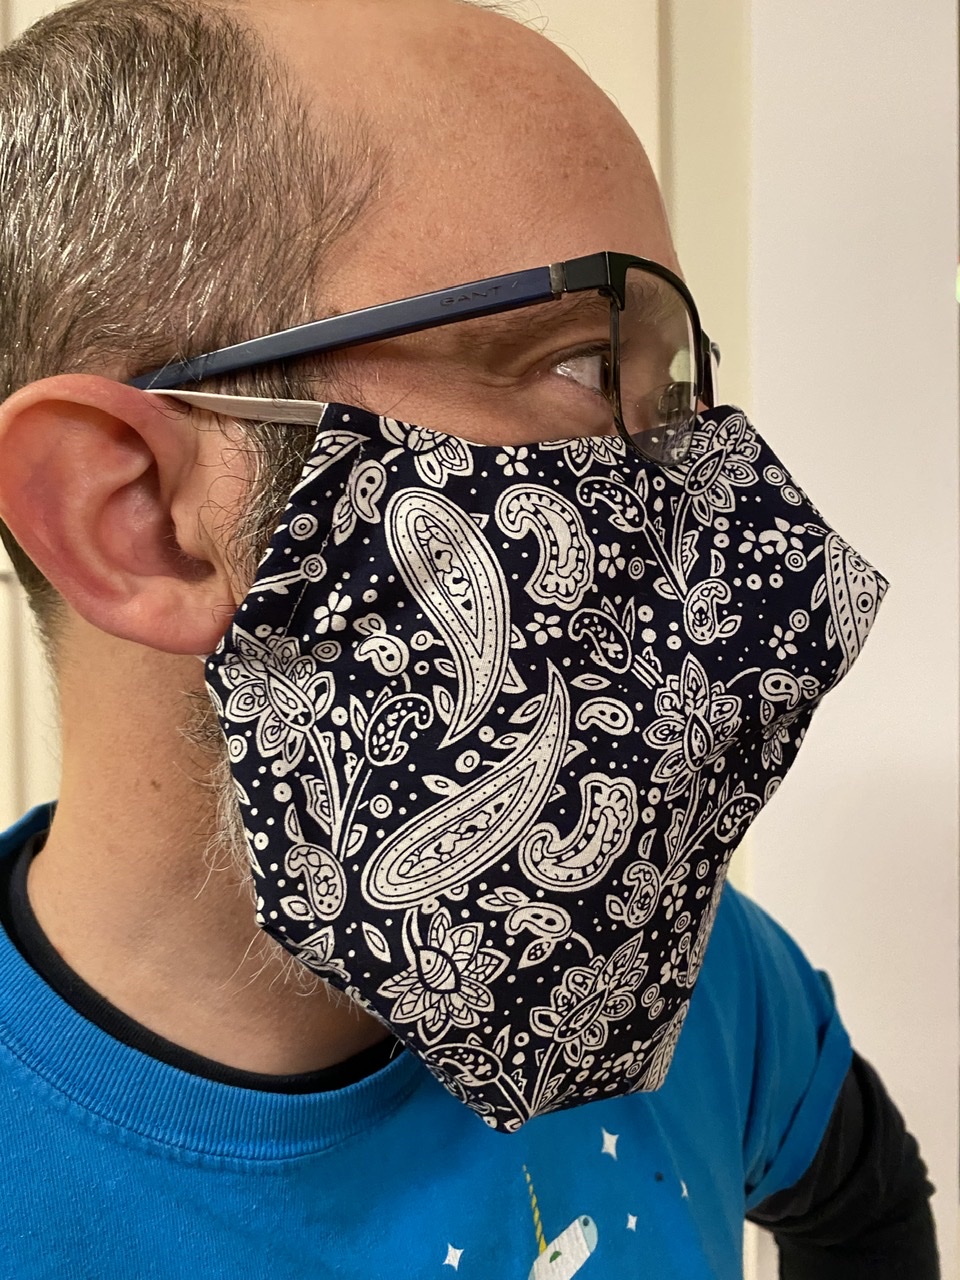
That’s better! The v2 mask is definitely fitting better around the nose, though there’s some pooching from the darts. It’s also a better length for the beard. Verdict: the v2 mask was deemed Acceptable.
For the other mask, I decided rather than add darts, I’d try to adjust the existing one for the nose. (The Snook doesn’t like the fabric to sit too close to his mouth.) So I kept the point in the same place but sliced the dart a bit wider…
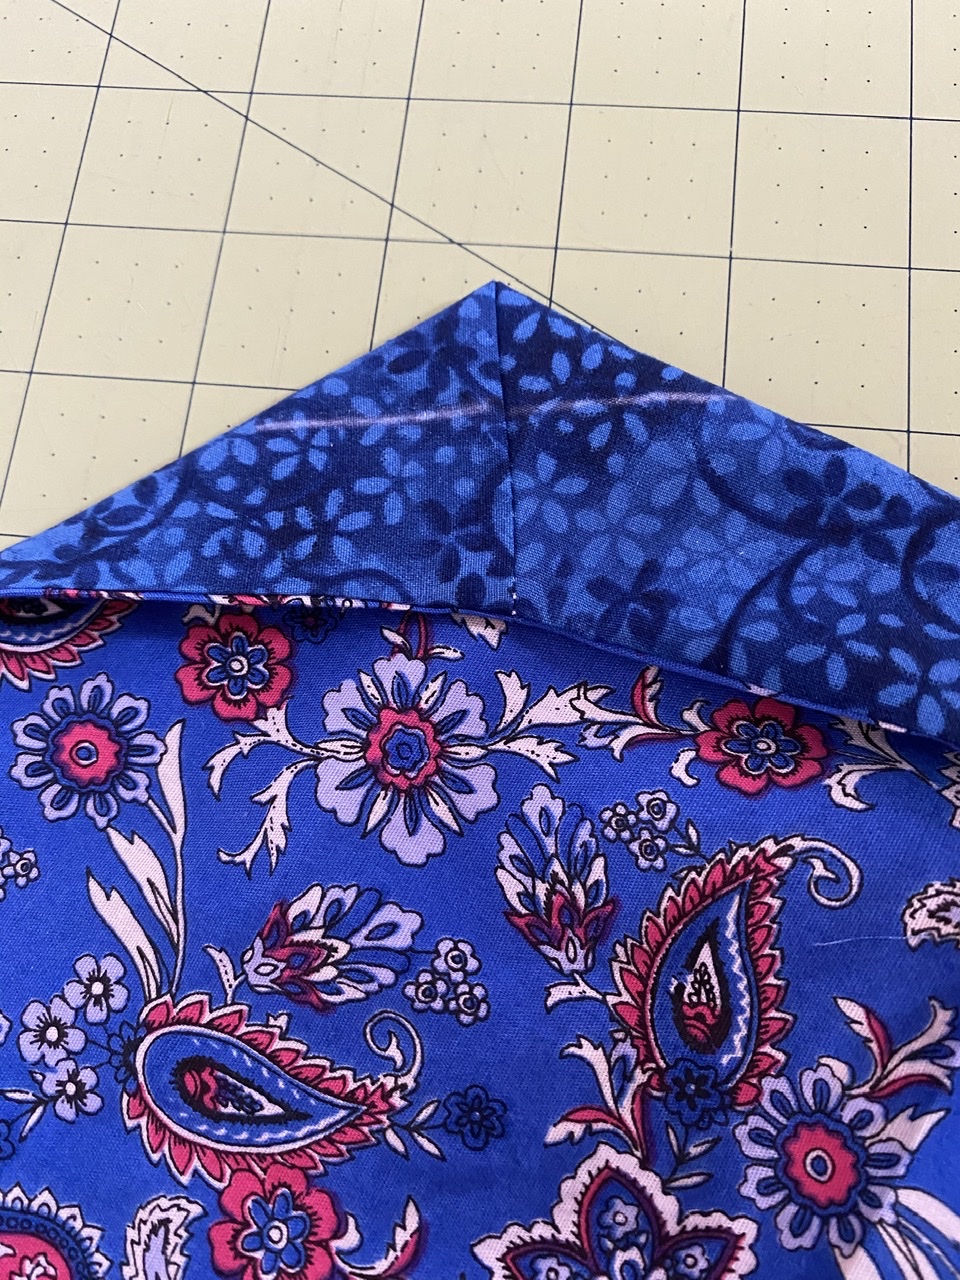
In that photo you can see where I cut across the top dart, and where I folded it across the middle. Once this one was put together, I brought it down for another fitting…
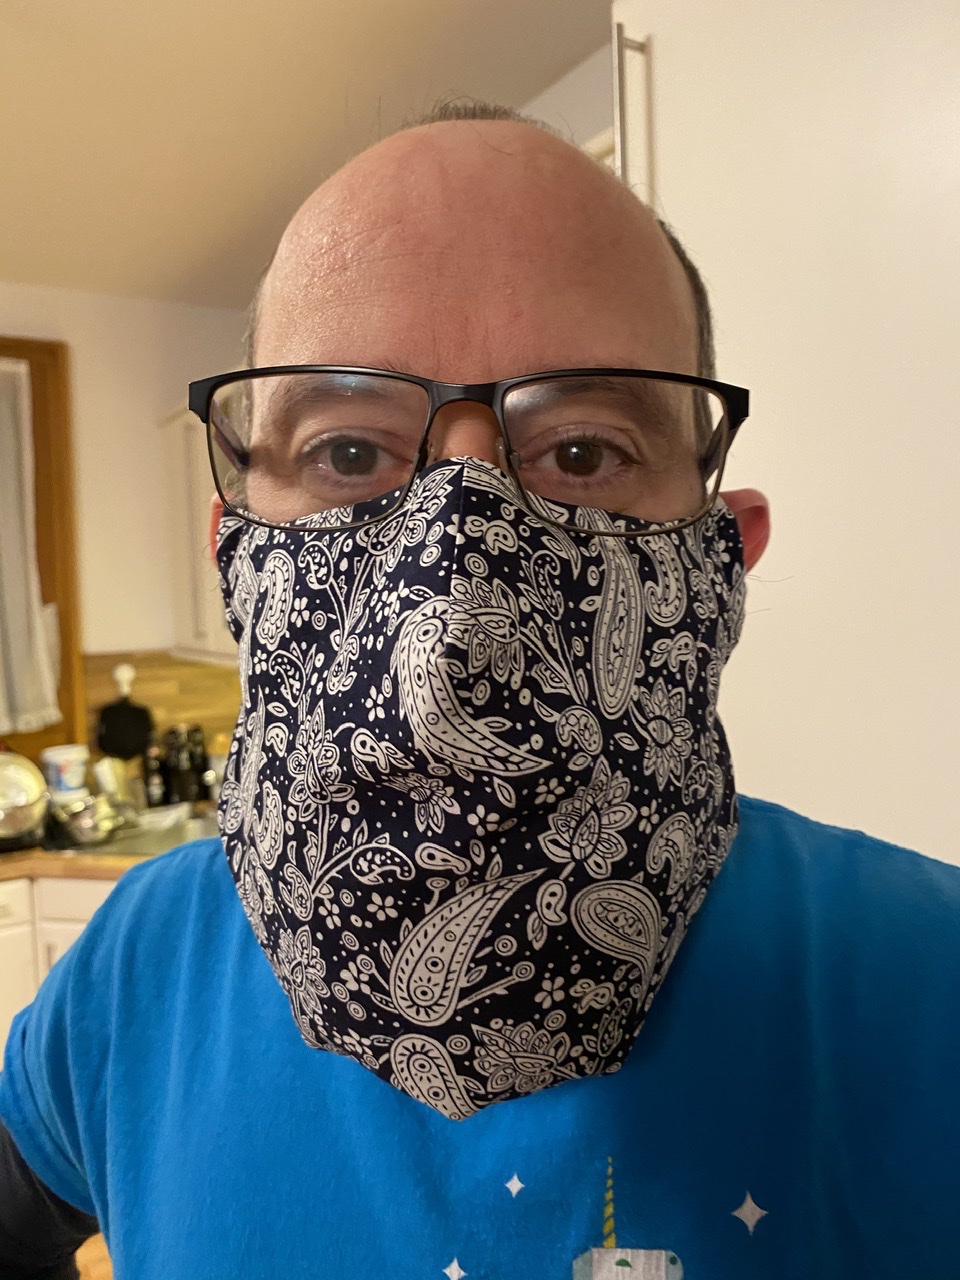
Hey, that’s pretty good! With a wire in, it fits fairly well around the nose without the extra fabric we pinched out in v2. The dart also makes it stick out quite a bit from his mouth in a sort of beak-like shape, which he likes. Again, verdict is Acceptable.
If you want to make the same pattern, there are a couple caveats I’ll mention. In Step 4, I didn’t quite understand the instructions for attaching the nose tunnel. The descriptions just mention pinning it on, but in the subsequent photo for Step 5, you can clearly see it’s been attached. So I pinned it on and then sewed across the bottom edge. The top edge gets attached when you sew the whole thing together.
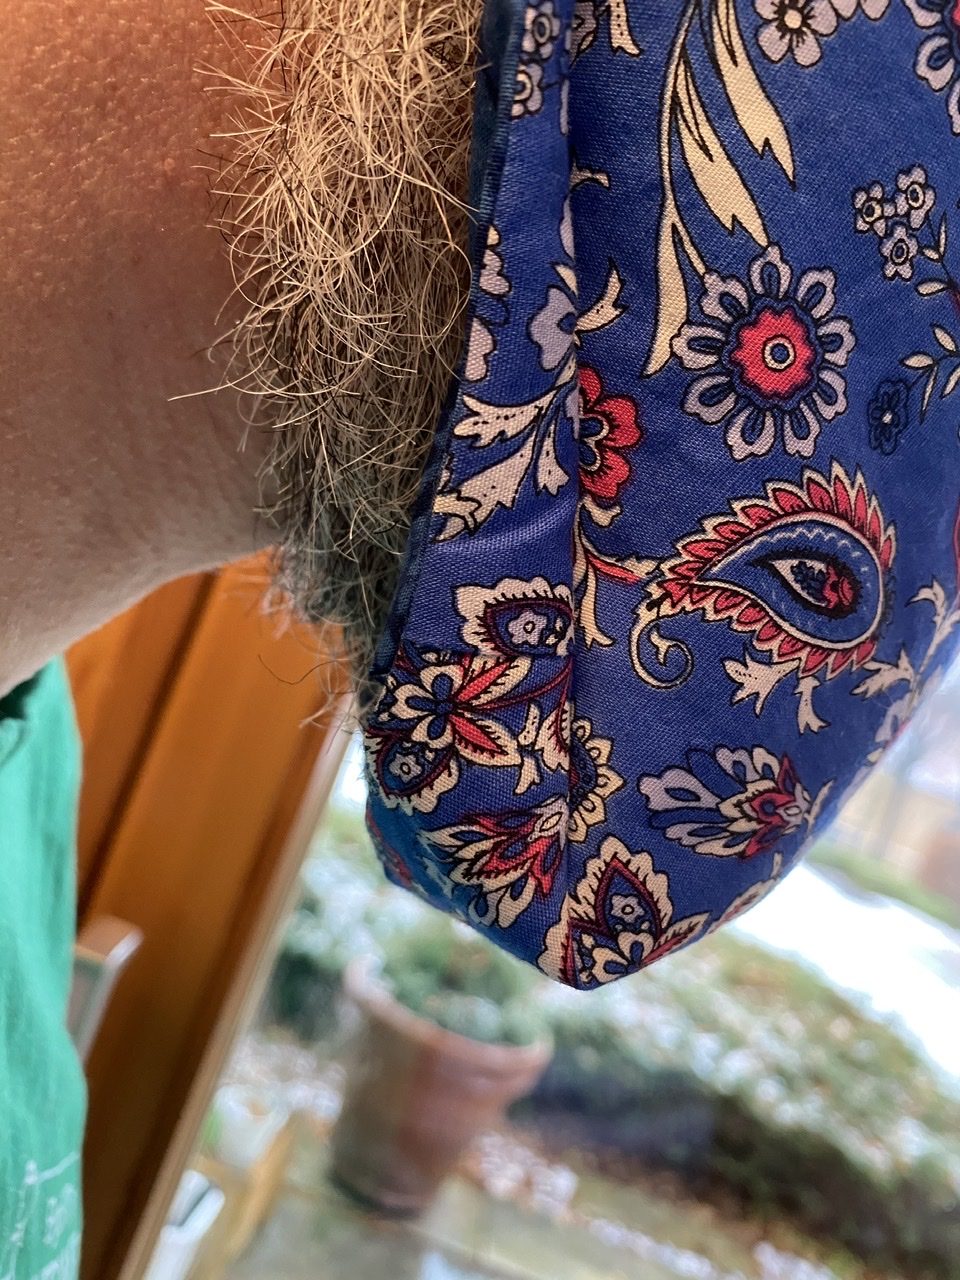
I was also slightly confused by the description for Step 9, but once you do it, it makes sense. The trick is to turn the mask inside-out, flatten the darts to either side of the chin, and then sew across. The softens that curve along the chin. You can see my version here, with my sewing line indicated in white.
Two more masks that won’t give him Mask Face! That should see him through the holidays… 😷