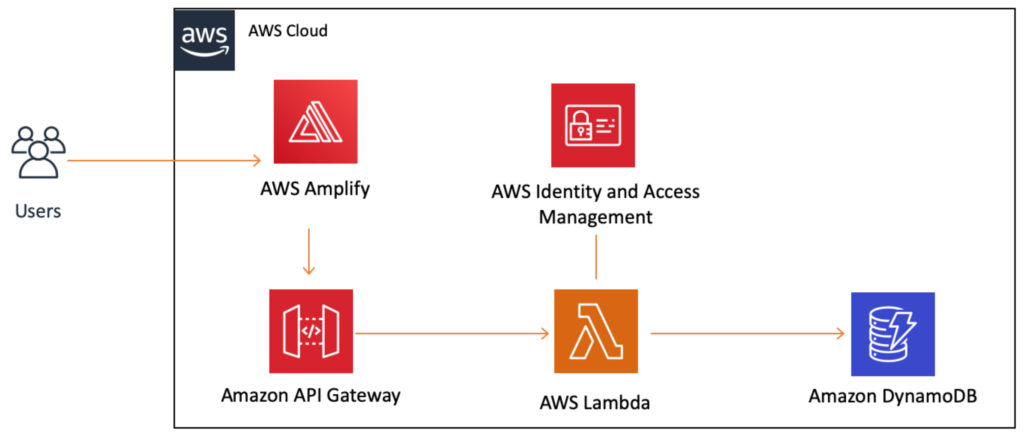
As always, I like to use the Oscar Contest as a way to try to learn something new. This year I decided to build it using AWS Amplify, a set of tools and services that can be used to quickly build and host mobile and web apps across a range of frameworks. I’ve somehow managed to avoid touching React, so I figured I might as well use that too. Here’s the basic architecture I went with:
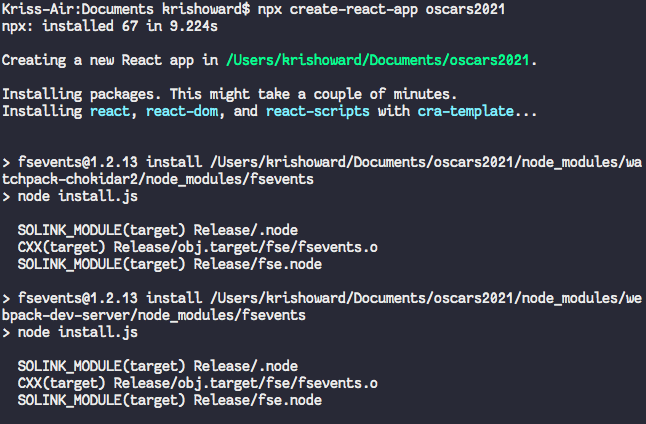
I figured it might be fun to walk you through the process I used in case you’d like to try something similar. The first step (if you haven’t already) is to install the AWS CLI and Amplify CLI and get them configured with your AWS account credentials. Then I created the basic React project using this command:
npx create-react-app oscars2021
That will download a bunch of stuff and set up the basic project files for you.
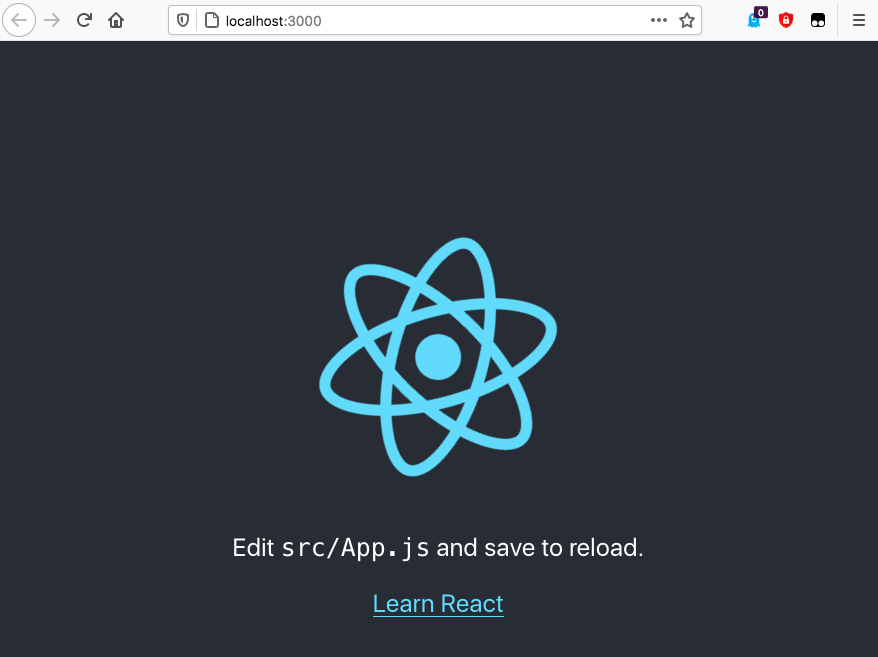
You can then switch into that directory and start the app to verify it’s working.
cd oscars2021 npm start
Now it’s time to hook your project up to Amplify, using this command:
amplify init
A wizard will walk you through setting up various parameters for your app, including your preferred code editor and the type of app you’re building. Here’s what I selected:
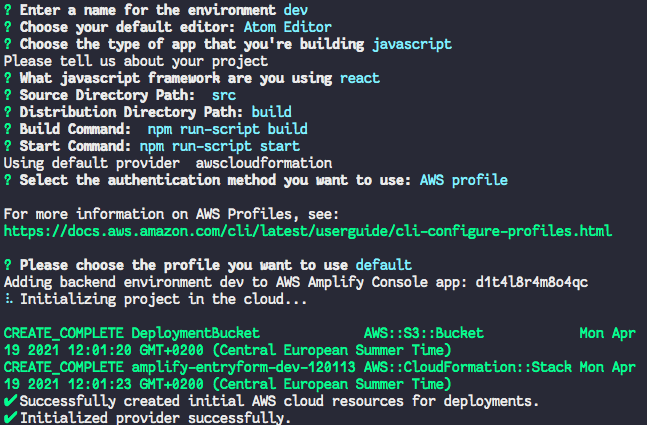
This will initialise your project in the cloud and set up some resources for you.
Now it’s time to add storage, which in my case meant an Amazon DynamoDB table. This is where I’d be storing each entry as it came in.
amplify add storage
This will again kick off a wizard that will walk you through some configuration options. I selected “NoSQL Database” and then set up the columns that I wanted in the table.
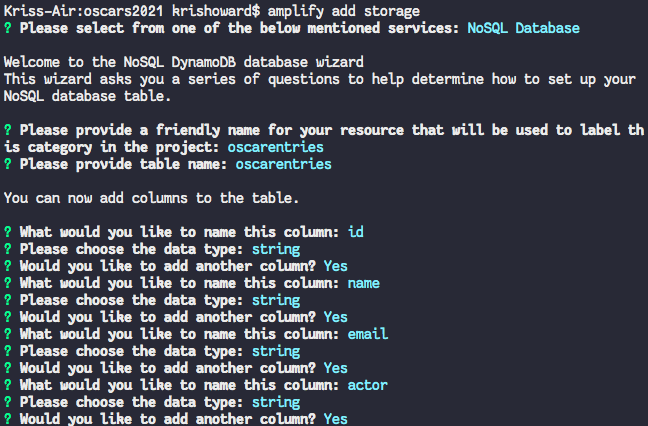
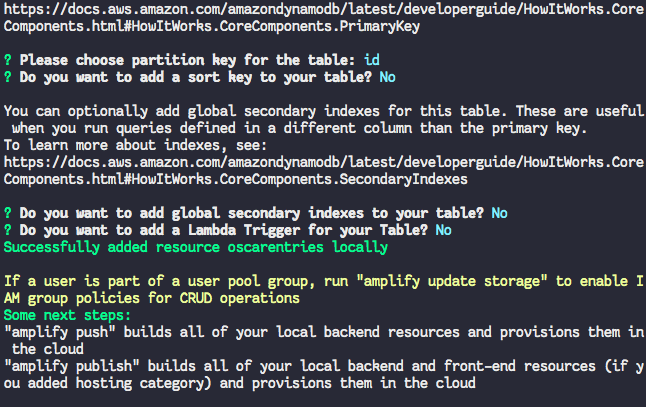
I also selected “id” as the partition key, with no sort key, no secondary indexes, and no Lambda trigger.
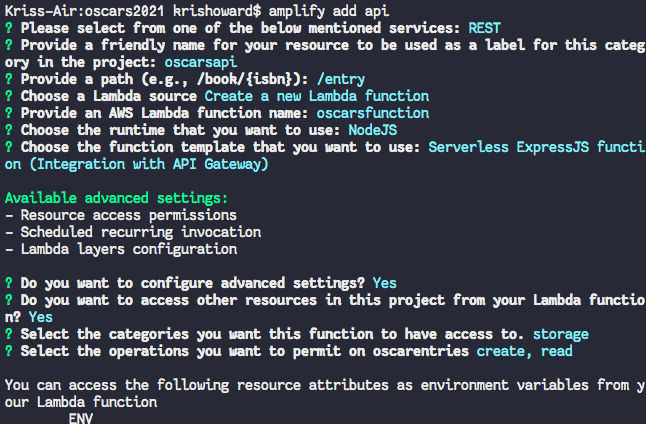
The next step is to add the API and Lambda function that will actually record the user’s entry. This is done with the command:
amplify add api
Again, a wizard will walk you through configuration. I created a REST API with the path “/entry” and created a new Lambda function using the Serverless ExpressJS template. I also gave the function permission to Create and Read from the storage (aka DynamoDB table) we just set up. I didn’t restrict access to the API, as I want anyone to be able to enter.
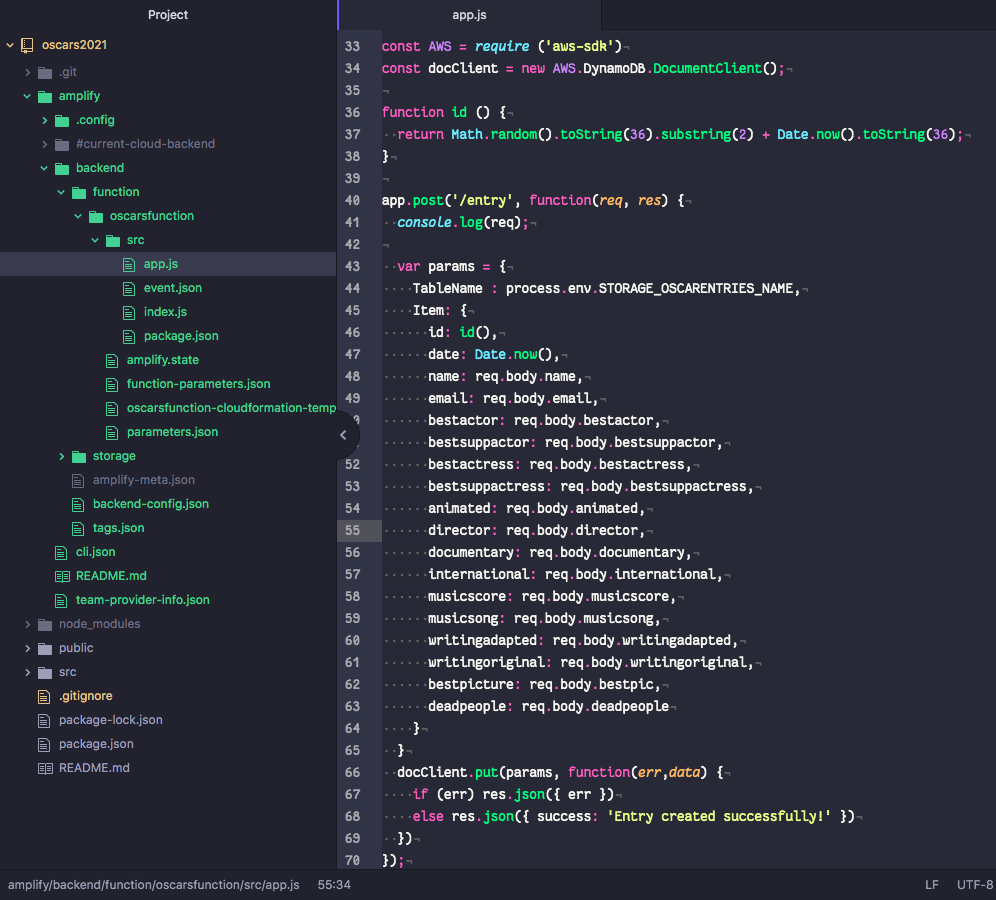
Time to actually update the Lambda function! I went into my preferred code editor (Atom) and opened the project. The function is located in “amplify/backend/function/oscarsfunction/src/app.js”. There are some commented example methods that I deleted and replaced with the code below. This adds the AWS SDK (so I can save to DynamoDB), a method for generating random IDs, and the actual post method to save the entry. (You can download this code from my Github project here.)
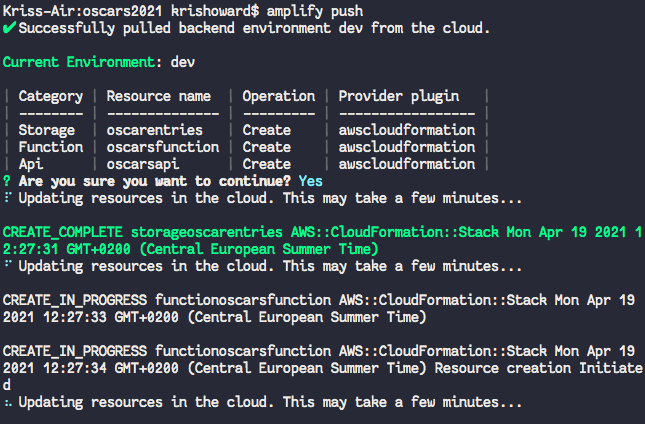
The next step is to use Amplify to push the newly created backend storage, API, and function to the cloud! You can do this with the command:
amplify push
Amplify will ask you to confirm which resources you’re deploying, and then it will start the process using AWS CloudFormation. This can take a little while.
If you make any changes to the function code later, remember to push the changes to Amplify so they are uploaded to AWS! In the meantime, it’s time to install some dependencies I need for the form frontend.
npm install aws-amplify @aws-amplify/ui-react npm install bootstrap npm install react-bootstrap
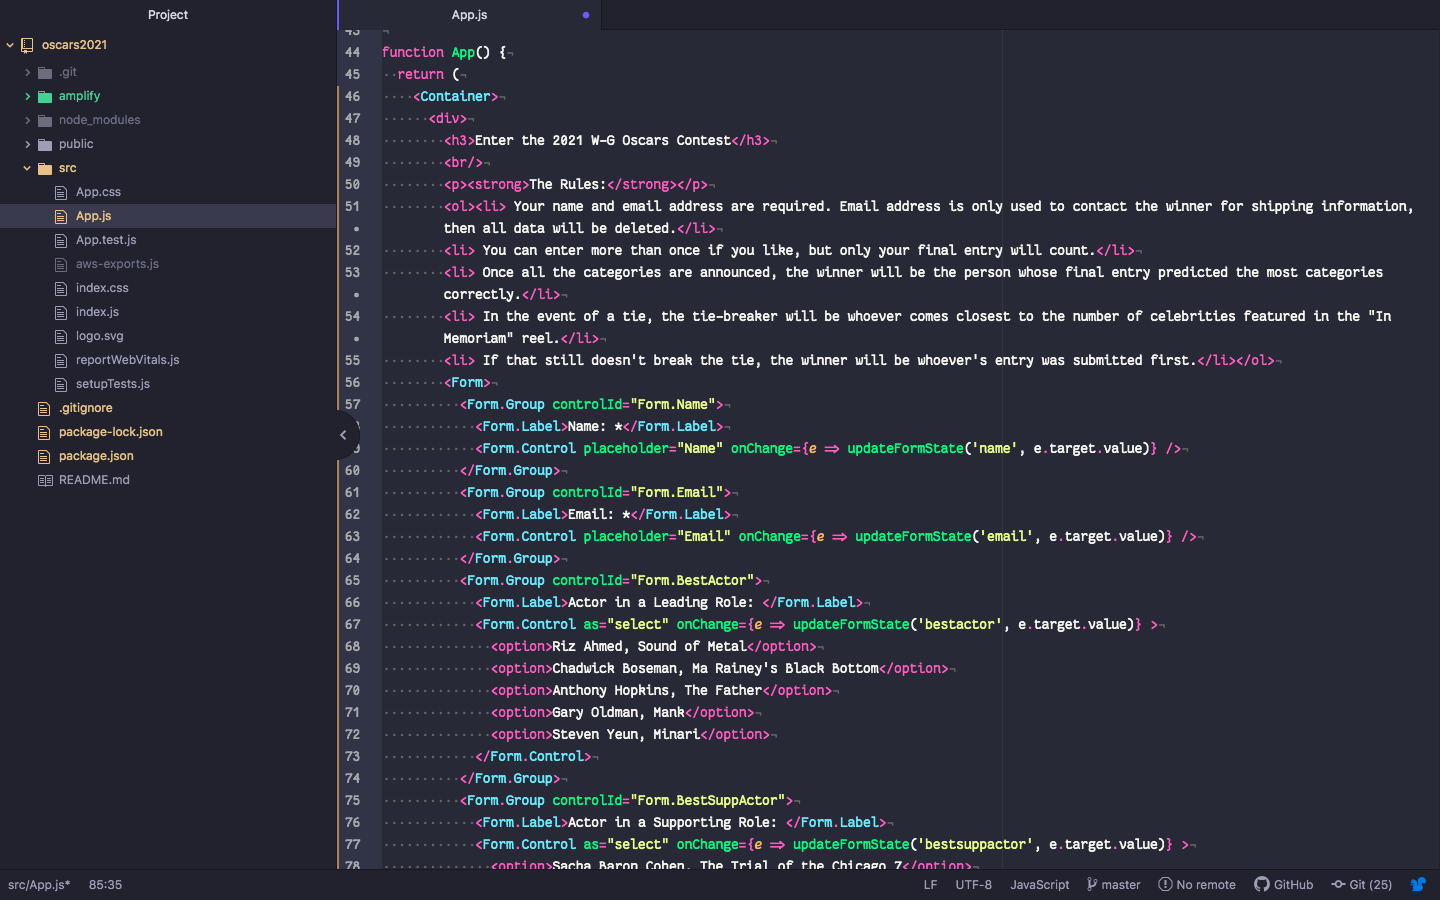
Once all that’s done, you can finally edit the form! The actual React app lives in “src/App.js”. I won’t go through everything I did (you can check the code out yourself), but basically I made sure to include Amplify (so the frontend can talk to the backend) as well as React Bootstrap. I also tweaked the CSS and added a couple images. Each time you save a change, the app will recompile and update in your running browser window. I also opened the “public/index.html” file and changed the title and description of the page.
You can also test out the form in the browser to ensure it’s working. When I opened the AWS Console and looked in DynamoDB, I could see entries being saved correctly into the dev environment table. 🎉
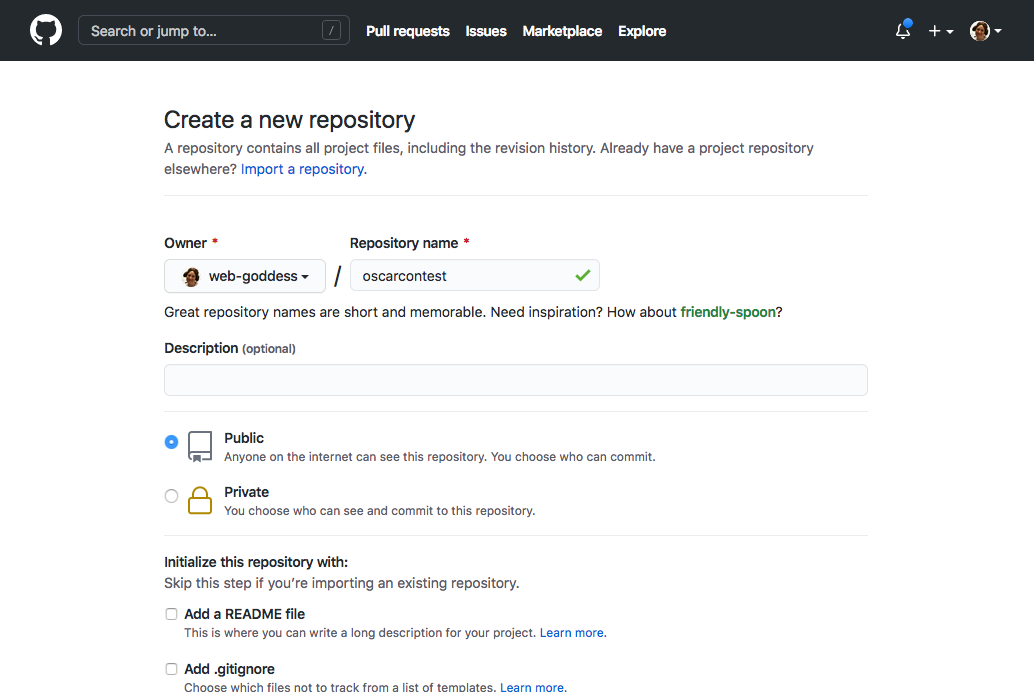
The final step is to deploy the frontend, and Amplify makes this pretty easy too. I created a new repo at Github and then pushed my code to it.
Then I went to the AWS Amplify console and clicked on my app. If you click on the “Frontend environments” tab, you’re presented with a range of options for hosting your app.
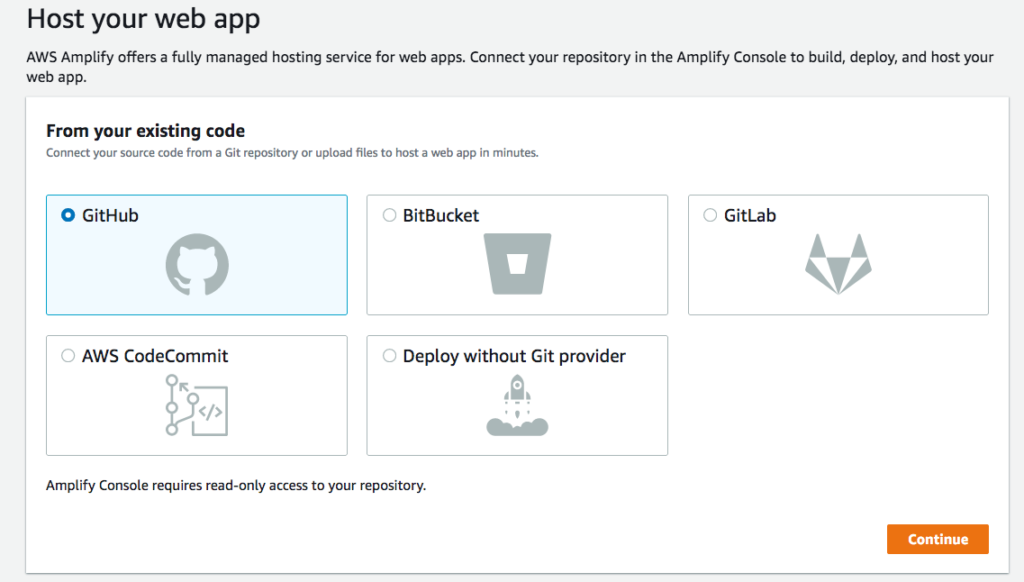
I clicked the one for Github and then went through the process of granting access to my Github account. Then I selected the repo I’d just created with the code for my app, and left the branch set to “master.” On the next screen, I left checked the option to “Deploy updates to backend resources with your frontend on every code commit” and created a new “prod” environment as the target. I also had to create a new IAM role for the deployment process. Once you save and deploy, Amplify will grab your code from Github, run the build script and any tests you’ve configured, and deploy the resources into your account. The build for my app takes less than 4 minutes to complete.
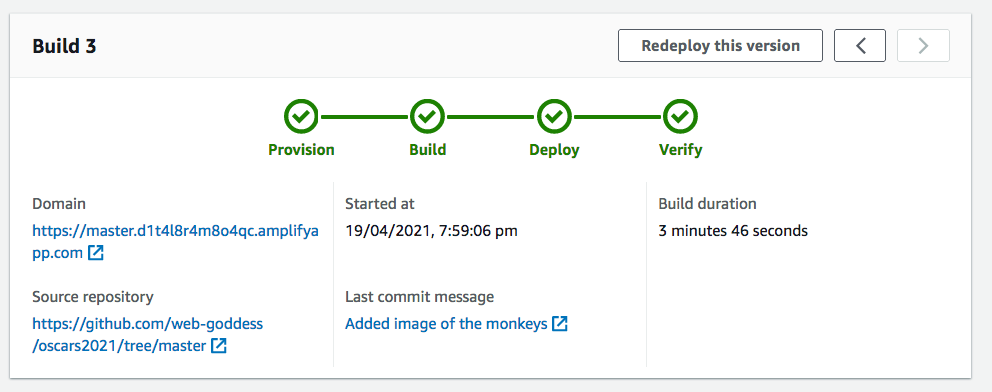
The beauty of the CI/CD pipeline is that whenever I modify the code and push it to Github, the whole process will kick off automatically! The Amplify console also gives me the URL to the hosted app, which is where you can enter the contest. When I check DynamoDB now, I can see entries coming through to the prod environment table. When the contest is finished, I can shut down and remove all the app resources by simply running this command:
amplify delete
If you’d like to try out Amplify yourself, I can recommend a couple resources. The AWS website has a very simple, step-by-step tutorial to Build a Basic Web Application that you can work through, but it doesn’t include React or the CI/CD part. If you want to copy what I did, check out my colleague Marcia’s YouTube videos on building a Contact form with React and automating your CI/CD deployments, which gave me the basics of everything I needed to build the contest entry form. Thanks Marcia!