Category: Computers

  • Custom Bluesky and Mastodon usernames with your own domain

    I recently went through the process of setting up custom handles/aliases for myself using my domain name on Bluesky and Mastodon. I figure I’ll share the steps here in case anybody else with a similar setup (WordPress on Amazon Lightsail) wants to do the same.

    Bluesky

    Simply follow the instructions that Bluesky have provided here. In Step 5, you will need to add a TXT record to your domain DNS. If you use Amazon Lightsail, click on the Domains & DNS option and then select the relevant DNS zone (in my case, web-goddess.org).

    Lightsail console DNS zone

    Then click on the DNS records tab and click the + Add record button.

    Lightsail console DNS zone

    Change the record type to TXT record and then put in the name and response provided by you by Bluesky. (The “host” is the “Record name,” and the “value” is the “Responds with.”) Click save.

    Adding a new TXT record

    Wait a little bit — in my experience, 30 seconds is usually sufficient — and then click that Verify DNS Record button in Bluesky. And then you’re done!

    In my case, you can now find me at @web-goddess.org on Bluesky.

    Mastodon

    Mastodon is a slightly more involved process, and it doesn’t change your official server username but rather gives you an alias that you can give out. In my case, my current Mastodon account is @web_goddess@aus.social. However, if I give out an alias instead, then it doesn’t matter if I change servers in the future — you’ll still be able to find me. I was inspired by these posts by Phil Nash and Maarten Balliauw for how to do it.

    First, open up a new browser tab and go to this URL, substituting your own Mastodon account values in there:

    https://{instance}/.well-known/webfinger?resource=acct:{username}@{instance}

    So in my case, I went to https://aus.social/.well-known/webfinger?resource=acct:web_goddess@aus.social. What you’ll get back is a blob of text (JSON). Copy that and set it aside for the moment.

    Then go to the Lightsail console and click on the little terminal icon to Connect using SSH to your instance.

    Lightsail console

    A window with a terminal will appear.

    Lightsail terminal

    Now you need to go to where the WordPress files are stored for your site. Type in this command in the terminal and hit enter.

    cd stack/wordpress/

    Important note: The path above is for one of the newer WordPress Bitnami instances. If you have an older instance, the path to where your WordPress files are stored might be different.

    Then you’ll need to create a new directory called “.well-known.” (Note the dot in front of the name.) Type in this command and hit enter.

    mkdir .well-known/

    Then go into that directory. Type in this command and hit enter.

    cd .well-known

    Now you will need to make a special file called webfinger. Type in this command and hit enter to open a text editor in the terminal.

    nano webfinger

    This is where you will paste in the blob of JSON text you copied from your Mastodon server. Copy and paste it straight into the editor, and then hit CTRL-X to exit.

    The editor will ask if you want to “Save modified buffer?” Type Y for Yes, leave the name as webfinger, and hit enter to save.

    You can then exit the Lightsail terminal and close the pop-up window.

    exit

    If everything worked correctly, you should now be able to go to your own domain and receive the JSON blob back by substituting your domain in this address:

    https://{yourdomain}/.well-known/webfinger

    In my case, I went to https://www.web-goddess.org/.well-known/webfinger in a browser tab and verified that the JSON was returned.

    And that’s it! What does this actually mean? It means I can tell people that my Mastodon username is @kris@web-goddess.org, and if they type that into a search box on Mastodon, it will point them to my official account.

    Mastodon search

    If I change servers in the future, I’ll just have to update the JSON blob with the correct values from my new Mastodon server, and people will continue to be able to find me from the alias.

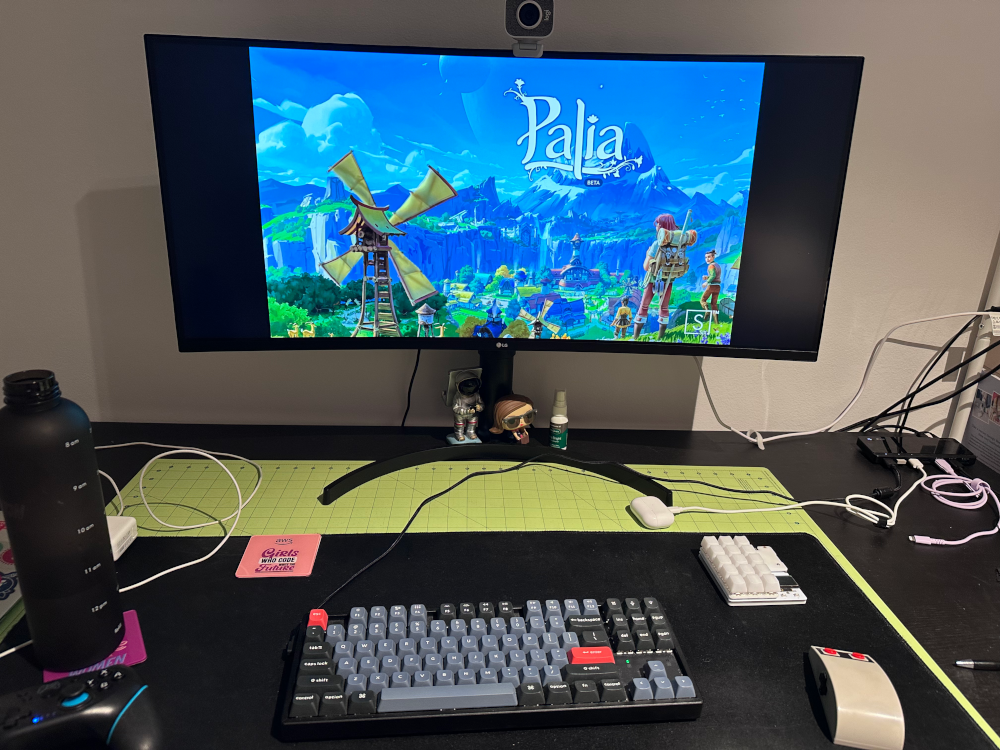
  • Palia on Mac

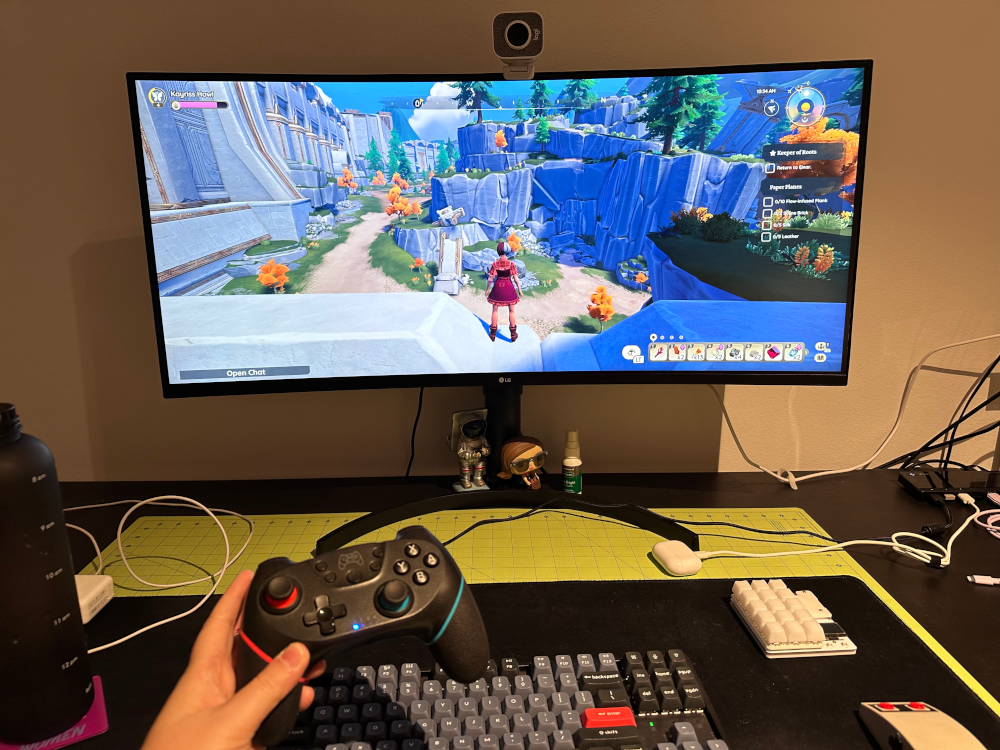
    Palia on Mac

    I’ve been casually playing Palia on my Switch for the past couple months. I’d heard it described as a “cozy” game, and I’m all about the cozy. You are a human in a fantasy realm, and you build a little house and farm. You hunt; you craft things; you cook food; you go fishing. There are some quests and puzzles along the way, but you don’t have to do those if you don’t want to. Nothing attacks you, and if you do manage to kill yourself (like by falling into deep water) it just resets you right nearby with no damage. I’m enjoying it.

    Playing on the Switch has some downsides though. Eventually I noticed that in the chat, other players were sharing where special items could be found. But typing messages with a game controller is painful. It seemed like most other people were probably playing on their PCs. But I don’t have a PC. I have a Mac mini, and Palia doesn’t have a Mac client yet.

    Palia on Mac launcherBUT! Apparently this is no longer a problem these days? I found some Reddit posts where people mentioned getting it to work on Mac using Whisky, which seemed doable. Then I found this Palia on Mac launcher that handles a lot of the setup for you. I kicked it off and installed Whisky, and followed the steps to setup a “bottle.” First problem: my bottle disappeared. I’m not sure what the issue was, but I tried it several times and they’d just vanish (but I could see the folders in the Finder). Eventually I reinstalled Whisky directly (rather than going through the launcher), and I went into the Finder and deleted the extra bottles. Suddenly my original one appeared. Yay! Then I went back to the launcher to finish the setup and download the game files. Second problem: the downloads would seem to hang with, like, no visual feedback what was happening. It looked like other folks on Reddit had similar issues, and that the key was just to keep restarting the launcher and it would continue where it left off. After leaving it alone for an hour or so today, it managed to get everything and the “Run” button appeared!

    Palia on Mac

    The game looks fantastic compared to the Switch. Mac mini is a lot more powerful, obviously! I was prepared for some glitchiness, but it was really minimal. I had one crash, but otherwise everything worked really smoothly. Rodd suggested I change it to play in a window rather than full screen, as on my wide monitor it was actually making me motion sick. But I’m going to just try to get used to it, because it looks so gorgeous.

    At first I tried playing with keyboard and mouse, which took some getting used to. I just don’t have the muscle memory yet. I could see that it was really great for some things – choosing stuff from your inventory, moving around the map, chatting to other players – but for other things it felt a bit awkward. And fishing sucked – there was so much lag that I lost every fish I hooked. Eventually I hooked up a Bluetooth controller, and that gives the best of both worlds. I can run around and catch fish, but also easily switch over to the keyboard for tasks that need it.

    Anyway, if you want to try it out, you can use my “Refer a friend” code and I might get some in-game swag for it. The game is free to play, but apparently you can use real money to buy, like, funky outfits and stuff. (You don’t need to though; I haven’t paid a cent!) Let me know if you start and I’ll friend you in there!

  • Mac mini + duckyPad

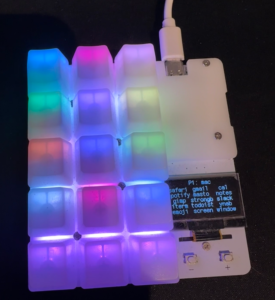
    duckyPadWhen I handed back my work laptop a few months ago, it occurred to me that I needed a new computer. My 2015 MacBook Air is still going strong but it’s many, many years old, and I knew it would struggle with streaming or playing games. So off I went and merrily started pricing new MacBooks when I suddenly wondered… maybe I don’t actually need a laptop?!  It was a strange feeling. But I’ve got the Air and an iPad, and it’s not like I need to do work on the road. So I ended up choosing a Mac mini M2 Pro, and so far I’m really happy* with it.

    I realised today though that I needed to update my duckyPad. Many of my shortcuts were related to work and therefore obsolete, and I also noticed that a few macros weren’t working anymore. So I downloaded the latest Mac ARM Configurator app and fired it up. Unfortunately it failed to connect to the duckyPad. Hmmm. I went through the troubleshooting and added some permissions, but that didn’t fix it. I also dug around in the official Discord to see if anybody had similar issues. I figured maybe there was some issue with the latest Macs, so my next approach was to plug it into the old MacBook Air, which still had an old version of the Configurator on it. That’s when I remembered that with the old version, you didn’t connect to the duckyPad directly but instead used an SD card reader. D’oh! As soon as I did that, it told me that my firmware was out-of-date. Makes sense.

    I went back to the Mac mini and followed the instructions for updating the firmware, which included using Brew to install a utility. That worked perfectly and I was able to then flash the firmware, and as soon as that happened I was able to directly talk to the duckyPad. Brilliant! I was able to remove all the old work macros, set up some new ones, and fix the old ones. (It turns out that I was using “HOLD” in some of them, which has since been replaced by “EMUK.”) The only challenge is that the Configurator is oddly unresponsive when you’re editing. I had to often click multiple times to get it to register or to change focus. Not sure why that is. It works; it’s just super super slow. When I was done, I hit “Save” and the new config was written to the pad.

    And incidentally – there’s a new duckyPad Pro coming! It’s got more keys, and knobs. I don’t really need it, but it looks cool.

    * My only complaint about the Mac mini is that without a Mac laptop or keyboard, I don’t have Touch ID. That gets really annoying when typing my long master password into Strongbox. I’ve seen a few folks though that have hacked a standalone Touch ID button though… A project for another time. 🙂

  • Video games I loved recently…

    I’ve been on a real gaming tear this year. Back in January I wrote about Dave the Diver and Unpacking, and I thought I’d mention a few more Nintendo Switch games that I’ve been playing lately and really enjoyed:

    • Yoku’s Island Express – Rodd found this one recommended on Reddit for people who like no-stress platformers. You play a little bug postman who pushes a ball around an island, and it’s like a platformer crossed with pinball, two things I LOVE. The artwork and world building is really cool too.
    • Steamworld Dig 2 – Another fun platformer where you play a little robot exploring a (mostly) underground world, digging minerals and trying to solve a mystery. There were one or two places were I got stuck and had to look up how to solve something, but I managed to defeat the end boss today all on my own. Good times!
    • Palia – Anybody else playing this? I literally just rolled a character tonight. I’ve heard good things about it…

    We also spent some time playing Breath of the Wild (a friend lent it to me) and I can see why it won so many awards. It just wasn’t for me, though. I struggled with all the different mechanics, and every time I picked it up I had to relearn how to do everything. There was just too much. I like something a bit more casual and low stress. If you’ve got recommendations, please share them!

  • Switching mobile plans to Boost

    When I was working full-time, I was fortunate in that my Australian employer had a generous mobile phone benefit. To maximise that, I did what most of my colleagues did – go to the nearest Telstra store and get a handset with the biggest plan that came under the cap. Now that I’m not working, I have to pay my own bills… and I know the Telstra plan is massive overkill for what I actually use. So I called them up, found out cost to pay out the rest of my contract, and worked out that it would be far more effective to switch over to a pre-paid 12-month Boost SIM. It uses the Telstra network and for $230 you get 170GB of data, unlimited Australian calls and texts, as well as unlimited calls to the US. I bought one of the SIMs at Coles and was able to port my number over and be up and running in less than an hour.

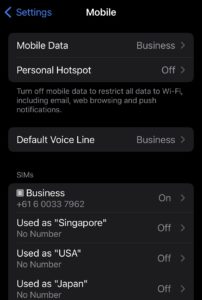
    Mobile settingsHOWEVER! I did have one issue with my iPhone, and I thought I’d mention here in case it helps someone else. See my Settings here? Even after my existing number was ported, the Mobile settings still showed the phone number that came with the SIM (that +61 6… one). It wasn’t a huge problem; I double-checked by calling and SMSing Rodd that my ported number was being used correctly. It did screw up iMessage and FaceTime though, as my ported number wasn’t listed as an eligible Receiving option. I tried changing it (both in Settings -> Mobile and also Settings -> Phone -> My Number) but it wouldn’t save. I restarted the phone multiple times. I contacted Boost, who couldn’t see any issue on their side. The agent said he thought that something was just cached, and it would eventually fix itself. But it stayed that way for weeks… until I finally figured out the solution myself.

    If you find yourself in the same situation, just go to Settings -> General -> Transfer or Reset iPhone. Click the Reset button (a bit scary, I know!) and then the “Reset Network Settings” option. It’ll ask you to confirm before it does it. And that fixed it! My ported number was finally showing for the SIM, and I was able to add it back to iMessage and FaceTime.

    (And if you’re curious about the overseas SIMs showing there, those are eSIMs that I use when travelling. I’ve been using Airalo for my overseas data needs for the past couple years and I’m very happy with them. Much cheaper than paying Telstra’s $10/day charge!)

  • You have died of dysentery.

    Friday night fun: watching a 90min documentary on “The Oregon Trail” educational video game. (I’m not even kidding. This was a massive nostalgia trip for me and I learned heaps about the Minnesota tech industry in the 70s and 80s.)

    * Trivia – The phrase “You have died of dysentery” never actually appears in the game!

  • Computer Scientists Invent an Efficient New Way to Count

    This is fascinating. I also really like the way they explain it, which makes it super clear and easy to understand!

  • The trough of AI disillusionment

    Oh man, I really loved this post from Ludicity: “I Will Fucking Piledrive You If You Mention AI Again.” (Language warning, obviously.) I’ve had a lot of conversations on that theme over the past six months, though obviously with less threads of violence. 😂

  • Links that amused me today

  • Photo Post

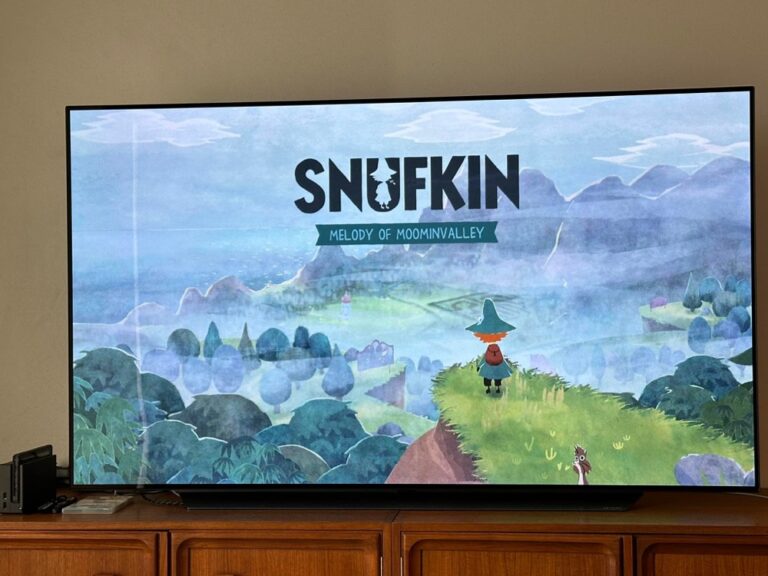
    I’ve been waiting to play “Snufkin: Melody of Moominvalley” for ages and it did not disappoint. Charming watercolour artwork, beautiful music from Sigur Rós, all my favorite Moomin characters, Little My being a hilarious jerk… and the gameplay is all about anti-authoritarian eco-activism. My only complaint is that I wish it was longer! ❤️

    I’ve been waiting to play “Snufkin: Melody of Moominvalley” for ages and it did not disappoint. Charming watercolour artwork, beautiful music from Sigur Rós, all my favorite Moomin characters, Little My being a hilarious jerk… and the gameplay is all about anti-authoritarian eco-activism. My only complaint is that I wish it was longer! ❤️

    I’ve been waiting to play “Snufkin: Melody of Moominvalley” for ages and it did not disappoint. Charming watercolour artwork, beautiful music from Sigur Rós, all my favorite Moomin characters, Little My being a hilarious jerk… and the gameplay is all about anti-authoritarian eco-activism. My only complaint is that I wish it was longer! ❤️