Tag: sewing
-
Photo Post
Automatic buttonhole feet are an amazing feat of engineering, and using one makes me feel like a badass. #imakeclothes
-
Web-Goddess Oscar Contest 2019
A month or so ago, Christopher commented on Facebook how much he missed my annual sock monkey Oscar Contest. I admitted that I’d thought of reviving it, but I hadn’t had any inspiration for a good monkey… and then it hit me! FREDDIE MONKCURY.
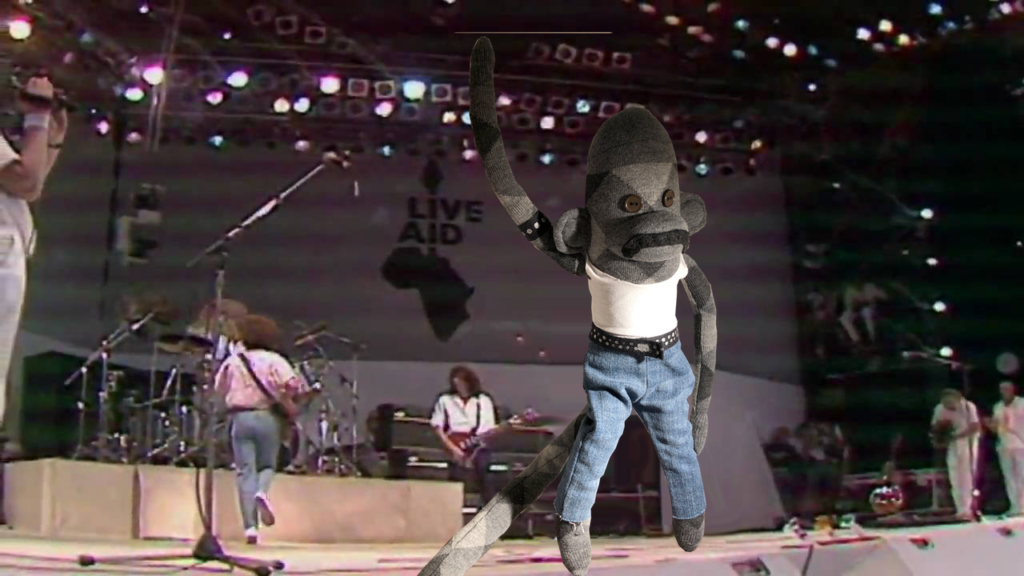
Freddie Monkcury at Live Aid 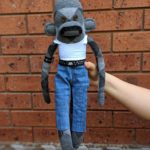
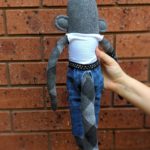
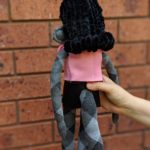
I had a monkey mostly put together from a few years ago, so he took shape fairly quickly. I found a very basic pattern for doll pants in the right size and used material from an old pair of jeans. His “I Want to Break Free” outfit was a little harder. The “leather” for his skirt is actually polyurethane from a $5 bag I found at Kmart. His bouffant wig started out as sculptural felt that I then handsewed black chenille pipe cleaners onto. (I also fashioned a very basic vacuum cleaner too!)
Application Architecture
For the first 11 years, the Contest consisted of a custom PHP and MySQL application that I’d built. For this year, I decided to challenge myself to completely rebuild it on Amazon Web Services (which is where I work!). Here’s how the architecture ended up:
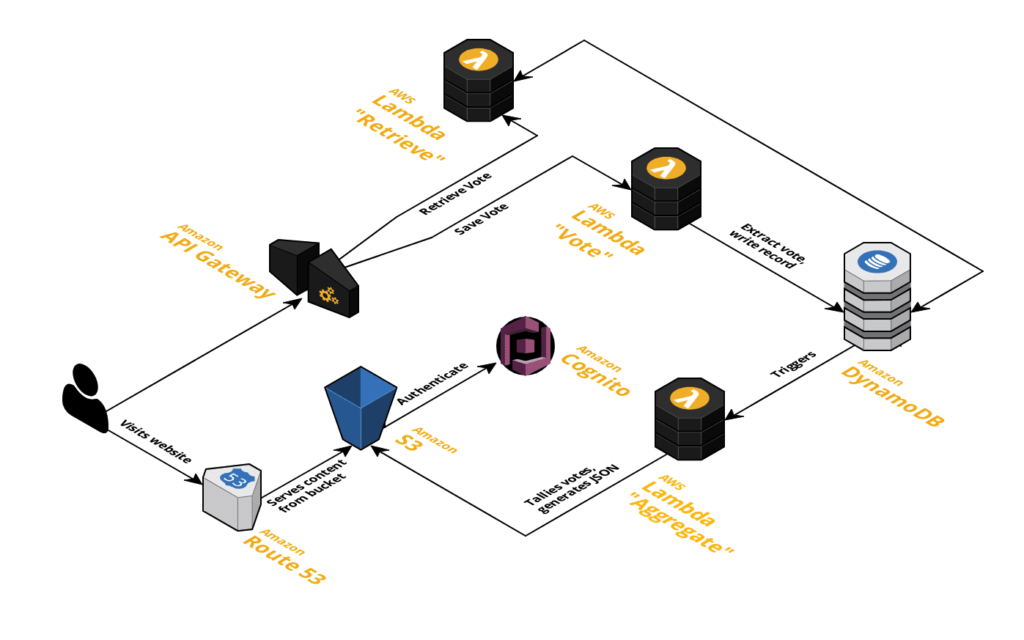
Oscar Contest application architecture As a starting point, I worked through this Web Application serverless workshop. I was already using Route53 to serve krishoward.org from S3, so I decided to put the Contest files there. Upon finishing the workshop, I had a working web app using Amazon Cognito for user authentication and a serverless backend consisting of an API Gateway-fronted Lambda function that writes data to DynamoDB.
The next step was to customise it! After I changed the images and CSS to my own branding, the next thing to change was the data saved to the database – I changed it to a form with all the Oscar categories and nominees. Next, I wanted users to be able to review and update their votes, so I added another Lambda function that retrieves a logged-in user’s votes so the form can be populated correctly. I then added a third Lambda function that scans the complete database, processes the votes, and publishes an aggregate JSON file to S3. (This is triggered whenever the DynamoDB table is updated.) For actually displaying the prediction graphs, I used ChartJS.
I think that covers everything! Many thanks to the Snook (my rubber duck and eternal programming mentor) as well as David, Jody, and Amy for their help with testing.

I’m stupidly proud of this promo image. -
Frocktober 2018 – Sewing Update 5
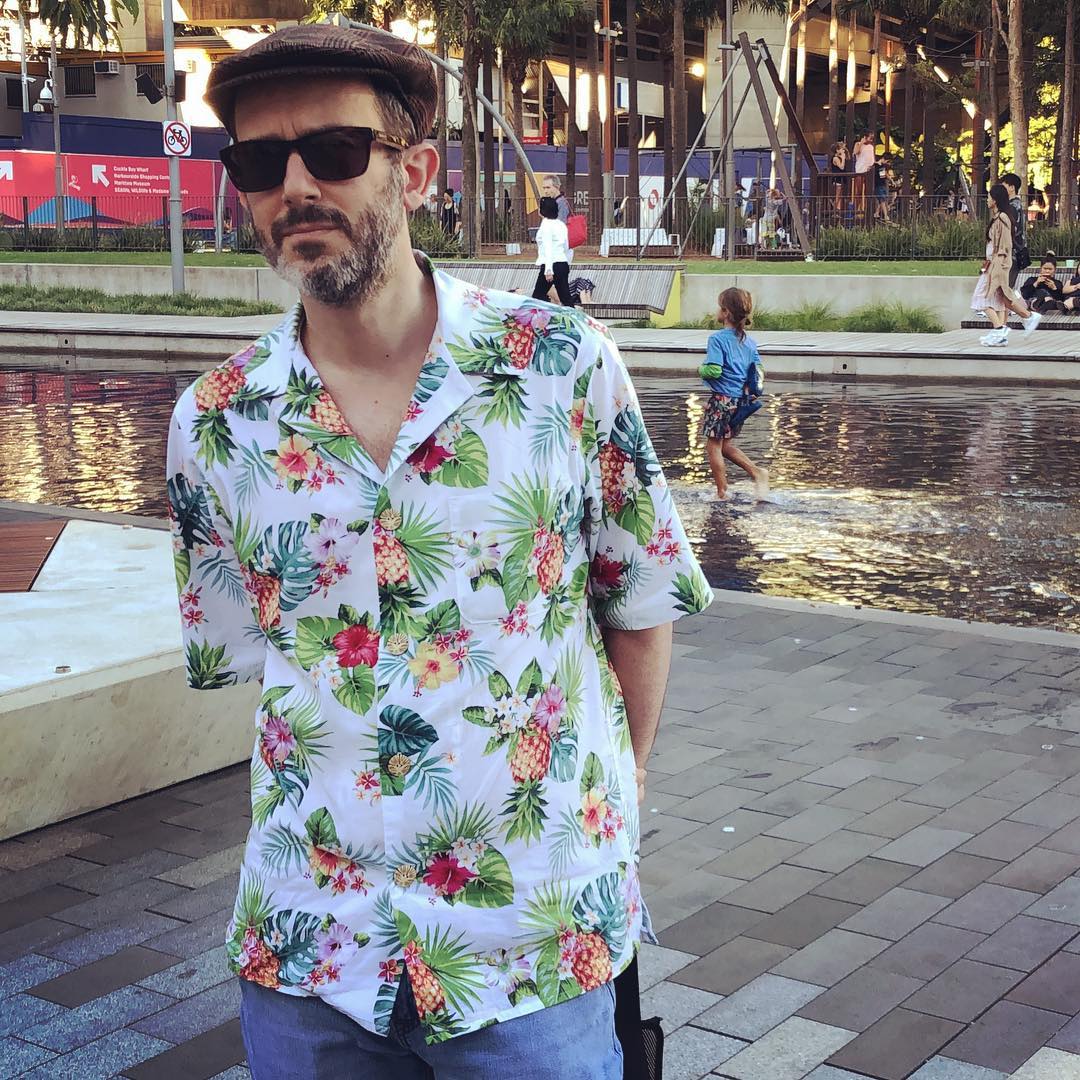
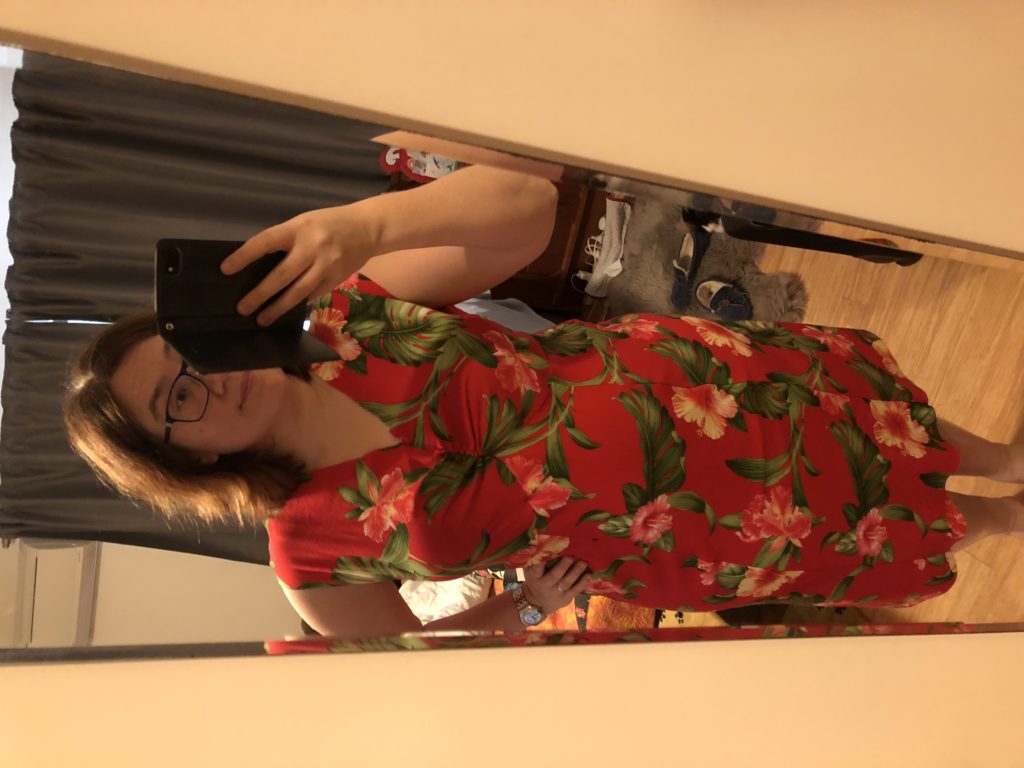
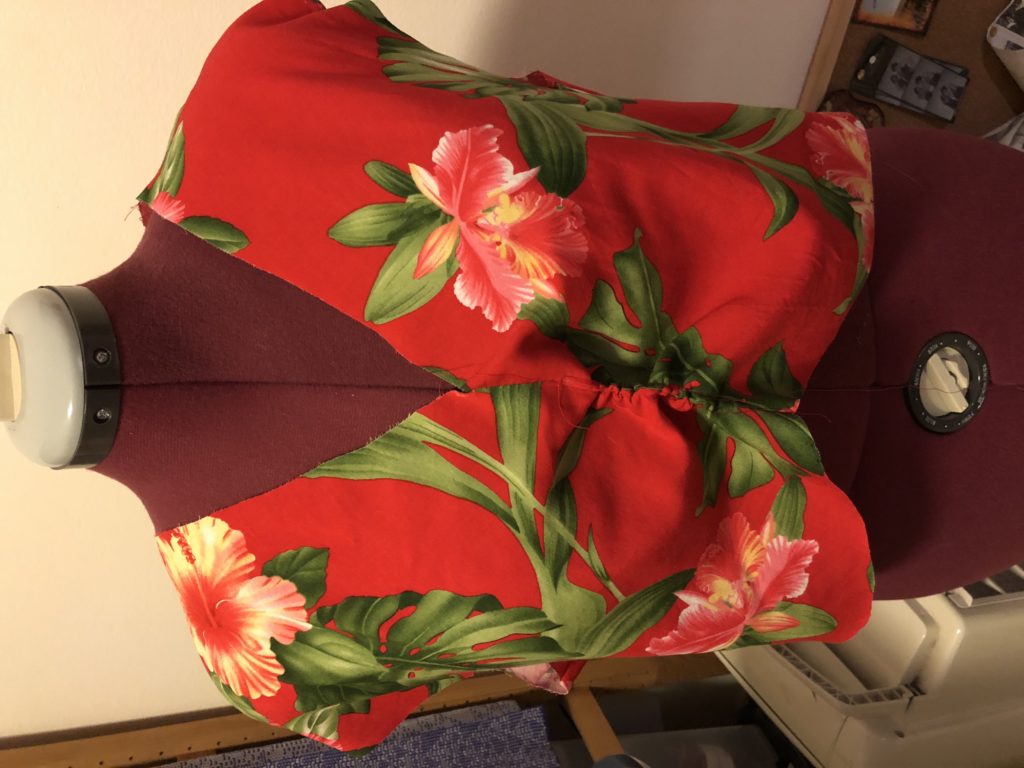
When last I left off, you’ll recall I had assembled the bodice and front skirt of my Hawaiian dress. Since then, I’ve snatched bits and pieces of sewing time whenever I’m able. I was soon able to finish off the complete outer shell and try it on.
I discovered quite a bit of fabric pooling at my lower back. (Note to self: I think I need to start doing swayback adjustments going forward.) I had the Snook help me by pinning out the excess. I was able to then undo the seam and move it to remove the extra fabric. Then I made a note of the measurements so I could do the same on the lining pieces.
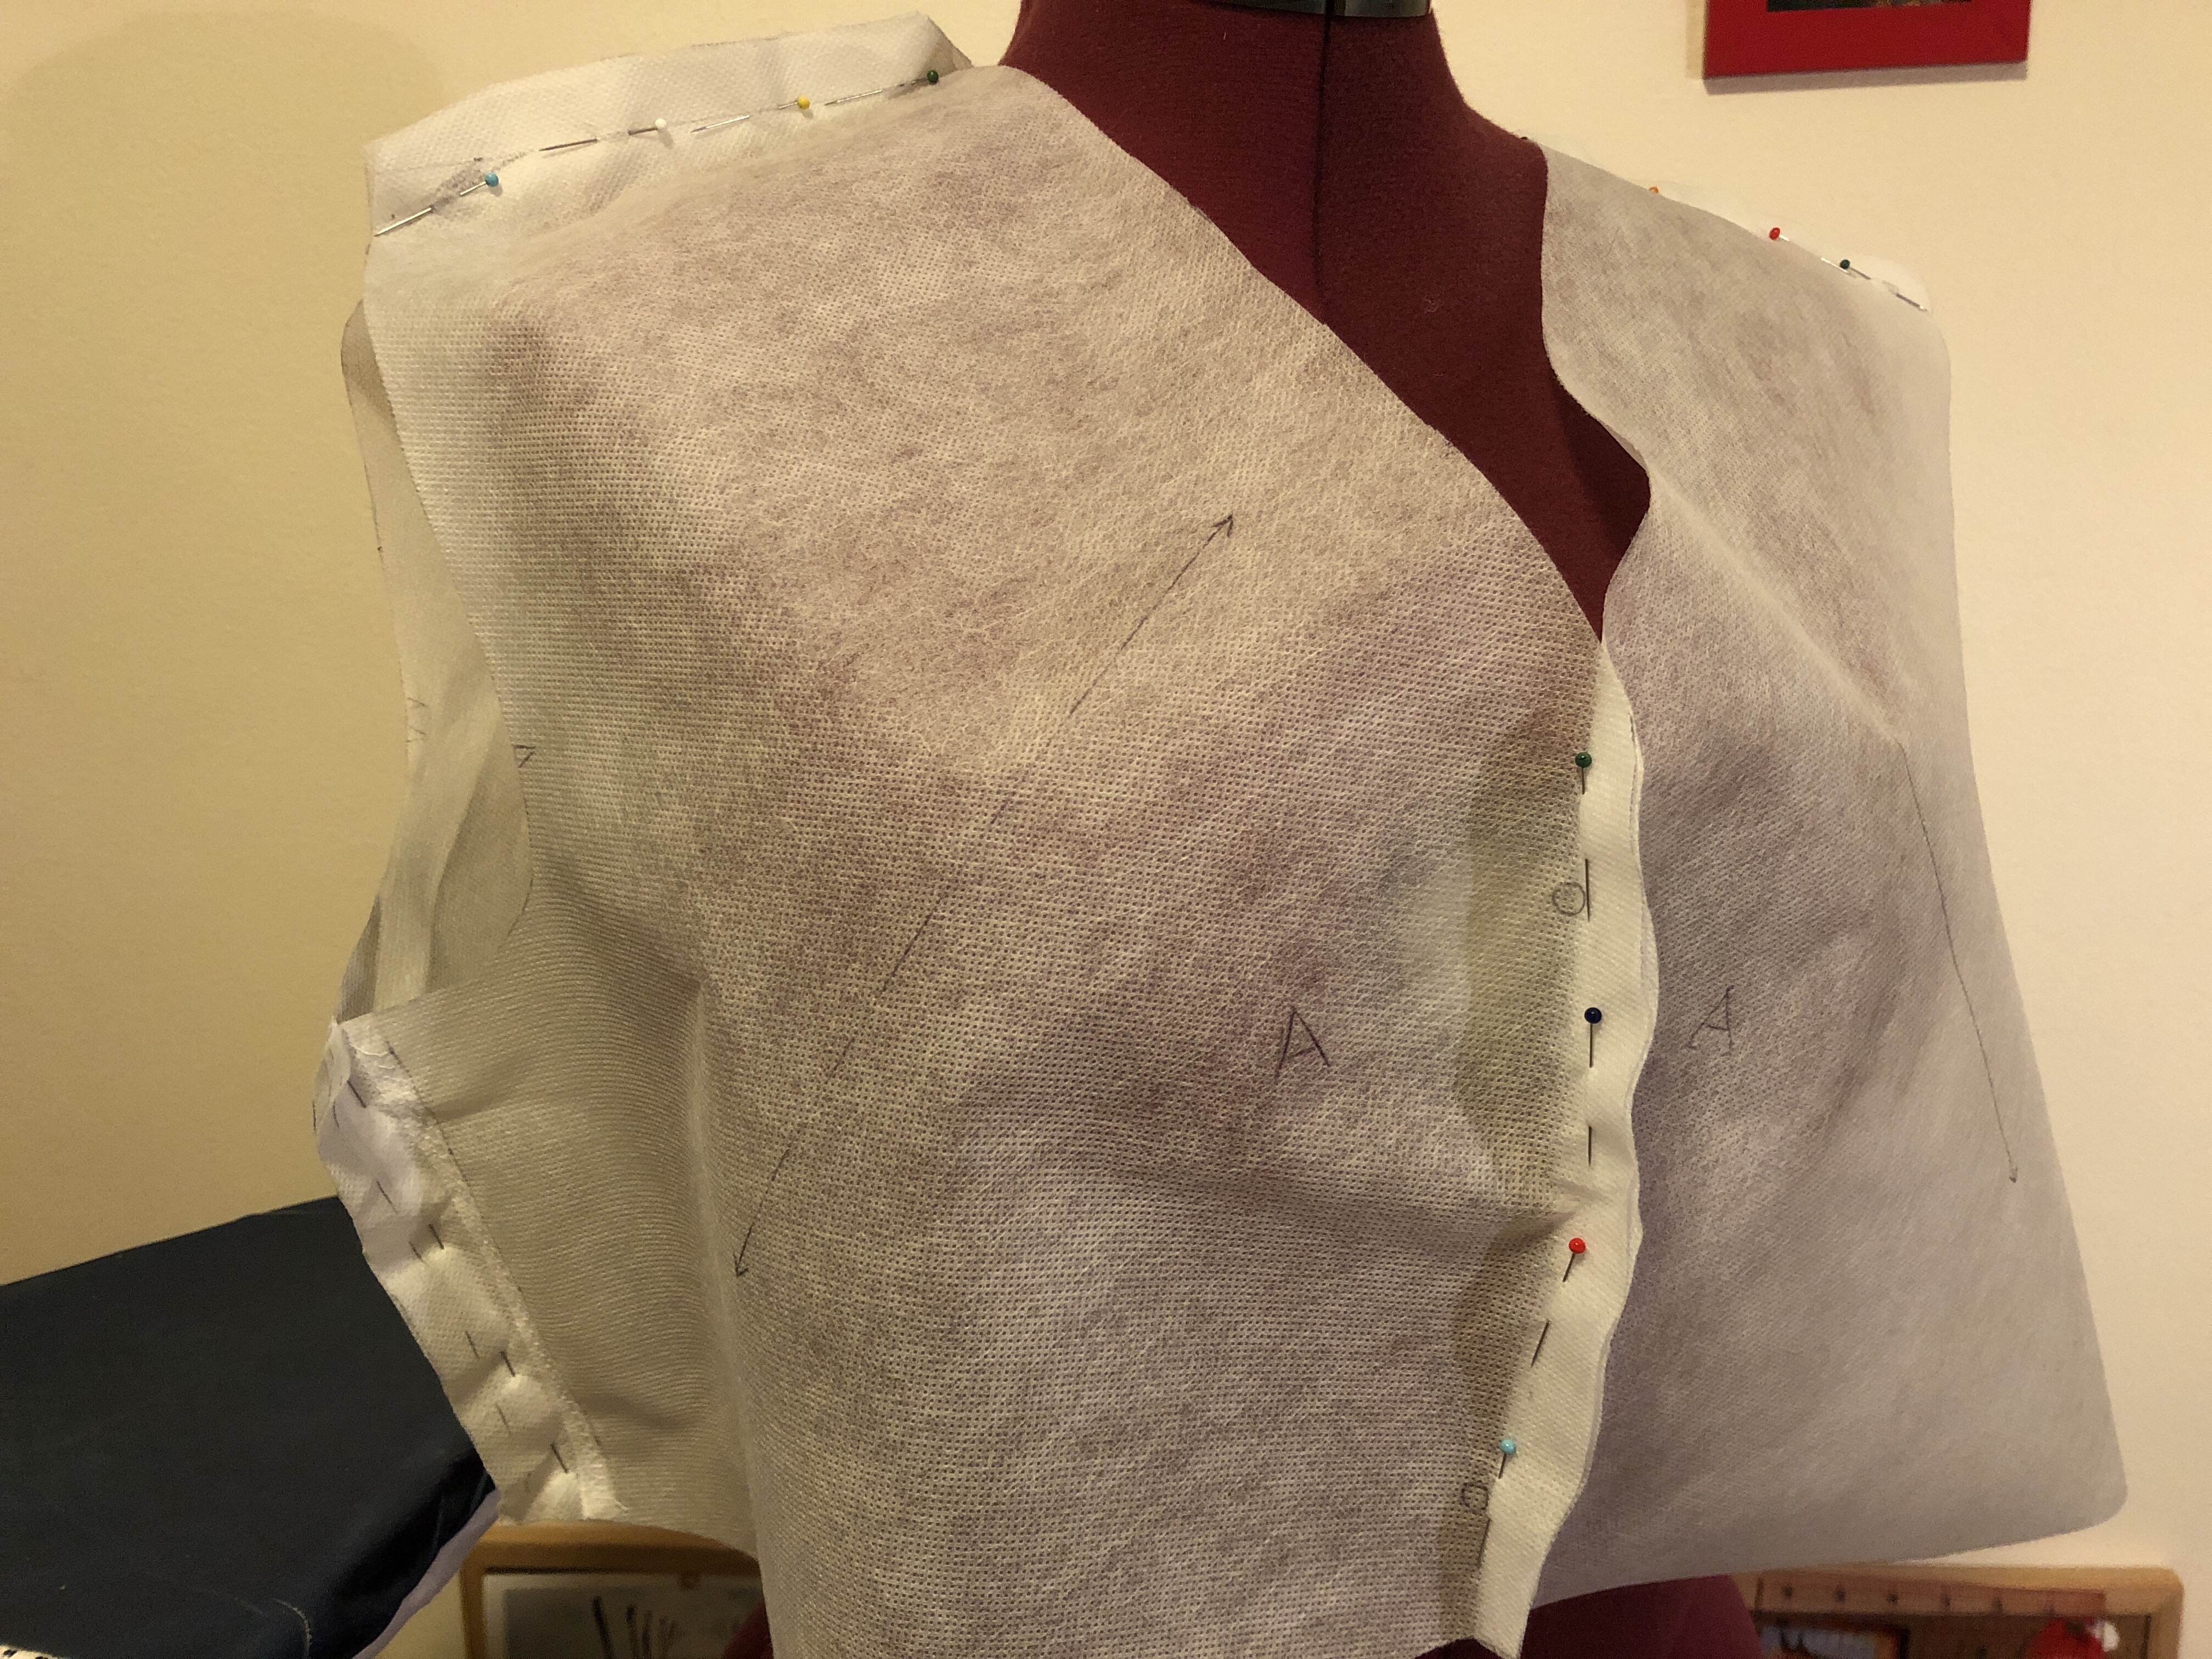
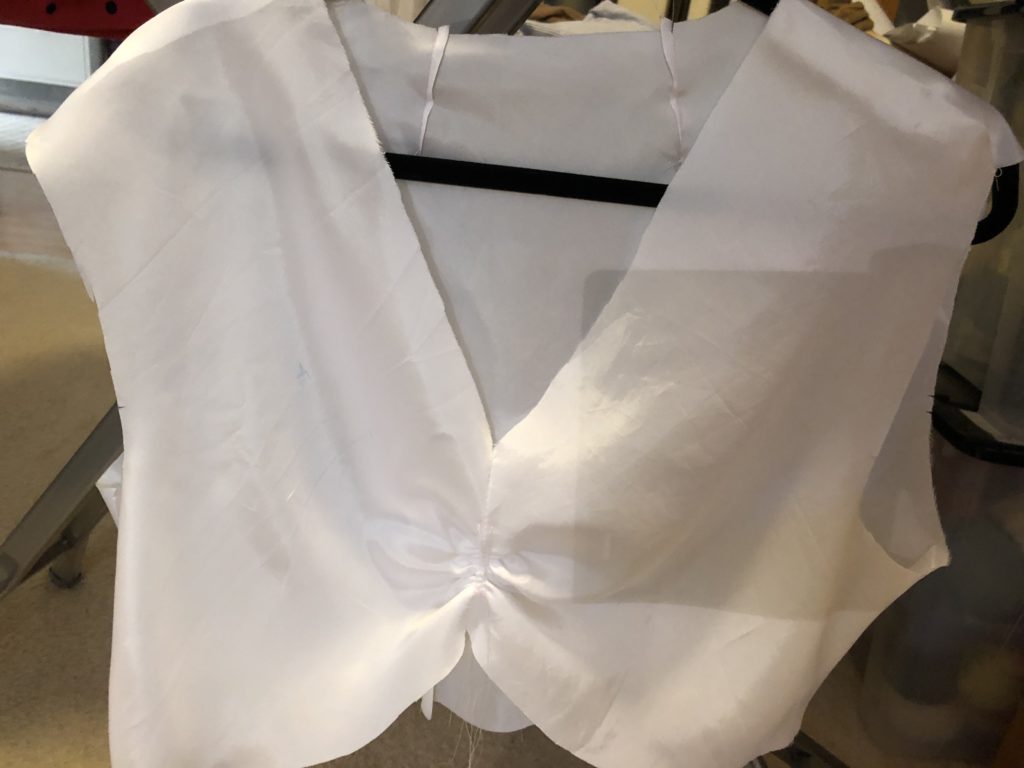
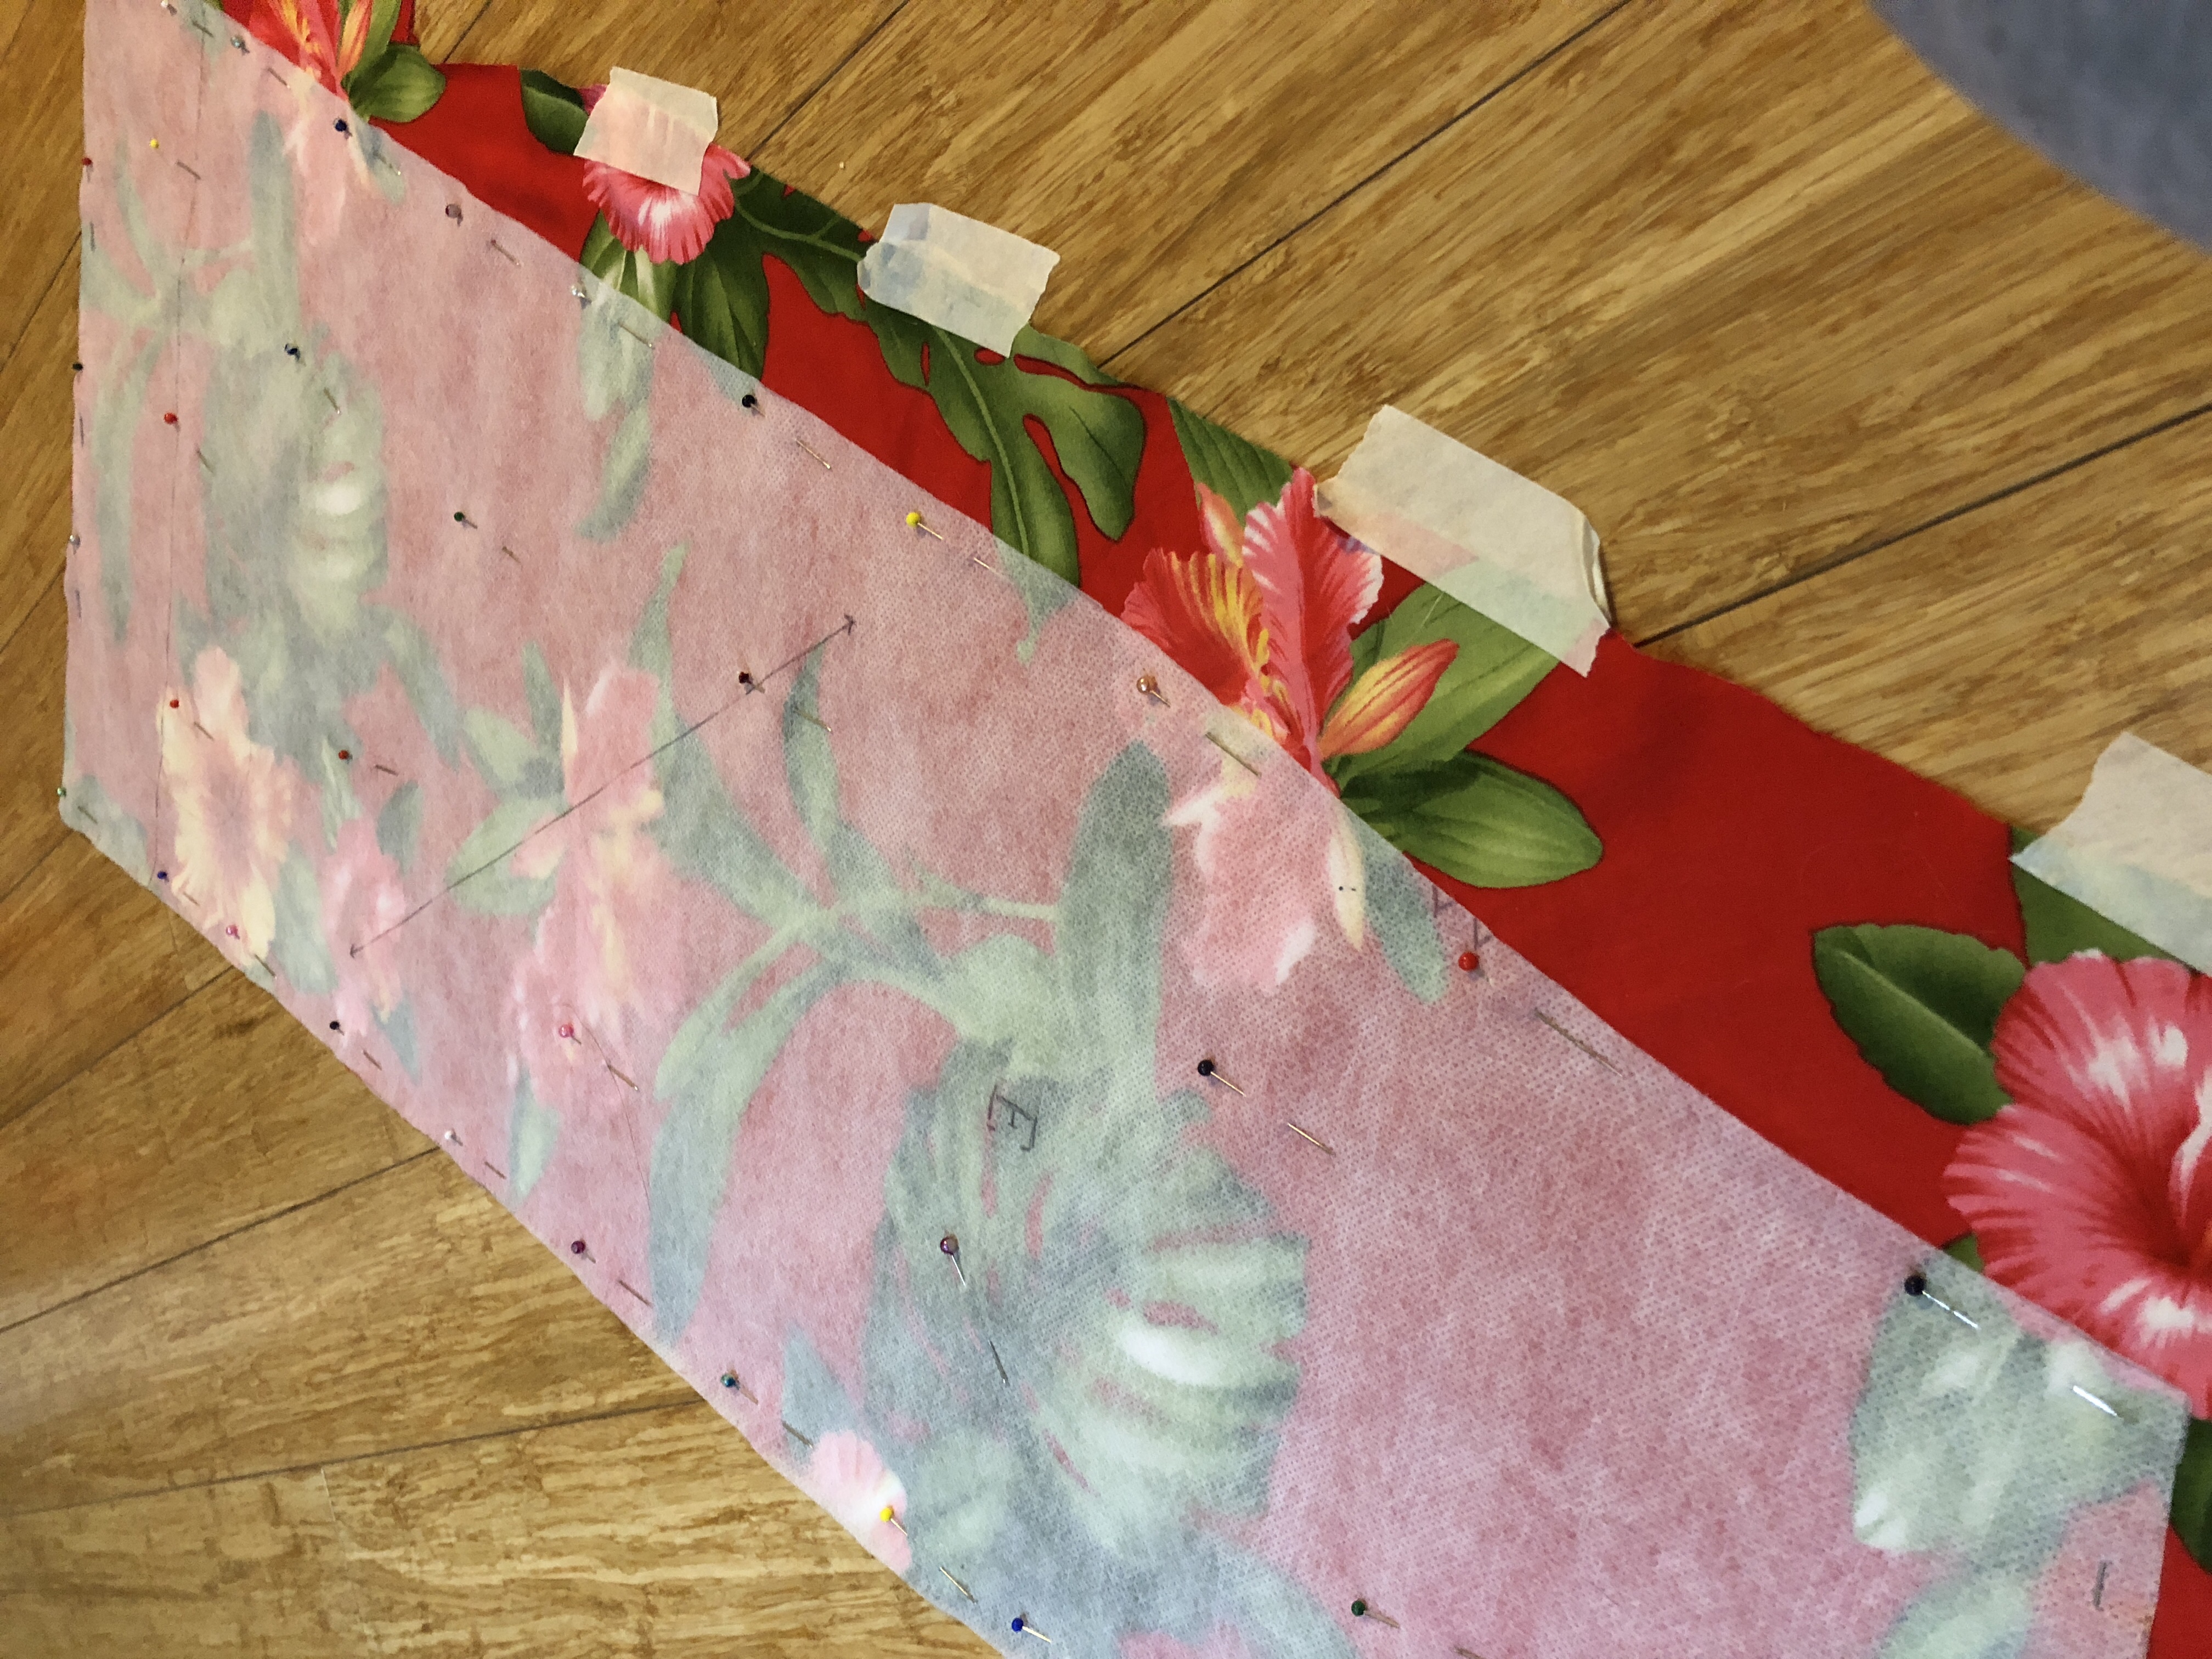
Oh right, the lining. Then I basically had to recreate the entire dress again. I had to cut out all the pieces on the bias, hang them, press them, and assemble the dress. Here’s the bodice in progress.
I also sewed together a neck facing out of my outer fabric. This was then pinned on top of the lining so that you wouldn’t see the white peeking out at the neckline. Here’s what it looked like on the inside before I sewed it down.
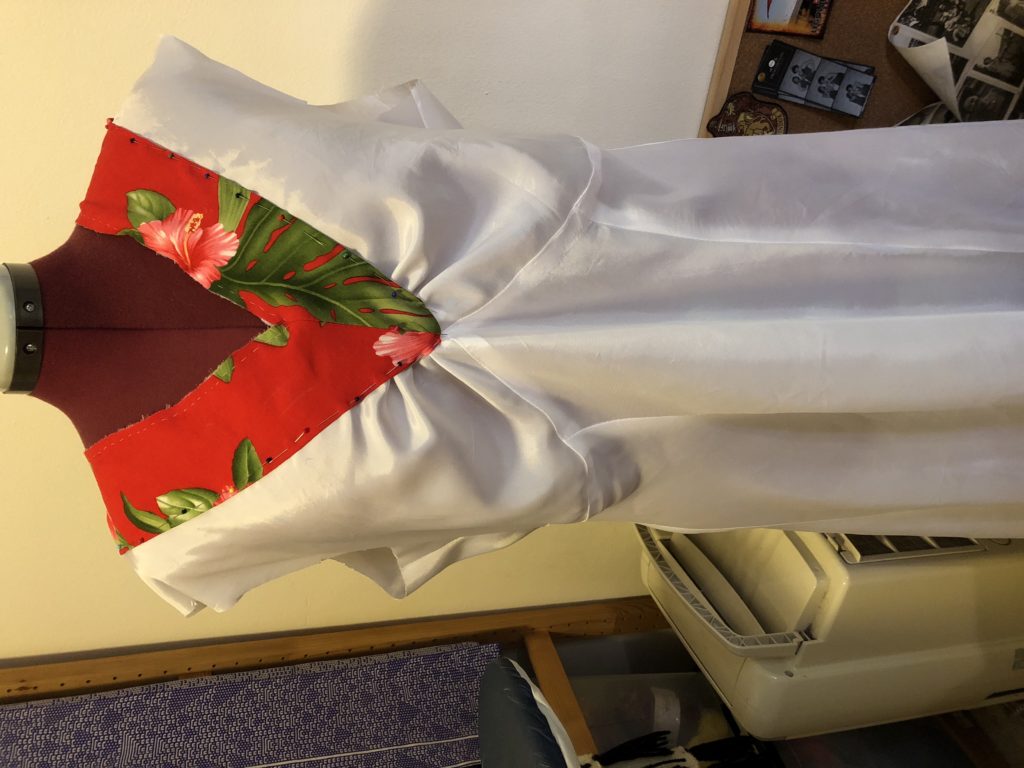
Then I inserted the lining, making sure the right side of the shell was next to the right side of the lining. Once I sewed them together at the neckline, I was able to flip it inside out so that the lining is inside and all seams are neatly trapped between. That v-neck was tricky though, and I had to unpick it a few times to get it to lie flat. (It’s still not perfect but it’ll do.)
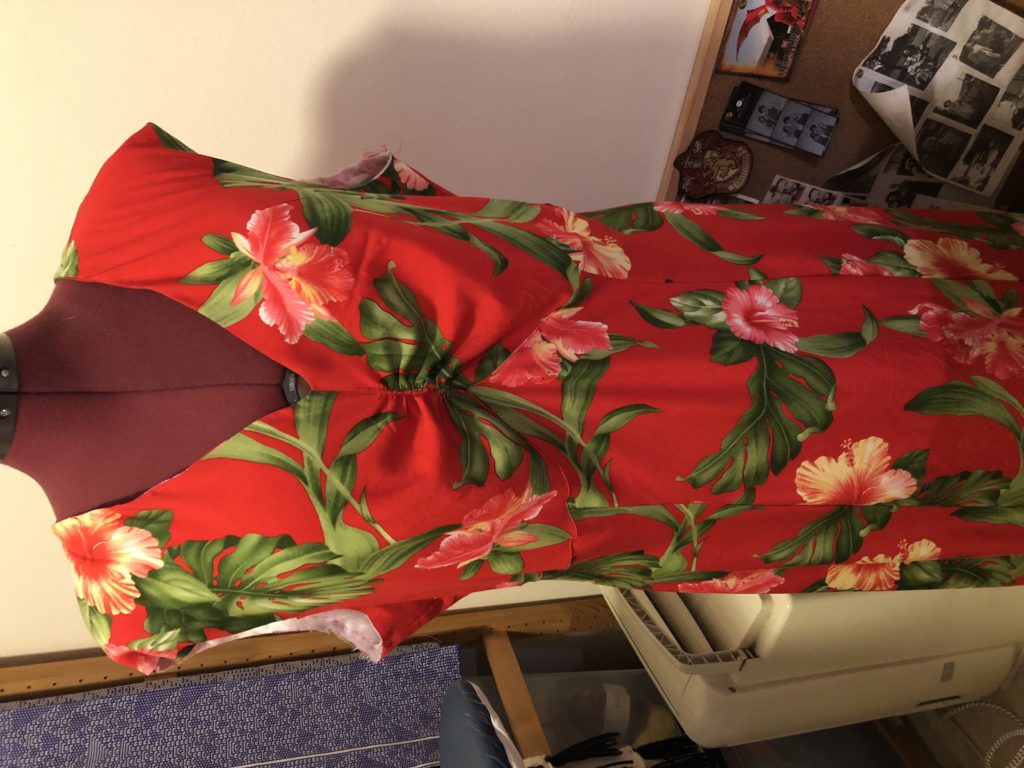
The next step was to prepare the sleeves. Each cap has a bit of a puff at the top so I sewed basting stitches so I could gather them to fit. Here’s what it looked like once I had the sleeve pinned in place.
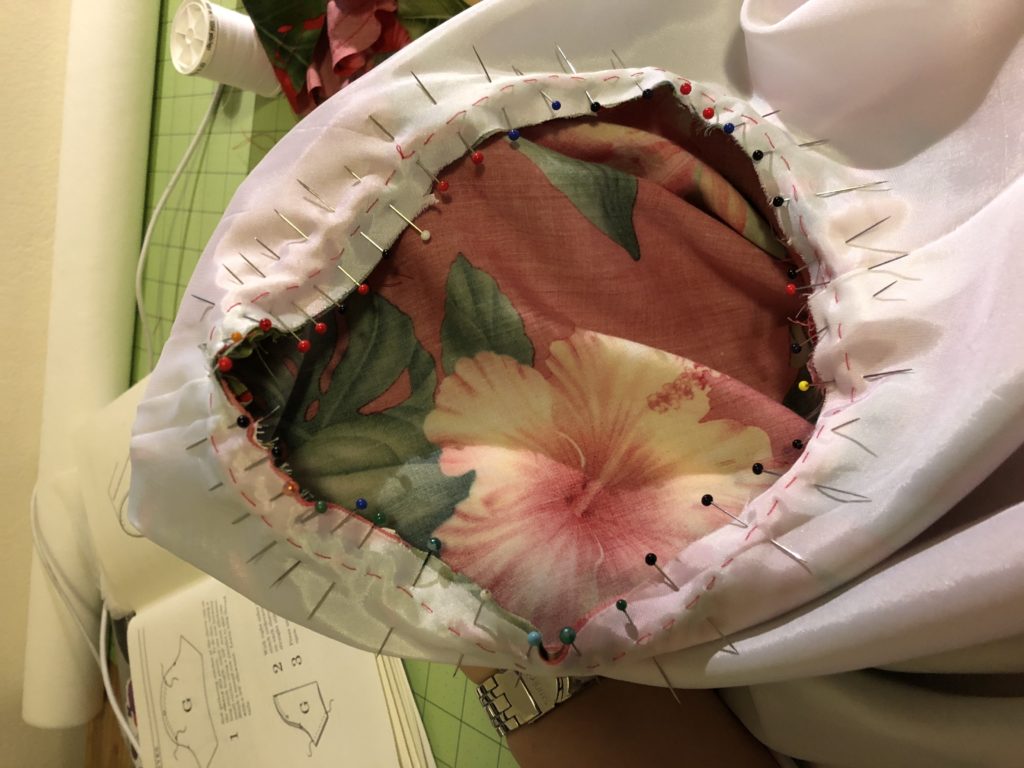
Yeah, I use a lot of pins.
Then I sewed in the sleeves and finished the seam. By the way, I found it weird that the pattern didn’t tell me explicitly to finish any of the seams. Not all of them (like the sleeves) are under the lining. I even went back and overlocked the skirt seams just because I was paranoid about fraying. Then I hemmed the sleeves.
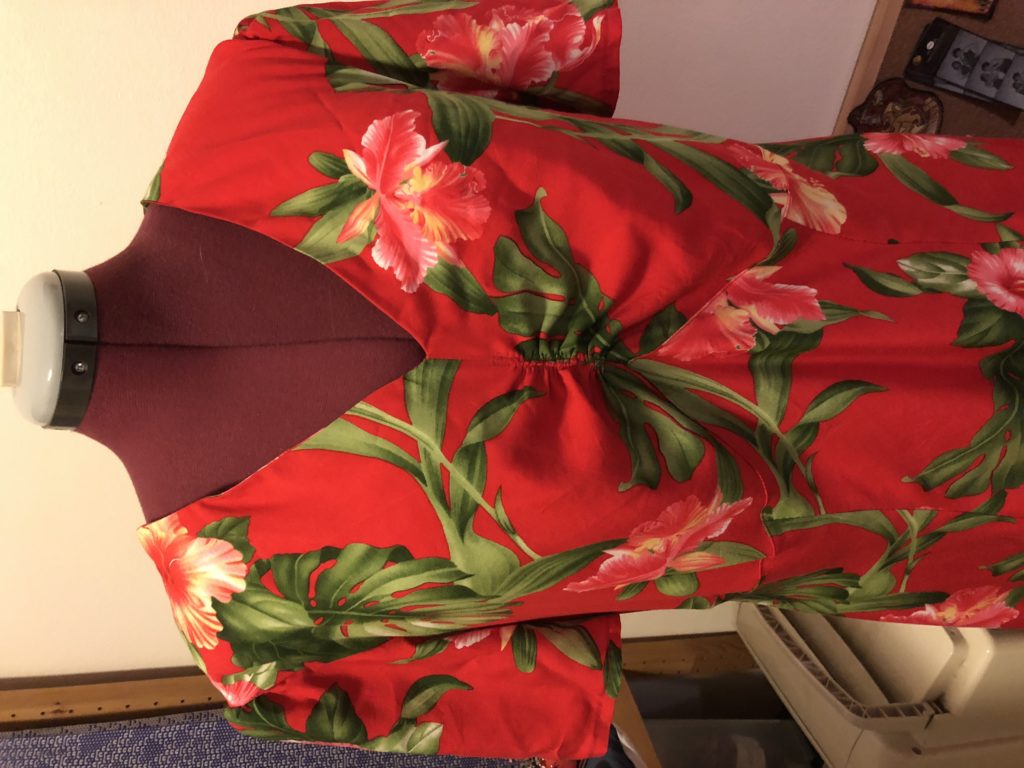
And here’s what it looks like right now. All that’s left is to straighten up the bottom and hem it!
-
Frocktober 2018 Update
We’re officially one week into Frocktober… and I’m wearing pants. Unfortunately I have to travel for a family funeral, and spending the next 24 hours in a dress just doesn’t seem optimal. I’ll tack on an extra couple days into November to make up for it.
In happier news, I am more than halfway to my fundraising goal! My donation page is showing $1,050 total against my target of $2,000. Thanks to everyone who has contributed so far! The Ovarian Cancer Research Fund is a fantastic organisation and every dollar helps.
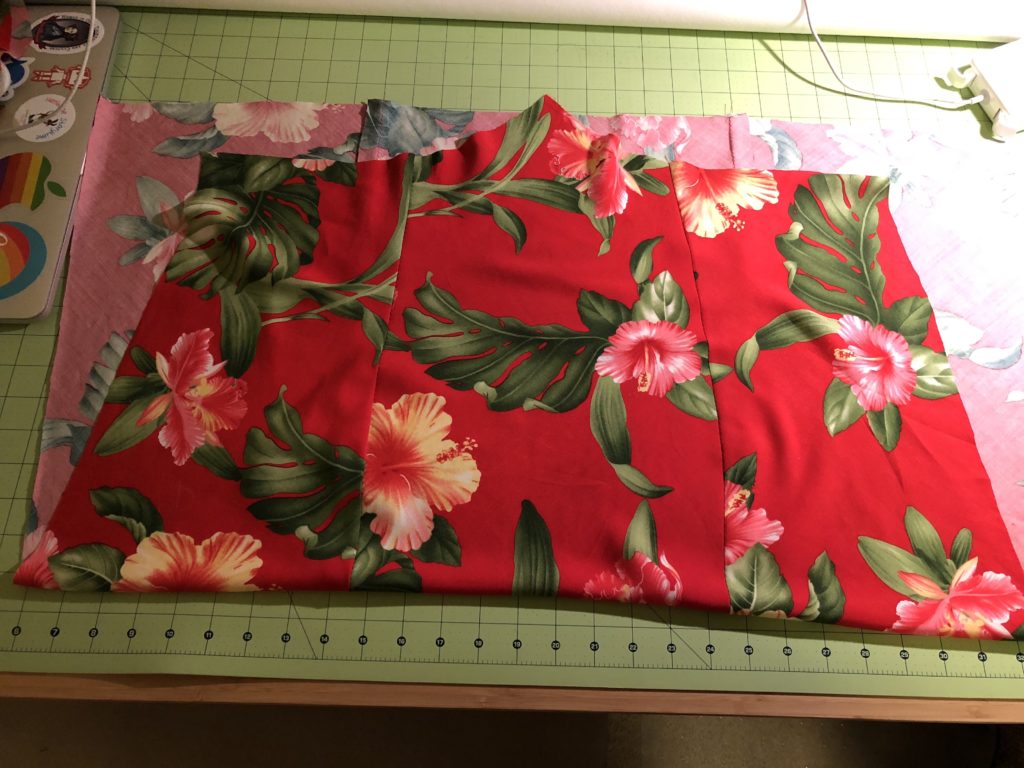
My sewing is necessarily going to have to pause while I’m away, but I did make more progress. I finished sticking together the shirtdress pattern and cut out my size. I also started sewing together my bias cut Hawaiian dress. I managed to get the bodice complete, as well as the front of the skirt. (Note that the ruching along the front is temporary via some basting threads. It’ll look better when it’s properly finished.)
And with that, I’m off!
-
Frocktober 2018 – Sewing Update 4
Still no actual sewing to be seen. Tonight I washed 8m of bemsilk lining, which will be used to line this first dress and at least one other. Once it was washed, it crinkled up like a mofo and I had to iron ALL of it while it was still damp.
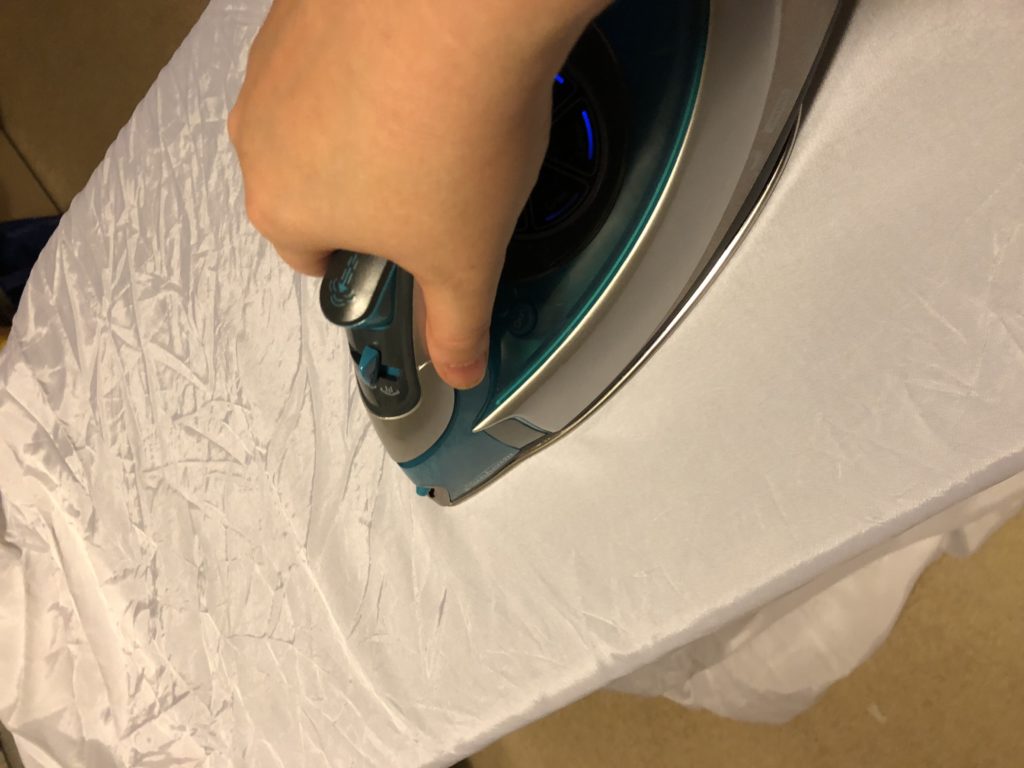
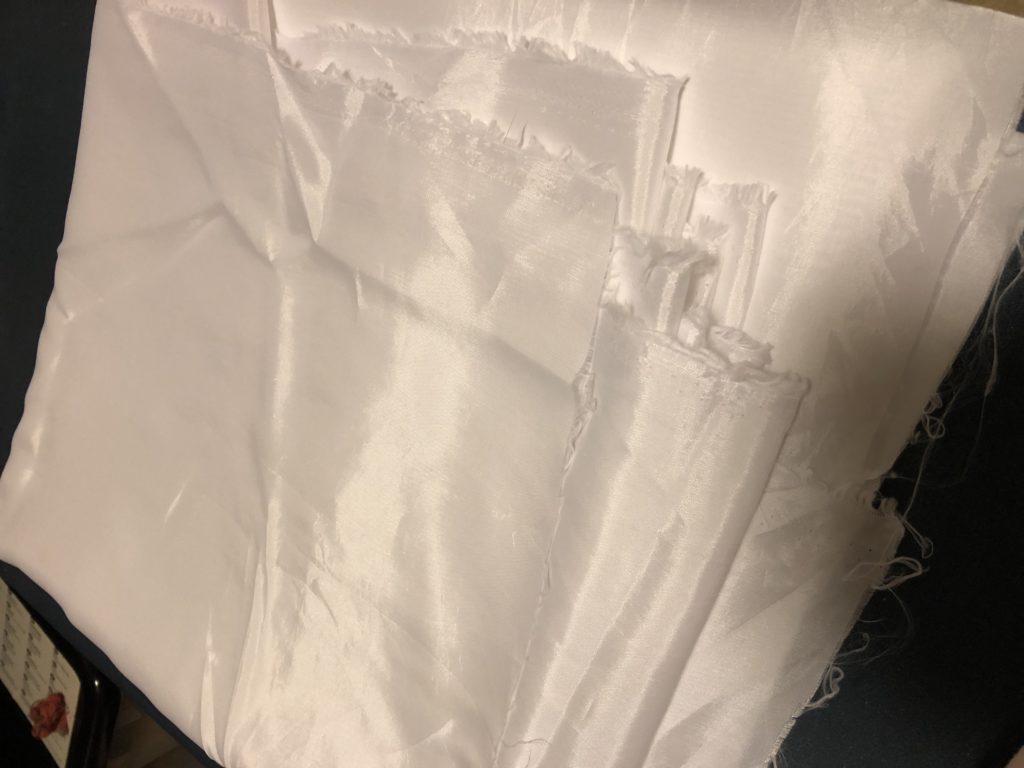
Seriously, my wrist hurts now. It took me over an hour.
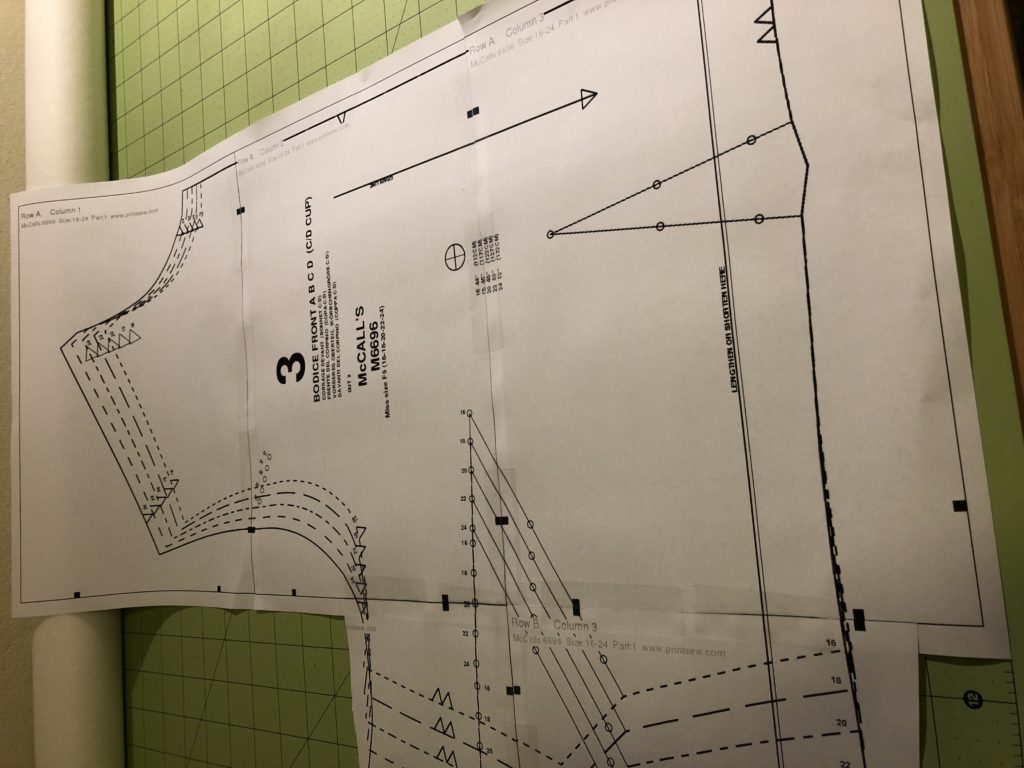
Rather than cutting the lining, I started prep work on another dress. This one is a shirtdress from a traditional, well-known pattern company. (I’m not naming them for reasons you’ll soon see, but it’s obvious in the photos.) I purchased a “downloadable” pattern, and it’s the first and last pattern I’ll ever buy from them. It came as a DRMed PDF, and I had to install some really dodgy proprietary software to even view it. And here’s the thing – this dress has a couple different options, so there are many, many possible pieces. The whole pattern is well over 100 A4 pages. And the software will only let you print the entire thing. You can’t specify pages, and even if you could, there’s no overview that shows you just the ones you want. Oh, and the DRM also prevented you from printing-to-PDF to try to work around these limitations. I was livid.
Of course, a livid geek is also a motivated one. In less than an hour I was able to, uh, figure out how to create an unencumbered PDF. That allowed me to create an overview which showed all the pages together, thus allowing me to see which page ranges I needed to print for my selected dress. Turns out I needed less than 60, so I saved 40+ wasted pages. YOU’RE WELCOME, TREES. AND SUCK IT, TRADITIONAL PATTERN COMPANY THAT I’LL NEVER BUY FROM AGAIN.
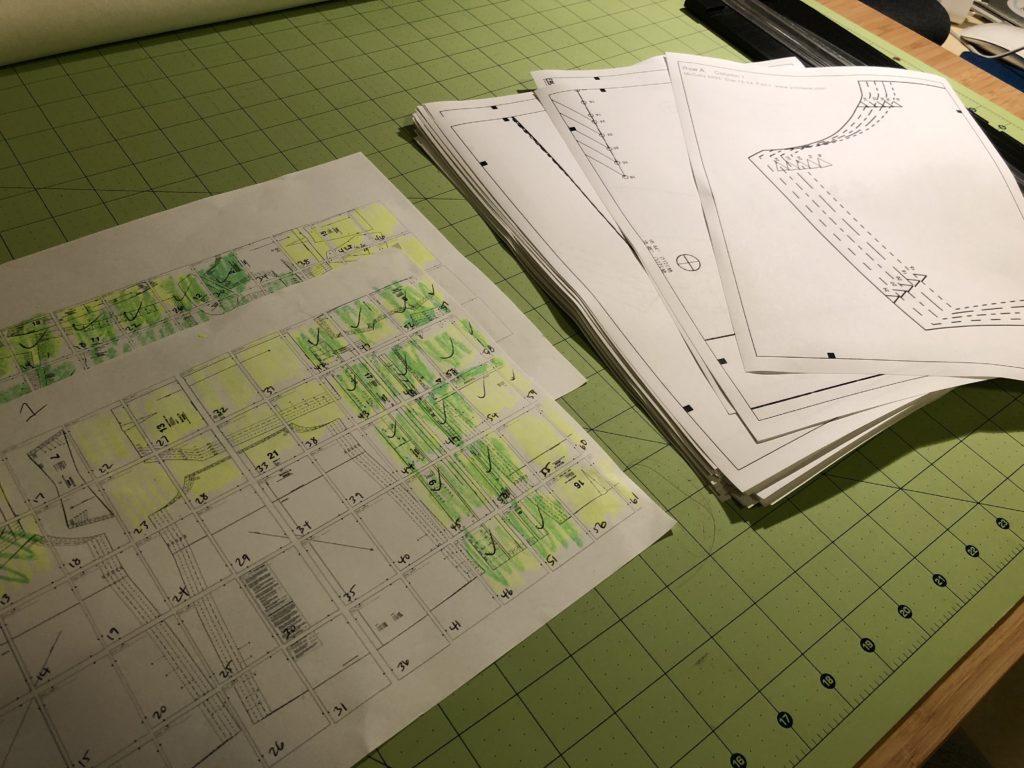
You can see my overview on the left there. The green pages were the ones I needed for my dress. On the right is the stack of printouts.
Print-at-home patterns are convenient but it means you have to go to the effort of assembling them. I have a good system down involving a mat cutter, glue, and tape. I managed to get about half the pages stuck together and assembled tonight.
Tomorrow I’ll finish assembly and then cut out the pieces properly. Then on the weekend I should be able to start sewing the outer part of the Hawaiian bias dress and cutting the lining!
-
Frocktober 2018 – Sewing Update 3
After yet more crawling around on my poor knees I managed to finish cutting all the main pattern pieces tonight, which means all the masking tape and fabric are finally off the floor. For now. 😂
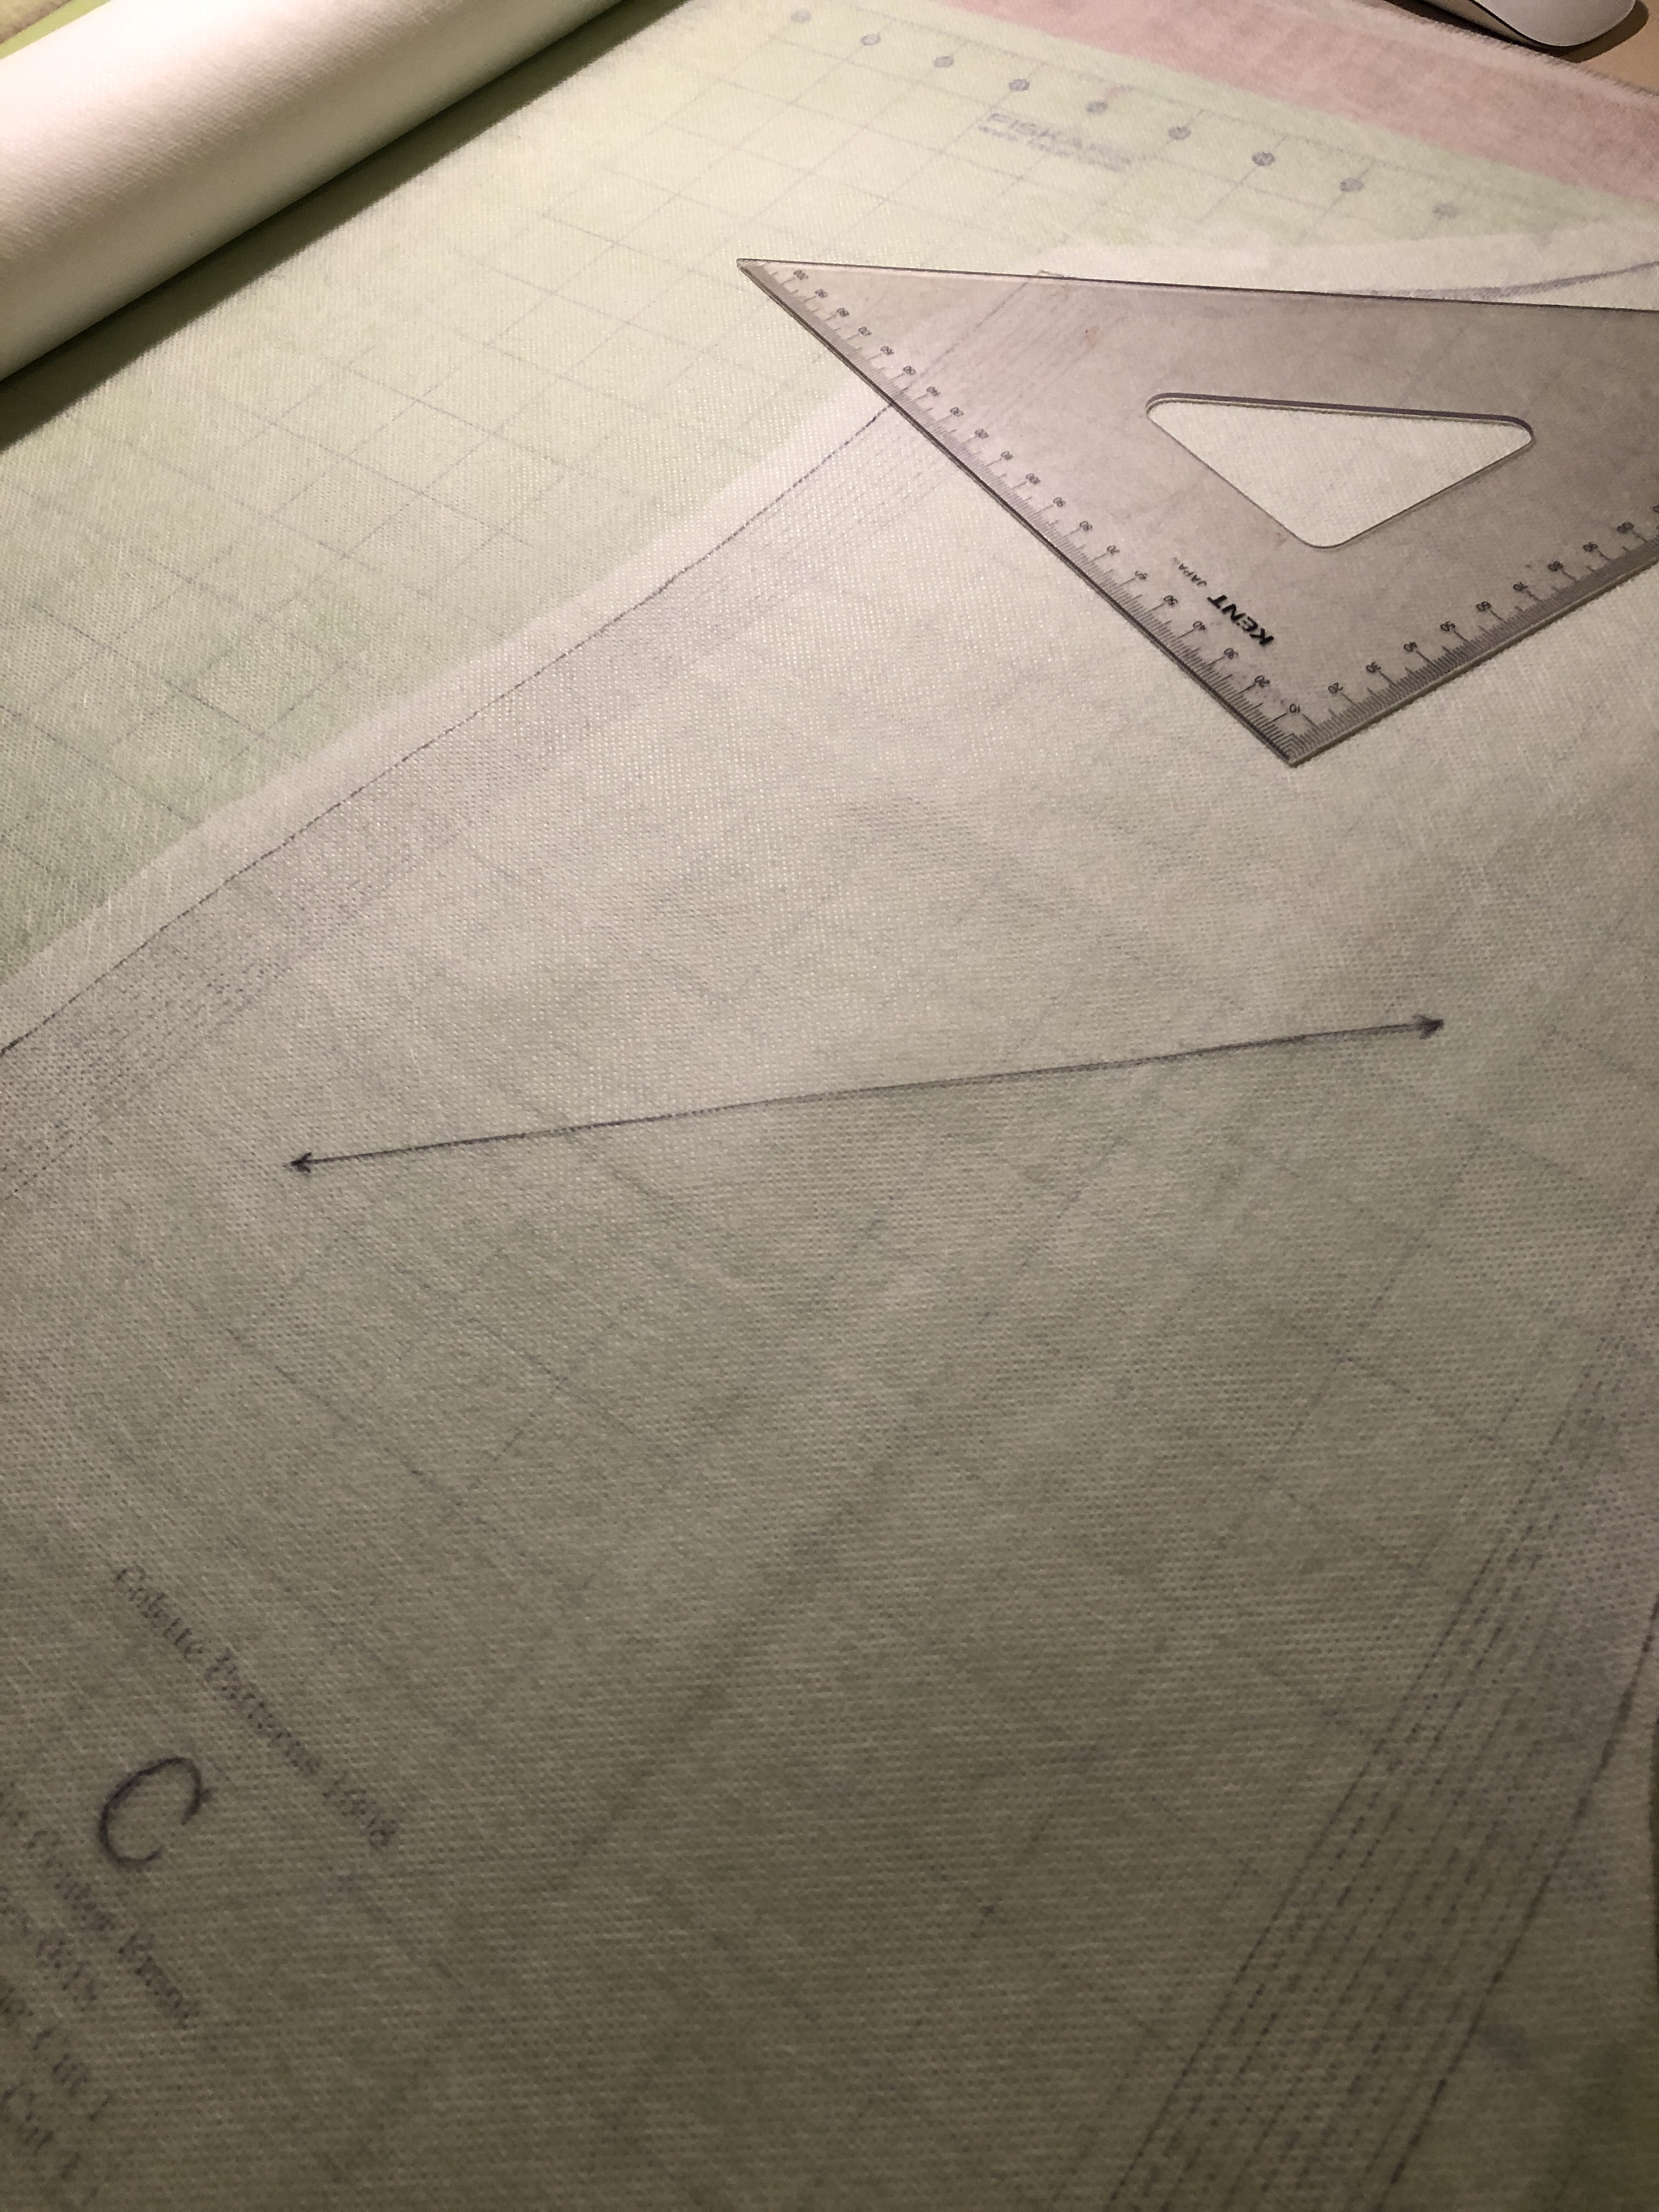
The final preparation step is to hang all of the pieces for at least 24 hours. This is because they were cut on the bias – that means the fabric (which is already really drapey due to the rayon in it) is very stretchy and can grow on you. So by letting it hang, you’re allowing the pieces to stretch before you start sewing them together.
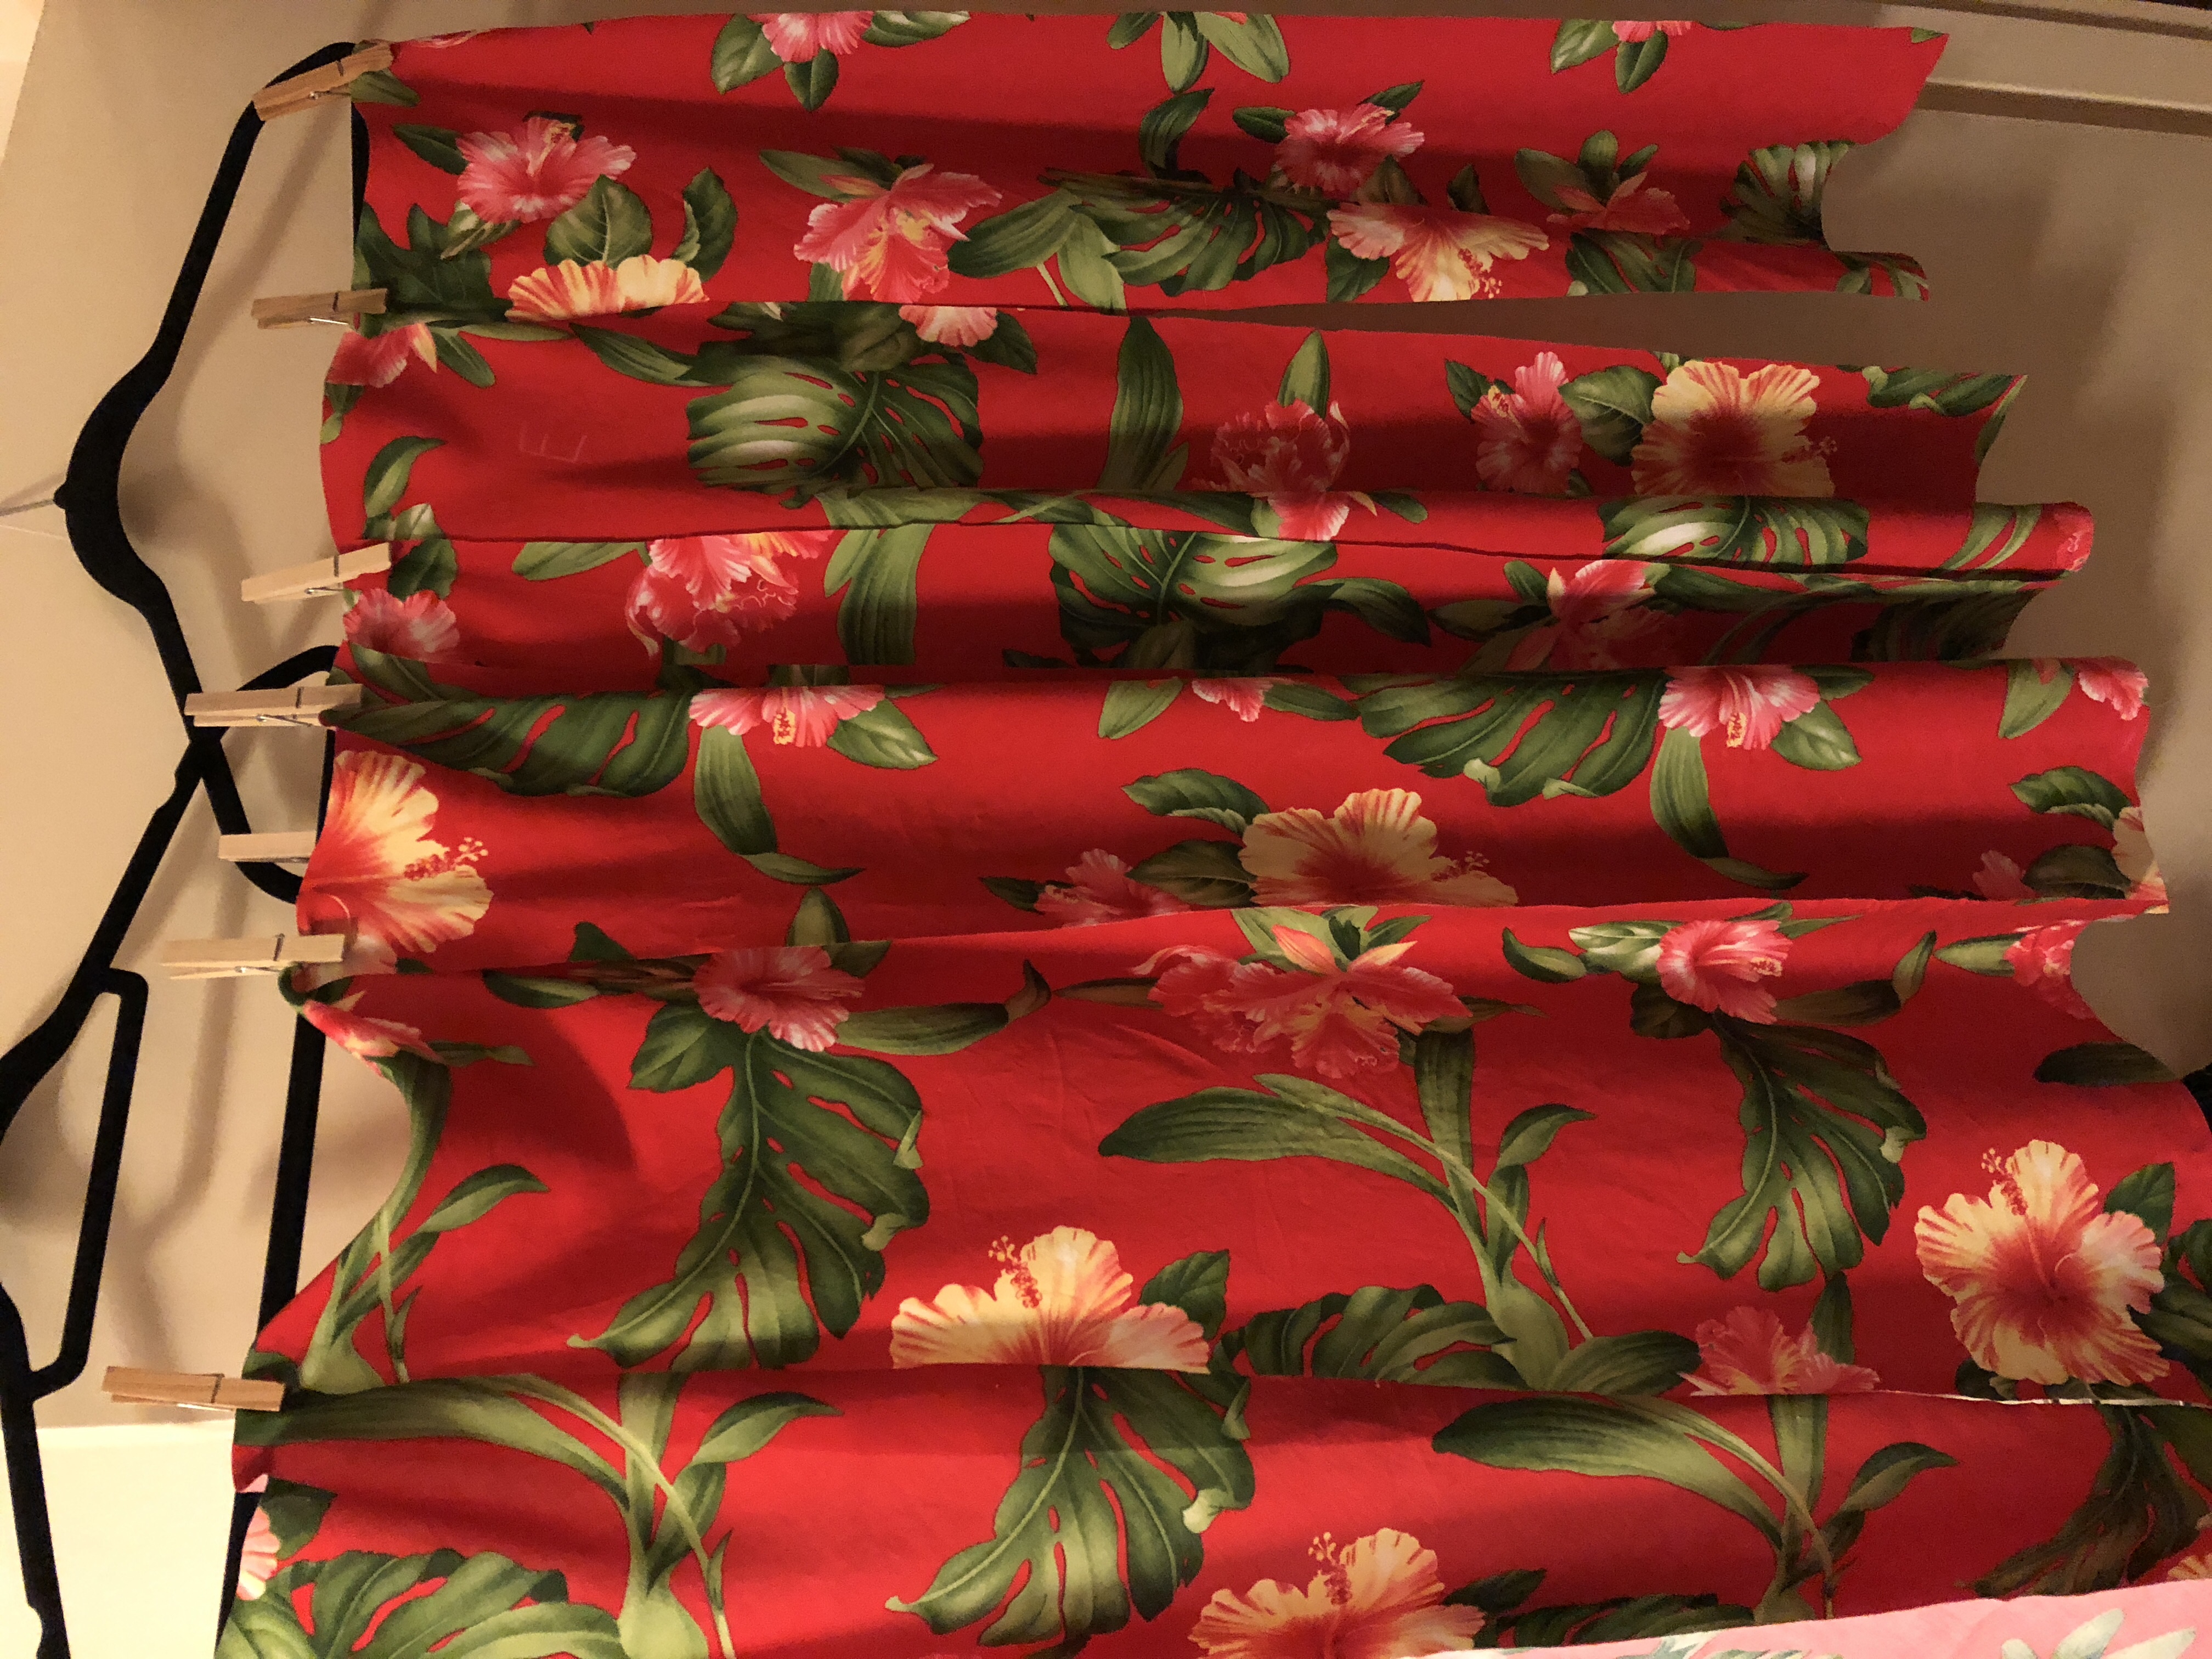
I was a little worried about how the skirt pieces would come out. It was hard to tell as I was cutting it whether the flower placement would be nicely random. The three pieces across the front are more similar than I’d like, but it’s still offset a bit and the Snook said he didn’t even notice. I’m not sure whether I have a big enough piece left to cut another one, so I think I’m stuck with it regardless.
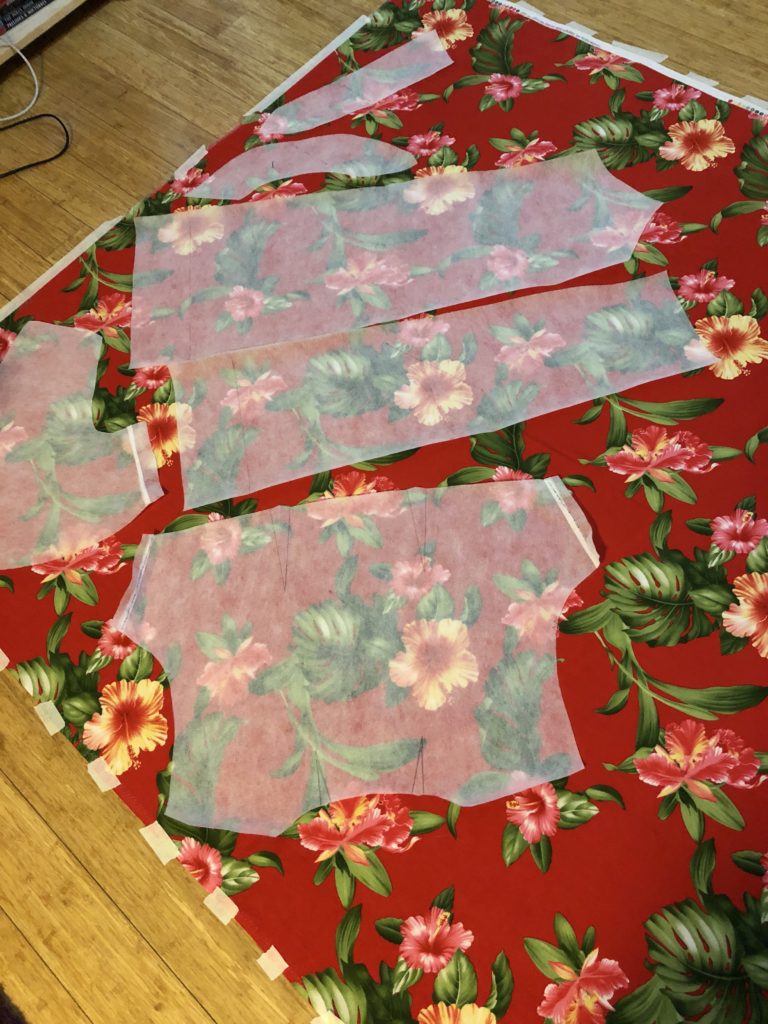
I reckon I’ll leave these to hang tomorrow while I get onto the next task: cutting out most of the pieces again, this time in the lining fabric. (My back is killing me already…)
-
Frocktober 2018 – Sewing Update 2
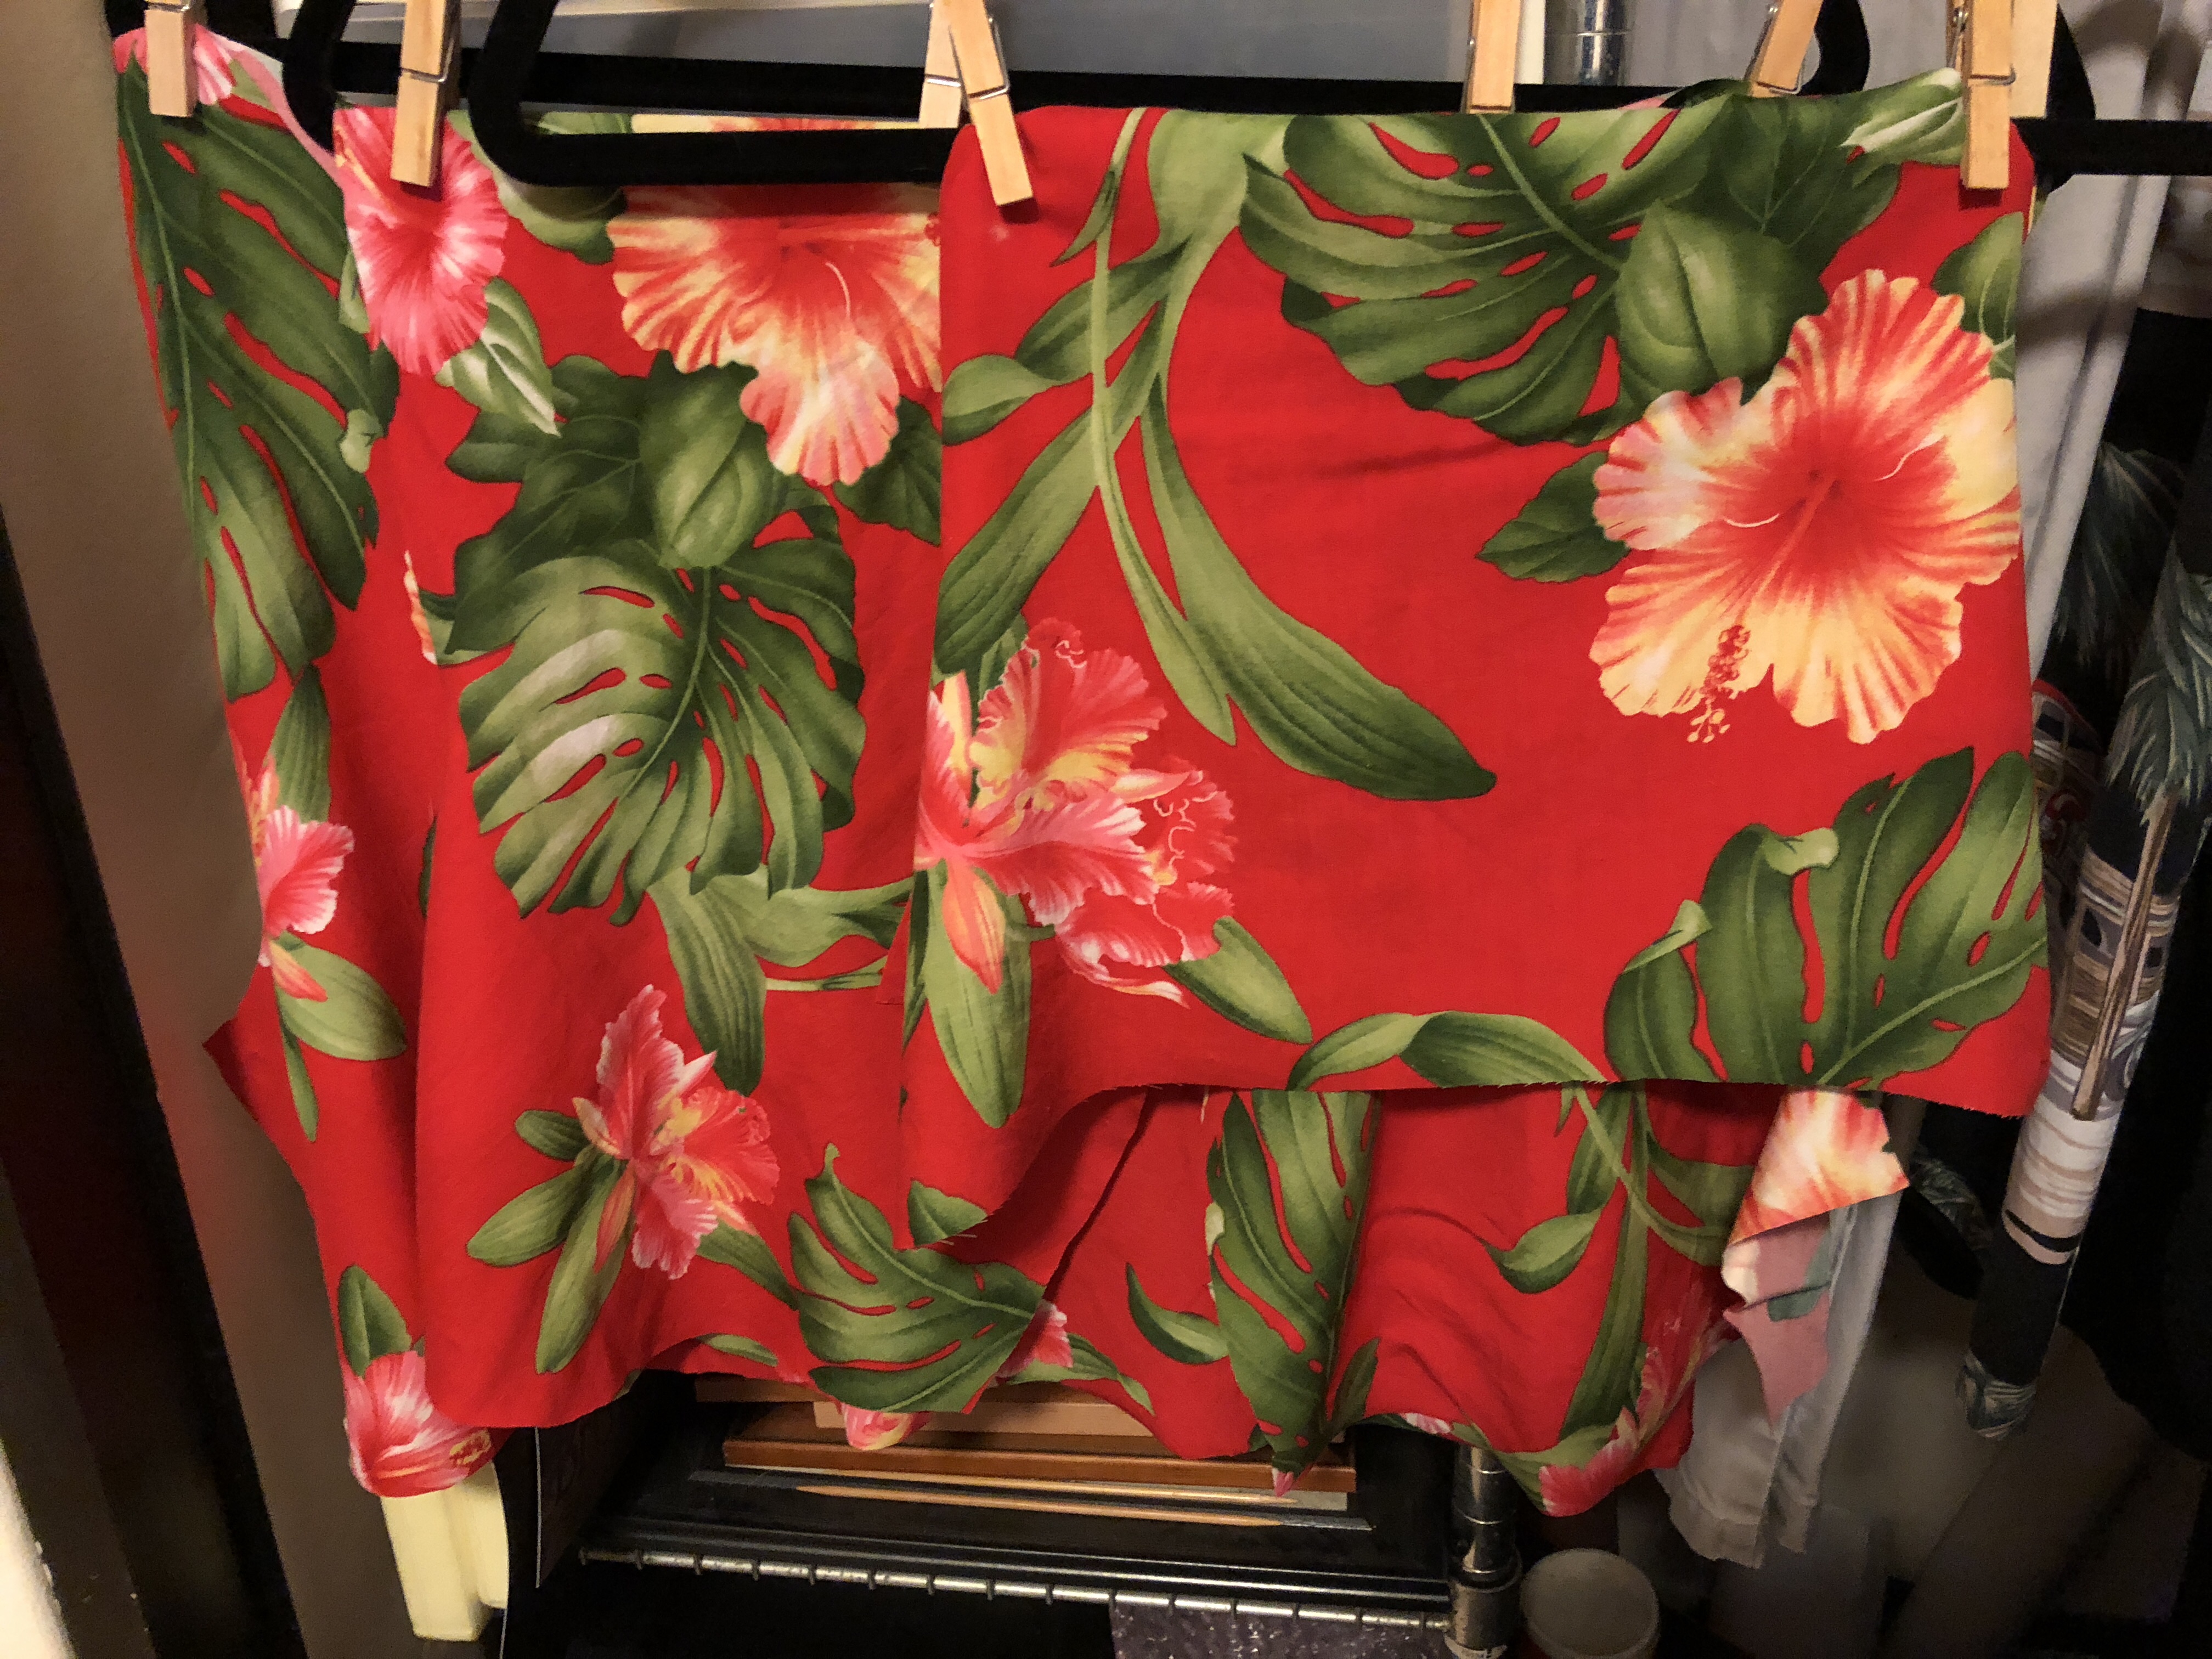
My goal was to have the Oolong dress cut out tonight… and I didn’t quite get there. First I had to iron my fabric though. It’s a Hawaiian print that I bought in Honolulu more than 5 years ago, and of course I no longer remembered what the hell it actually was. Between my Internet sleuthing and the Snook’s chemistry knowledge (ie he literally burnt a chunk of it), we’re fairly certain it’s a cotton/rayon blend. It’s very drapey and should work nicely with this pattern.
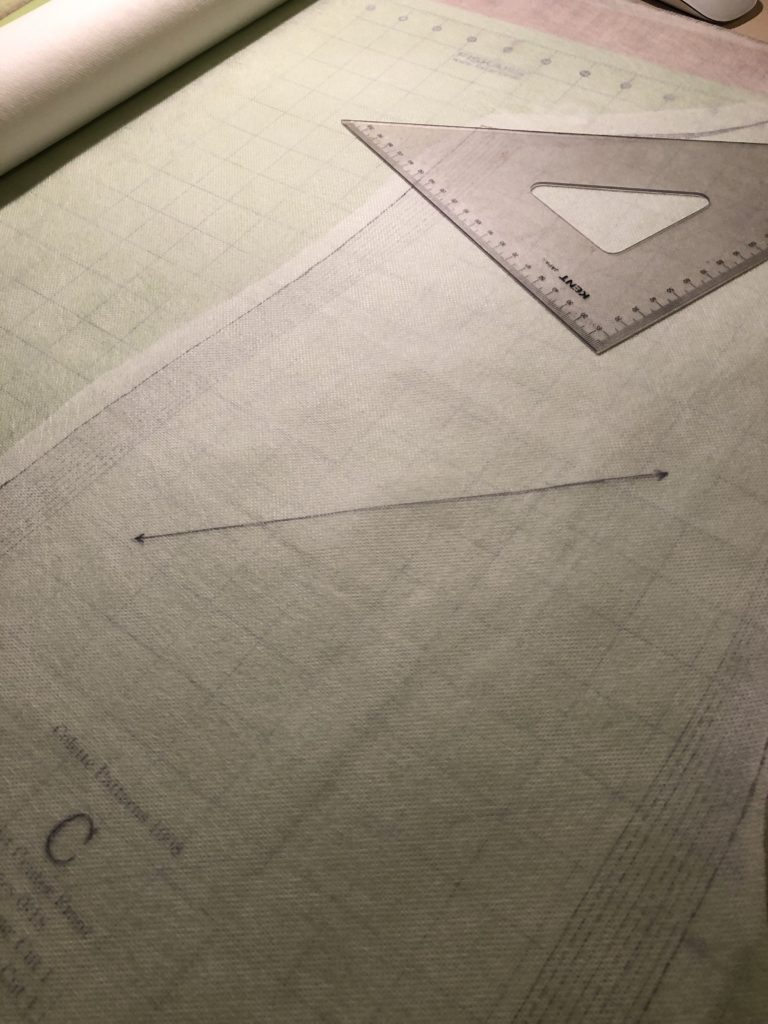
Now – this dress is cut “on the bias,” which means you have to place the pieces at 45-degrees to the fabric’s grain. This means that I actually needed to square up my fabric. I ended up laying it out on the living room floor, using the wooden floorboards and a load of masking tape to get it stuck down straight. Then I started pinning and cutting.
Ugh. Crawling around on your hands and knees on a wooden floor really sucks. I managed to get about halfway done, so I’ll finish up tomorrow. I’m wrecked.
-
Frocktober 2018 – Sewing Update
As you would’ve seen from the photo in the previous post, Frocktober is here again! I am once again taking part, and you can donate towards my efforts here. I have set a stretch goal of $2000 raised for the Ovarian Cancer Research Fund this year, but I reckon we can do it!
In addition to wearing a different dress every day, I’m also going to be documenting a couple frocktastic sewing projects throughout the month. I haven’t sewn anything for several months, so it was nice to tidy up the sewing room today and to hit Spotlight for supplies.
My big challenge with sewing (and it’s the same challenge I have with cooking) is that I lack the patience to set up my mise en place properly. Most of the work isn’t the sewing part; it’s in the painstaking preparation: tracing, ironing, and cutting. I need to learn to appreciate this part just as much as I do the actual assembly.
My tasks today were to wash my fabric, trace out my pattern – Colette Oolong – onto some interfacing, and then pin it together into a toile for sizing. I tried it on and the Snook assisted with some adjustments. (We added some width to the underarm pieces, deepened the darts at the upper back, and adjusted the shoulder slope slightly.) Then I had to transfer those adjustments back to my pattern pieces.

That’s all for today! The next step is to iron my fabric and cut out the pieces.