Tag: sewing

  • The Big Data Dress

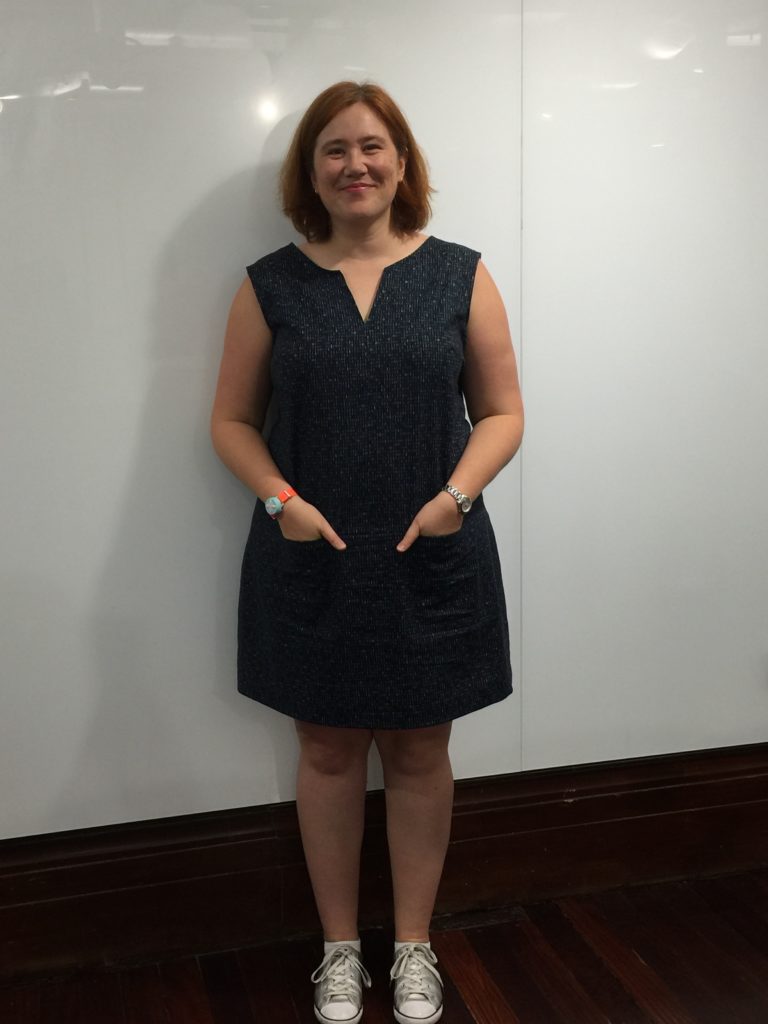
    I made a new dress last weekend! This is a sleeveless Colette Laurel that I modified to have pockets(!) and a notched neckline (using this free hack). I’ve made a few sleeveless Laurels before, and the main attractions (besides looking nice) are that they’re fast to make and don’t use very much fabric. I had about 2.5m of this fabric, but it’s a quilting cotton and thus very narrow (less than 45″ wide). It’s navy blue and covered with a stream of binary numbers in light blue and silver. (So cute!) It’s called “Binary Solo” from RJR Fabrics’ collection “Silver Circuits.” My Mom made a point of showing it to me at her shop back in Indiana, and I just had to have it!

    I’m calling it my “Big Data Dress” because, as Juliet Houghland pointed out at YOW! Data recently, all stock images of “Big Data” are blue and involve binary. 😂 I wore it to Girl Geeks last night and it was a big hit!

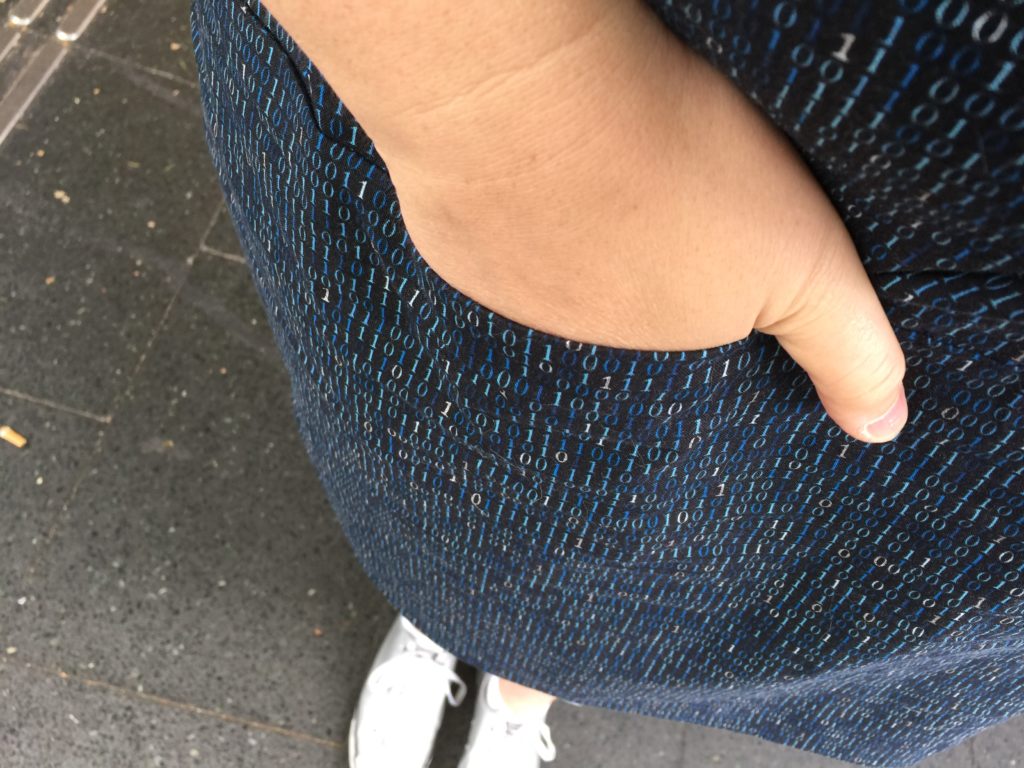
    Sewing notes: Based on my measurements, I cut a straight 18 (the largest size) on this pattern. It’s roomy, but given the style of the dress and the crispness of the cotton, that’s what I was aiming for. It’s very comfortable. There are bust darts on the front and diamond-shaped darts on the back that keep it from being a completely shapeless sack. The hack instructions were easy to follow, but I didn’t bother tracing the pieces onto new paper. I bought the pattern PDF, so I can just print another one, right? So I just cut the front and back in two and then taped on some extra for the seam allowance. I had been worried about getting the print to line up across that center front seam, but then I hit upon the obvious solution. Cut it on the fold as one piece, and then split it up the middle. Voila! Lines up nicely. I finished the neckline and armhole edges using bias tape that I made – as always – using Colette’s continuous method. (For reference, I used a 9″ x 9″ square and just managed to eke out all three openings.)

    What I’d do differently next time: I’m not sure why the back piece needs the corresponding horizontal seam. Maybe it’s because Sarai made hers out of linen, so it’s more visible and looks weird if it’s not there? But my print is so busy that I could have easily left it out and saved myself some cutting and sewing time. I’d also move the pockets out a little bit further as the 2.5″ from center she suggests seems a bit close for me. Lastly, I’d probably consider putting some interfacing behind the neck notch. (I still might do that, actually.) I noticed when I was wearing it yesterday that one side wanted to flop forward and fold down occasionally, so a little bit of extra stiffness there couldn’t hurt.

    Overall I’m very, very happy with this one! It’s cute, comfortable to wear, and a real conversation starter.

  • Frocktober 2017

    As I’ve done for several years running now, I’ll be raising money this “Frocktober” for the Ovarian Cancer Research Fund. I’ll be wearing a different dress every day of the month, with over half of them made by me personally. Last year’s total was $1481.04, so this year I’m aiming to top $1500. If you’d like to help, my fundraising page for 2017 is here: [page no longer available].

    This year I’m offering a special perk: for the first three folks who donate $100+, I will personally teach you to sew your own dress (or something else if you’re not a dress wearer)! I’m not going to do it for you, but I’ll walk you through choosing a pattern, picking out fabric and supplies, and every step of the sewing process. If you’re not in Sydney, this might have to be a combination of email and video chat, but we’ll make it work. 😄

  • SQUIRREL!

    Squirrel Stuffed Toy PDF – Grainline Studio – Super cute little pattern. Very tempted. I think I’ve even got the materials to make it!

  • Sewing notes: Georgie Tops

    It’s time to get serious about my sewing, so I’ve made a resolution this year to not buy any new clothes (excluding undergarments, which are in the Too Hard basket for now). Towards that end, I’ve sewn two more new shirts so far in 2017 from Tessuti’s Georgie Top pattern.

    Georgie #1: The first was this short-sleeved version in a vintage fabric remnant I had. (We did a burn test on it and it melts so I reckon it’s probably either nylon or polyester.) I cut the largest size and did an FBA – more on that in a sec – and finished with exposed bindings. For the bindings, since I had limited fabric I didn’t bother cutting them with the provided pattern pieces but instead used a square to make continuous binding via the Colette method. I really like the Tessuti method for doing the back neck keyhole opening. I don’t get their insistence on using tearaway Vilene to stabilise the neck though – it seems like stay-stitching would work just as well? Overall I’m really happy with the finish on this one. All this practice is really paying off! The only outright mistake I made on this project was cutting the sleeves upside-down, so the motif (which looks a little like an insect!) goes the wrong direction. It’s small enough though that (the Snook claims) you only notice when I point it out. 🙂

    Okay, so the FBA. Based on my experience with other Tessuti patterns, I decided to do a Full Bust Adjustment on this one before I started. The problem is that I trusted the first result that Google gave me: this Craftsy tutorial. People, this tutorial is WRONG! But I didn’t realise it at the time. So I followed the instructions, not realising that step 7 had a massive error. Then when I went to sew up the side seams, guess what? The front was massively longer than the back. Which makes sense, as that stupid tutorial has you draw the new dart in such a way that you’re adding material to the side. I ended up having to rejig my bodice front on-the-fly and try to make it work, and I still ended up having to cut material off the bottom. So though I’m pleased with the finish on this one, I feel like the fit is slightly weird. The neckline is a little high for me (not really the fault of the FBA though), and there’s excess material on my upper chest. It’s wearable, but not exactly great.

    Georgie #2: The second Georgie is this sleeveless version in a vintage cotton remnant. (It’s got little medals all over it!) I was inspired by Gertie’s keyhole blouse to try for a keyhole neckline detail on the front. The first thing I did was print a new bodice front, lower the neckline, and then do a proper FBA. Then I free-handed a U-shape at the center of the bodice front piece and cut it out of my fabric. Rather than using Vilene, I simply stay-stitched the neckline, keyhole, and sleeve openings before I started. I again made my own continuous bias tape via the Colette method. Binding the keyhole was tricky but doable, and I’m really pleased with how flat it turned out! When I bound the neckline, I initially left a gap of about an inch across the keyhole (so it was more of a U-shape than a teardrop). Then I tried it on, and I again had the problem of excess fabric in the upper chest. When I pinched the top of the U-together though (simulating a tuck), it magically disappeared. Huh! So I unpicked half the neckline binding and then redid it, joining the top of the U together into the teardrop. Very happy with that outcome! (If I make this again without a keyhole, I’ll adjust the bodice front to remove that wedge.) As for the sleeves, I did actually cut them and I intended to use them, but when I tried it on for my neckline alterations, I realised I liked it better sleeveless. I debated whether I needed to adjust the sleeve openings – I know that sleeveless garments tend to have larger armholes – but they looked fine. So I simply added an exposed bias binding to each armhole. So far I’m really happy with it!

  • Lady Skater Dresses

    Lady Skaters
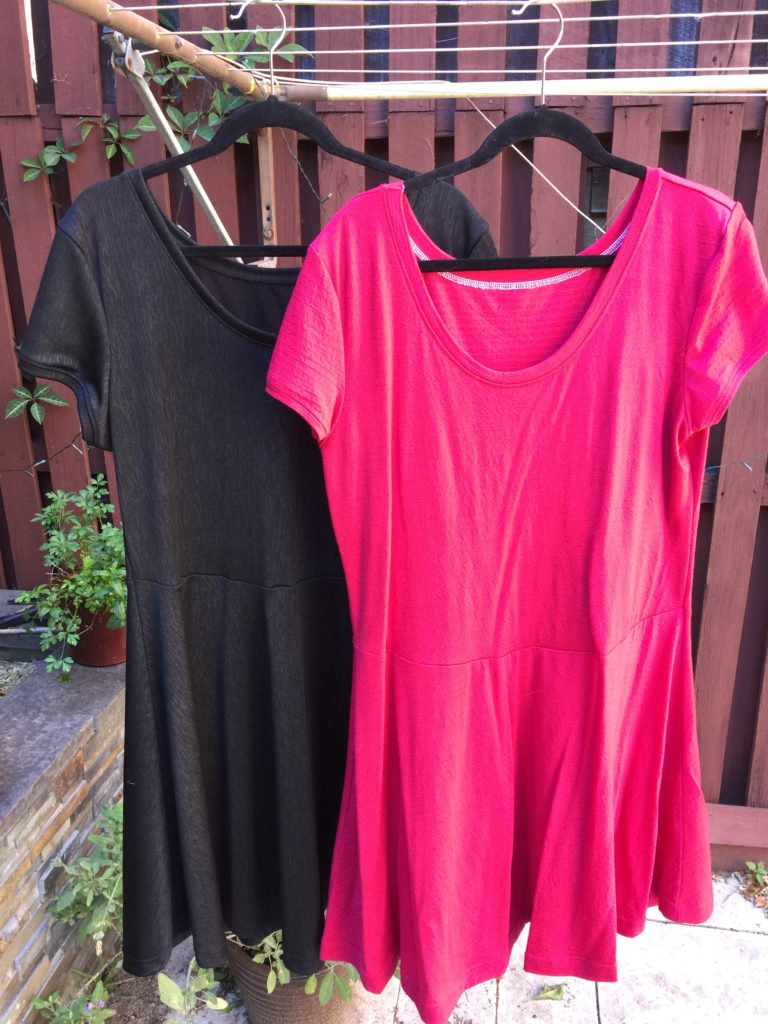
Finally blogging these two Lady Skater dresses that I made at the start of Frocktober. This pattern’s been on my wish list for a long time. It’s pretty fast to sew up, especially if you have an overlocker. I made the pink one first, and I used a fine merino jersey that I bought at Tessuti’s on clearance a few years back. It has a subtle texture through it, I think created by elastane that has been woven in narrow stripes. It was a pain to work with though, because it was nowhere near square and it curled like crazy. Still, I made that first one in about a day. I could tell while I was sewing it that the waist was going to be too low, but I shrugged, told myself it was a wearable muslin, and kept going. (The fabric had been really cheap as it had a hole at the end that I had to cut around.) The end result doesn’t look too bad in the photo, but it’s practically a drop-waist on me. That waist seam is supposed to be at my natural waist (ie the skinniest point), which is a fair bit higher.

    So for the black one, I shortened the bodice by about two inches. (You can see the difference in the photograph.) Better, but I still reckon I could go a bit higher next time. The fabric I used is really, really weird. I bought it at a remnant sale a long time ago, and I have no idea what it is. It feels quite heavy, almost like a rayon, with elastic shot through it. I feel like you easily could use it for leggings or even a bathing suit! But I made a dress out if it, because WHY NOT. It’s actually pretty comfortable to wear.

    The pattern itself is clear and easy to follow. I did have a hell of a time with the clear elastic though. It sticks onto my machine and refuses to feed through, so I came up with the idea of putting some wax paper over it. That helped, but it was still annoying and fiddly. Applying the neck and sleeve bands wasn’t too hard, but I haven’t quite mastered getting the joins to line up nicely with the seams. I still find the overlocker very satisfying though! I just need to remember the Cardinal Rule – when it starts misbehaving, check that it hasn’t been threaded wrong. (Every damn time…)

  • #frocktober day 2 – brand new Lady Skater made by me!

    Lady Skater dress

    #2 is the Lady Skater from Kitschy Coo. I made this in about 24 hours. The fabric is a fine knit (possibly merino?) with some elastane in it. I was worried the bodice would be too see-through, so I self-lined it. (The skirt and the sleeves aren’t lined though.) I didn’t do any mods, but next time I will definitely be shortening the bodice by a couple of inches. As it is, the waist seam is hitting me right at my navel. I also have a bit of fabric pooling at the back, so a swayback adjustment may also be in my future. But hey, it’s wearable and it counts!

  • Archer Pleated Popover Variation Tutorial | grainline

    Archer Pleated Popover Variation Tutorial | grainline – I’ve been thinking of making an Archer shirt for ages, but damn–I have fallen in love with the popover variation hard. Anybody else want to join me in a sewalong of sorts?

  • Invisible Zipper Tutorials

    Ooh, excellent. The Sew Tessuti blog has posted two fantastic new tutorials about sewing invisible zippers: NEW Invisible Zipper Tutorial, and How to attach your invisible zipper to a facing like a BOSS! In the past I’ve mainly referred to Colette’s Invisible Zipper Tutorial, but this one looks to be a slightly different technique. I’ll give it a whirl next time!