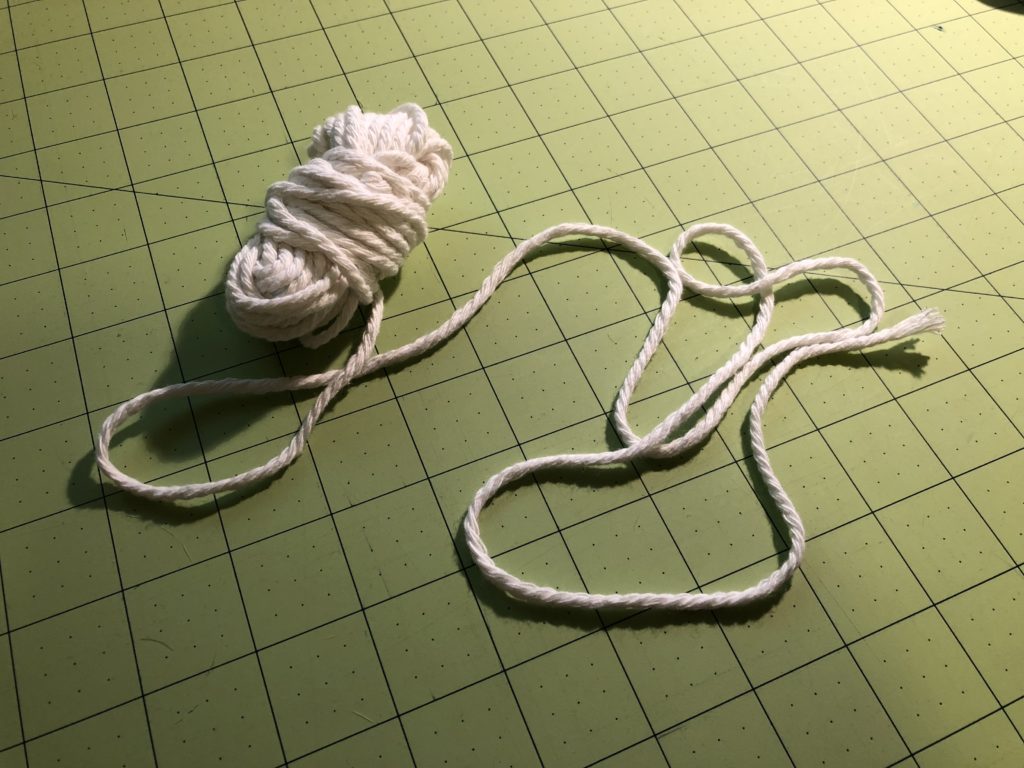
For my latest sewing project, I decided to try my hand at using some contrast piping along the waistband. I’ve only ever used piping once before, for the Comma Club Cushion I made for the Canva Hackathon a few years back. It wasn’t too hard though and I still had plenty of the cording left over.
To make piping, you need bias tape. I should probably explain what the heck that means. For those who don’t sew: imagine fabric being woven on a loom. You’re picturing it as a rectangle, right? Pretty much like a big bedsheet. And that’s correct! Woven fabric has threads at right angles to each other, and it’s usually pretty strong and non-stretchy if you pull on it lengthwise or widthwise (unless it has elastane or something like that in it). However, if you pull on a piece of fabric diagonally, you’ll probably find that it does have some stretch. We refer to the direction diagonal to the weave of the fabric as the “bias.”
If you’re cutting out pieces of fabric to make clothing, you normally want to keep the pieces oriented straight up and down to keep them from stretching out of shape. That’s why pattern pieces usually have lines on them so you can line that up with the straight edge of the fabric. Occasionally though – most often for certain dresses – you want a kind of flowiness that clings or skims over the body. In those cases, you cut the fabric on the diagonal. (You may have even heard the term “bias cut dress” or something like that.) Fabric cut on the bias is stretchy enough to move and flex around curves. That’s what we want for the piping, because it’s going to be applied around the curved waistband of my shorts.
You can, of course, purchase pre-made bias tape (also called bias binding). That’s what I did for the Cushion, and it worked fine. But it tends to just come in plain colours though, and I wanted to use a special fabric. That means I had to make my own! I highly recommend you try this sometime. It’s really satisfying, and it doesn’t take that long. It’s also a great way to use up scraps of fabric that aren’t big enough to use in other projects.
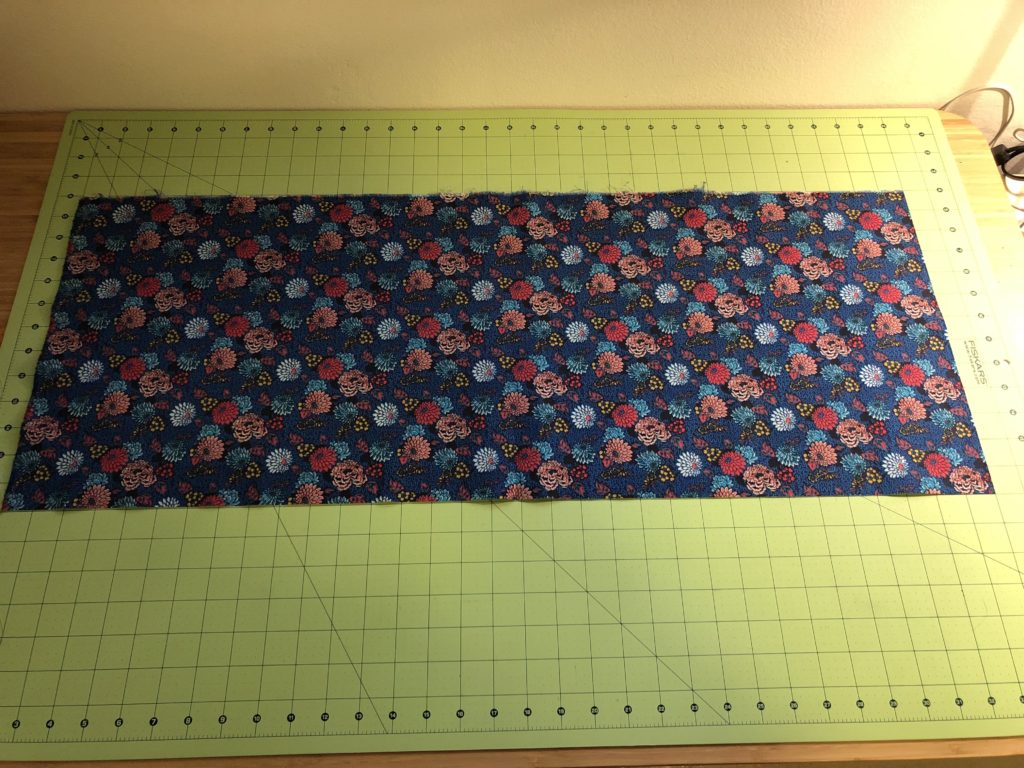
The method I use is based on this tutorial from Seamwork. I recommend you look at that one first, as it uses a small square of striped fabric and is thus slightly easier to see what’s happening. I started with a rectangular piece of my fabric that was 33 inches wide and 13 inches tall. (Actual size doesn’t matter as long as it’s cut “on the grain” – ie. straight.) And yes, I tend to use English measurements when sewing, just because my cutting mat uses them as well as most of my patterns. Feel free to convert to metric; it makes no difference to the end result.
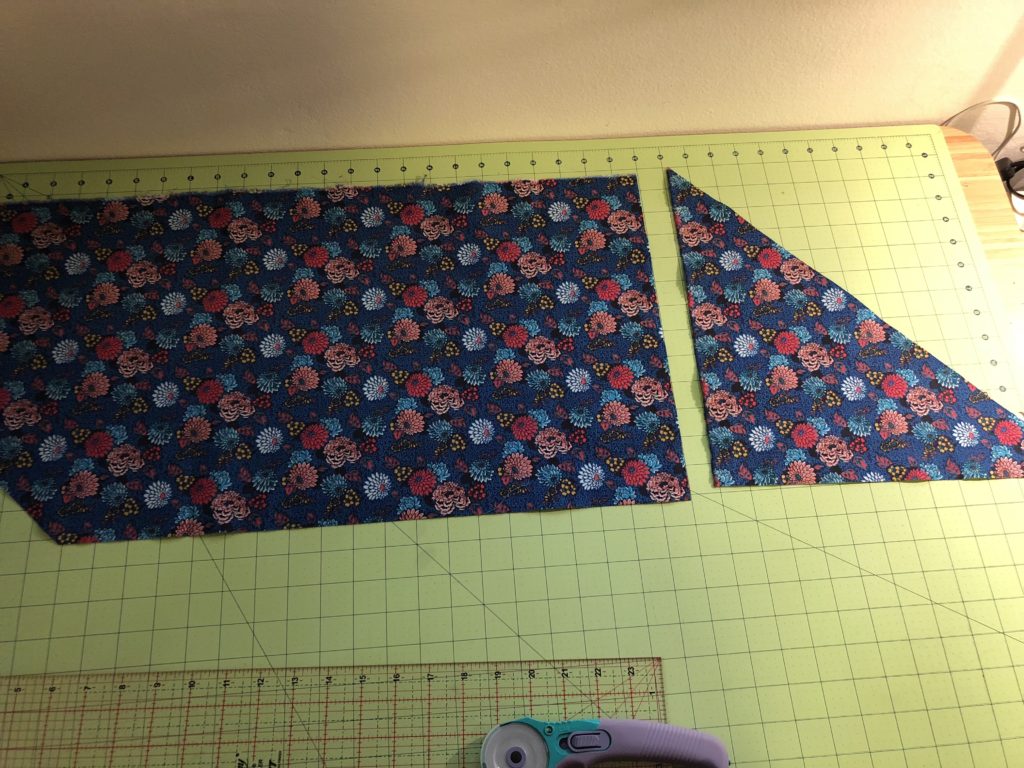
Next, I cut off one corner at a 45 degree angle. I used the lines on my cutting mat for this with a long ruler and my rotary cutter, but you can also do it by drawing a line and then cutting along it with scissors.
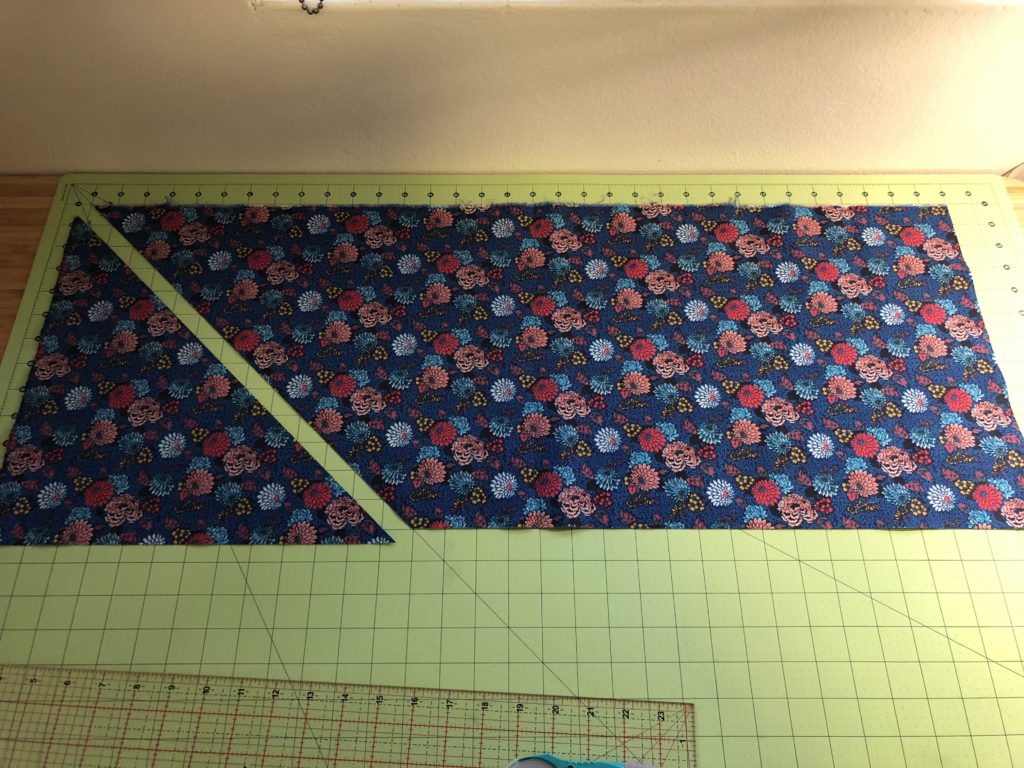
Now you want to move that piece you cut off to the other end of the fabric to make a parallelogram. We could just cut off both opposite corners and throw them away, but that would be wasting fabric. By constructing a parallelogram first, you’re using every bit of it (which is nice, because this fabric is expensive!).
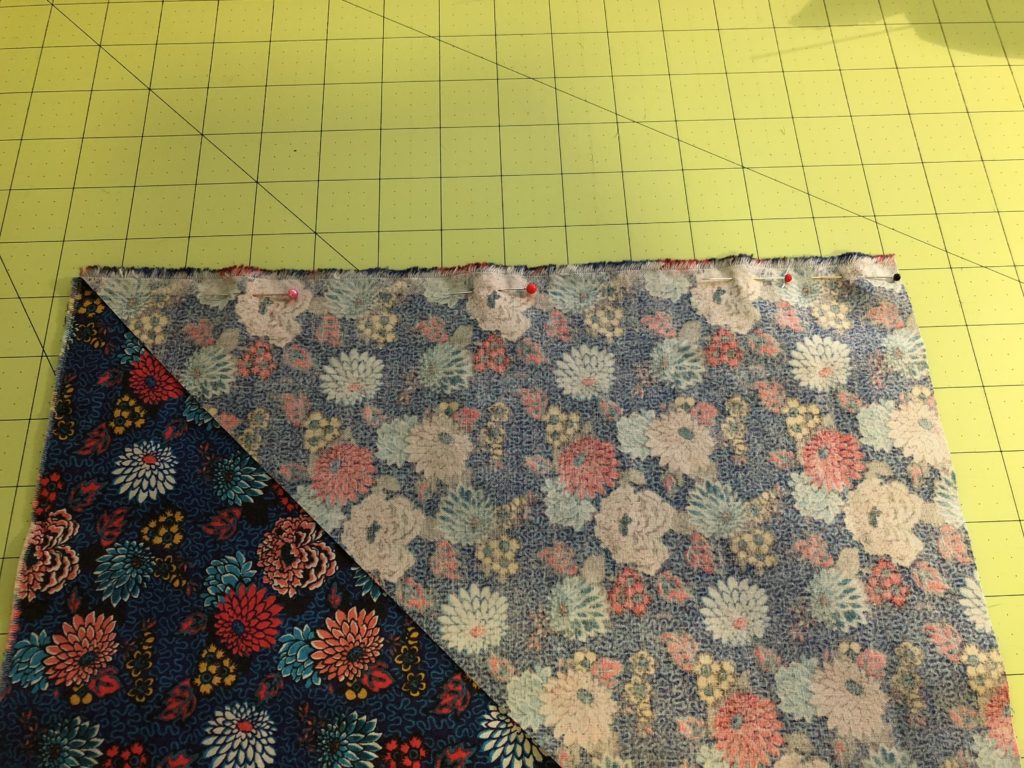
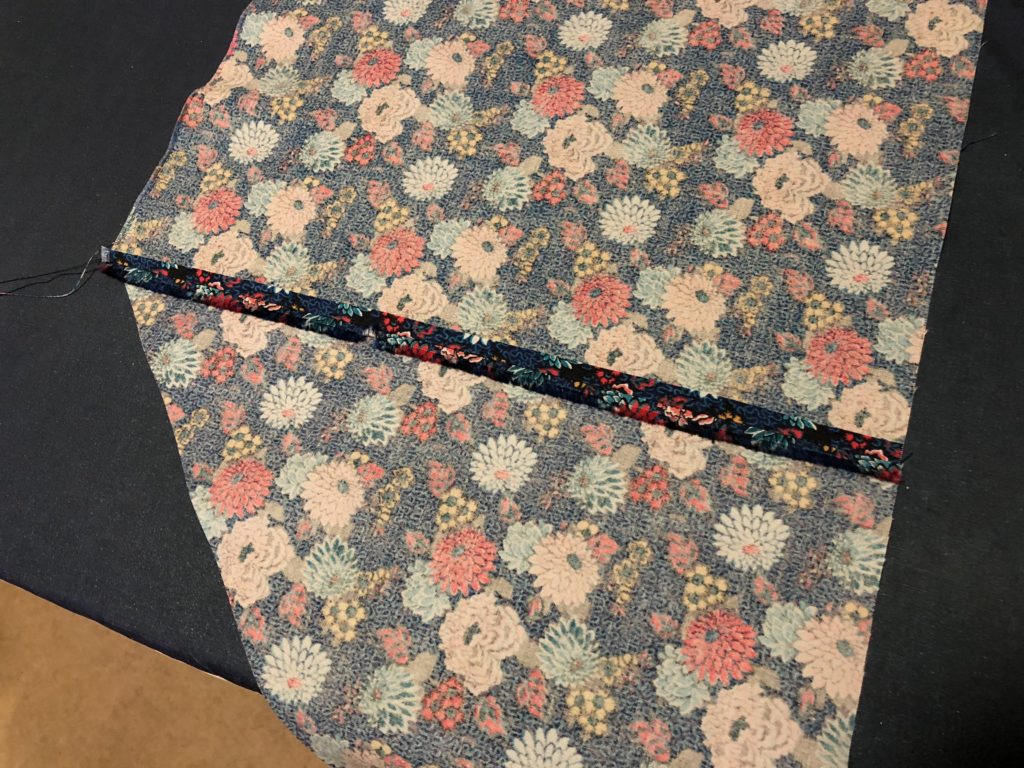
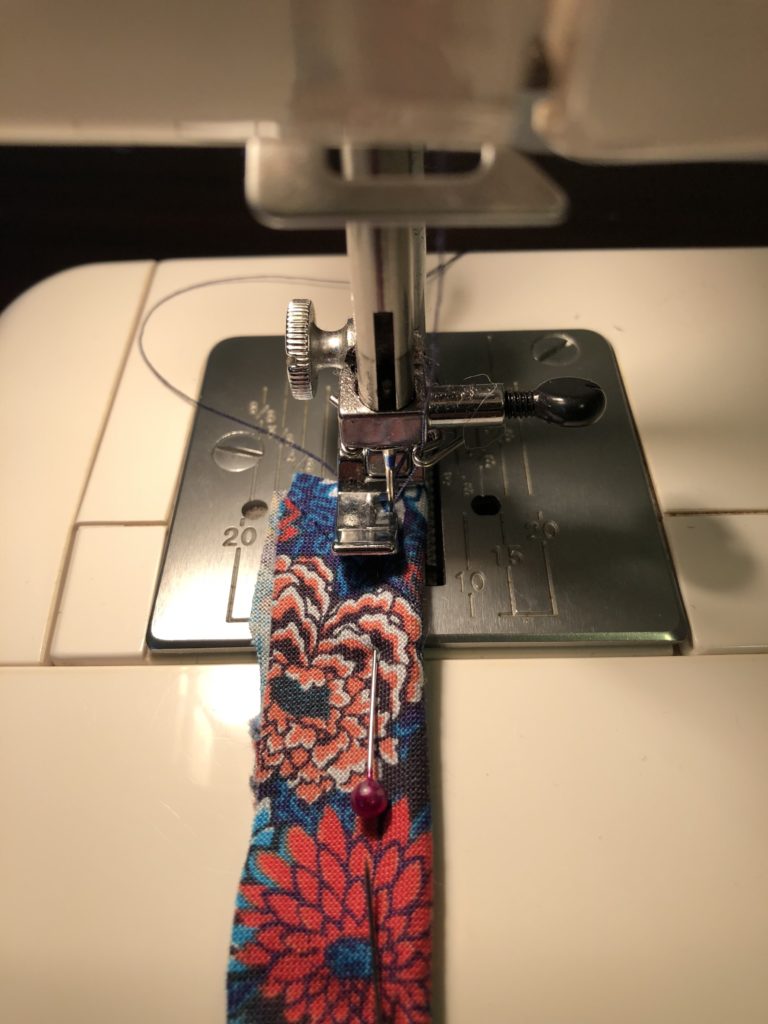
Now I need to sew those two straight edges together to join up our parallelogram into a single piece. Here I’ve pinned the triangle on top of the other pieces, right sides together.
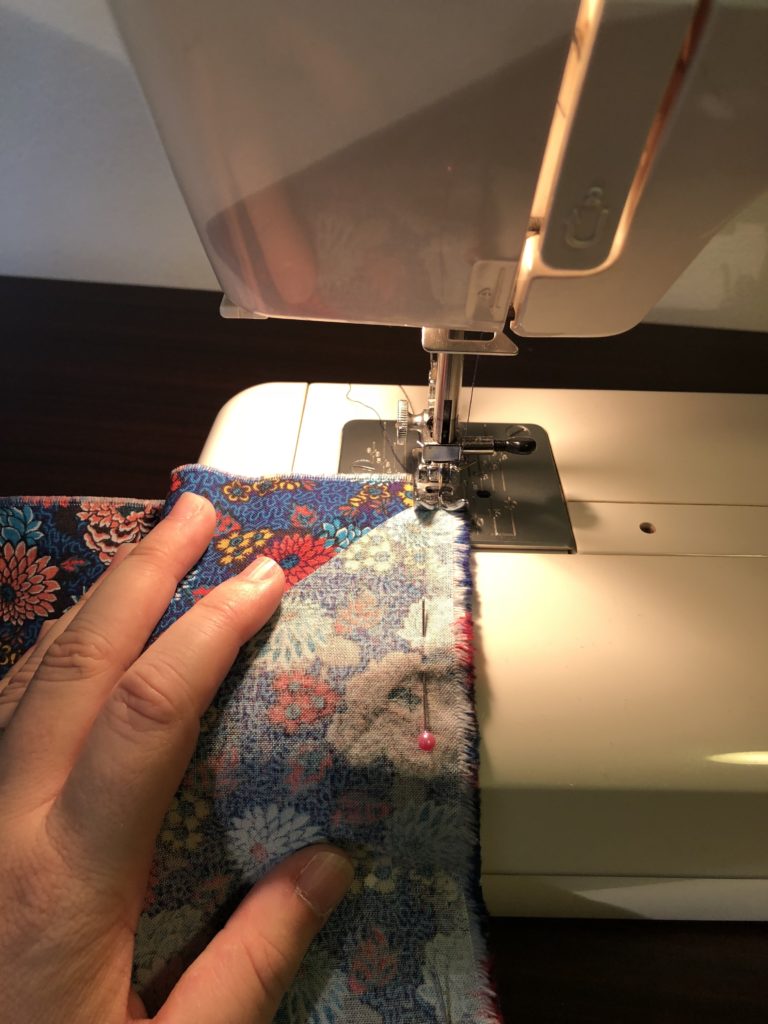
Now to the sewing machine! I’m going to sew this seam with a normal straight stitch and a narrow 1/4″ seam allowance.
Once it’s sewn, it’s over to the ironing board. First I press the seam to “set” it. (I have no idea if this really makes a difference, but I read a suggestion to do it once so I do. 🤷♀️)
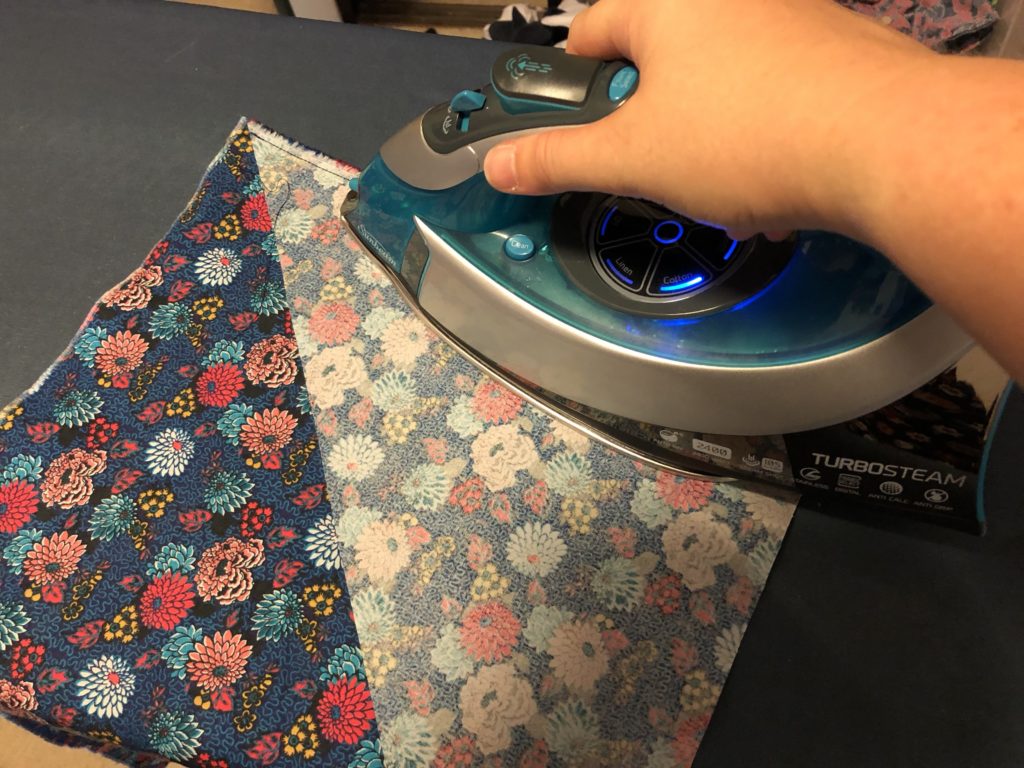
Then I place the fabric face down and use the iron to press the seam open and flat.
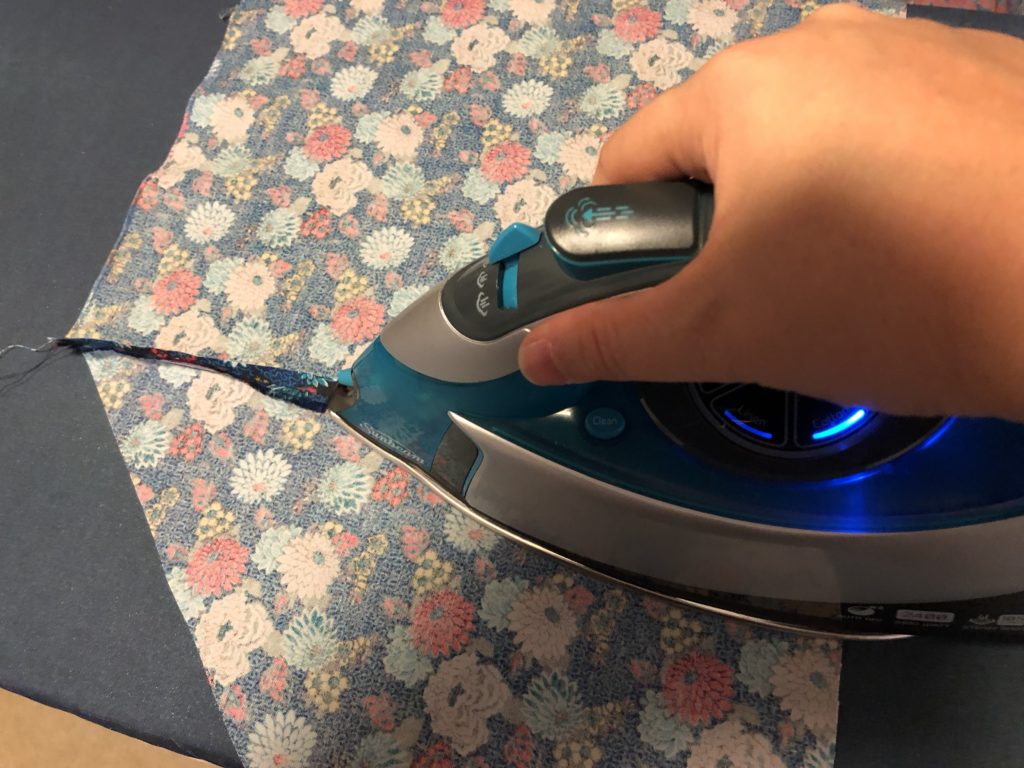
The end result looks like this on the back…
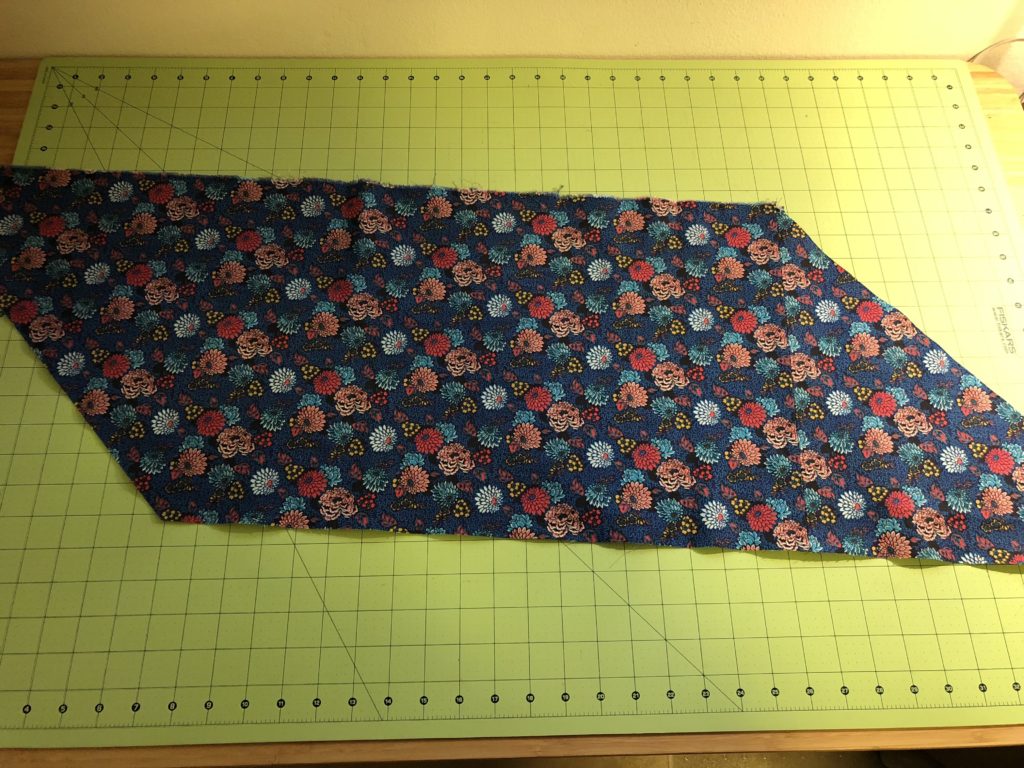
And now you can see our joined and finished parallelogram!
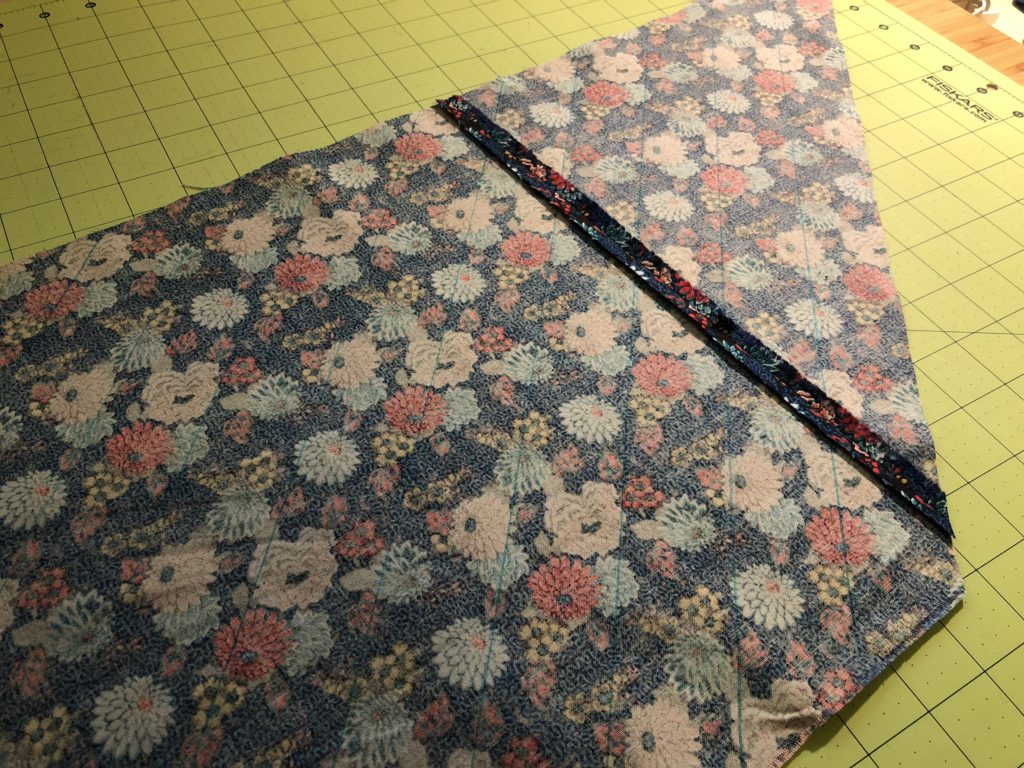
The next step is to mark the width of your bias strips. I wanted mine to be 1 1/2″. Since my fabric is so dark, I flipped it over and used a washable fabric pen to draw the lines with a ruler. You can just see them in this photo below. (They’re light blue.) The lines go right over the seam we just sewed. Whatever width you’re using, you’ll probably have a little bit left over at the end of your parallelogram. That’s okay; you can just cut it off.
Now – we could just cut all these strips and then laboriously sew them all together. But where’s the fun in that? It’s time for SEWING FUN WITH GEOMETRY. We are going to turn this flat piece of fabric into a tube with a continuous spiral of bias tape going around and around it. Get ready for your brain to turn inside out!
Basically, we’re going to line up the marks we just drew on the long sides of the parallelogram and then sew them together. However, if we just lined them up straight, when we cut them apart we’d get a series of circular rings of fabric. So instead we need to offset it by one so that the line goes around and around continuously. Again, I think the Seamwork tutorial does a good job of showing how this works. (It really is something you need to do yourself to really grok.)
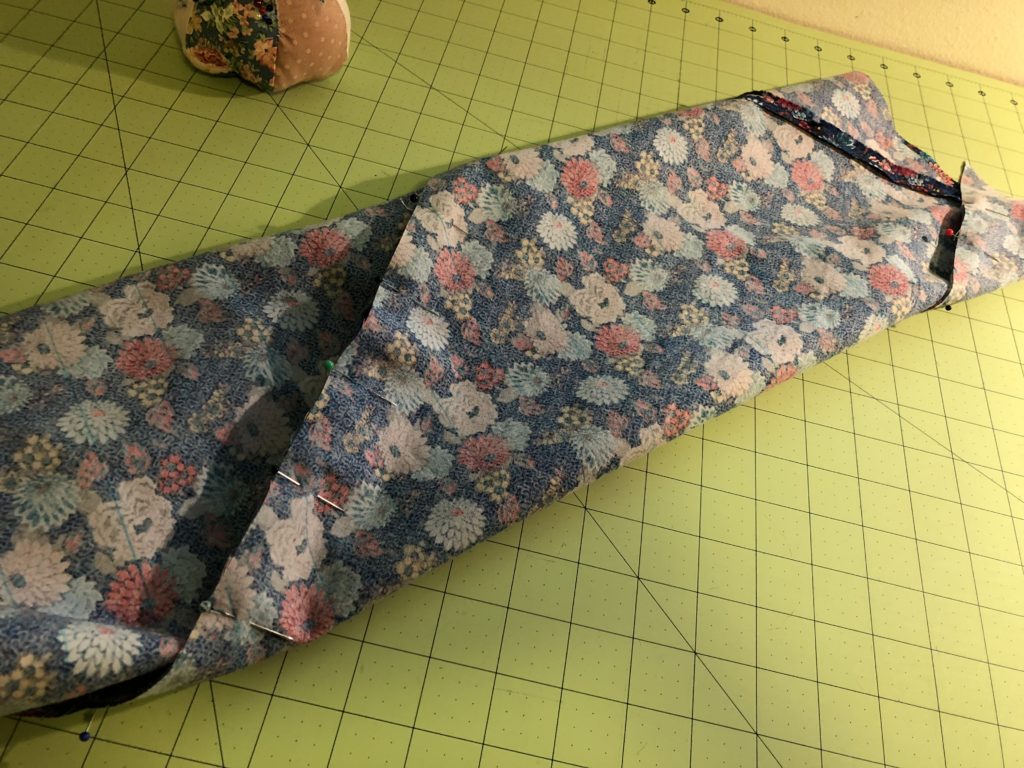
Here I am pinning the tube seam with right sides together. I pin at every single line, placing my pin at a 1/4″ seam allowance and making sure it intersects the other line at exactly that point. You’ll find the fabric doesn’t easily want to offset like this, and to some extent you have to keep turning it and coaxing it as you go.

This is what the tube looks like all pinned up for sewing. It’s like a shirt sleeve, but twisted. You can see that the seam with the pins that we’re going to sew actually wraps around the tube.
Sewing it is awkward but doable. Just do a little bit at a time, and keep rotating the tube as needed as you go down. The key is to make sure you’re not inadvertently sewing over any other bits of it as you go. Just keep a nice narrow 1/4″ seam as we did before.
Once you’re finished, your completed spiral tube will look like this. You can clearly see the offset strip at each end as well as how the lines I drew continue around and around, over the seams.
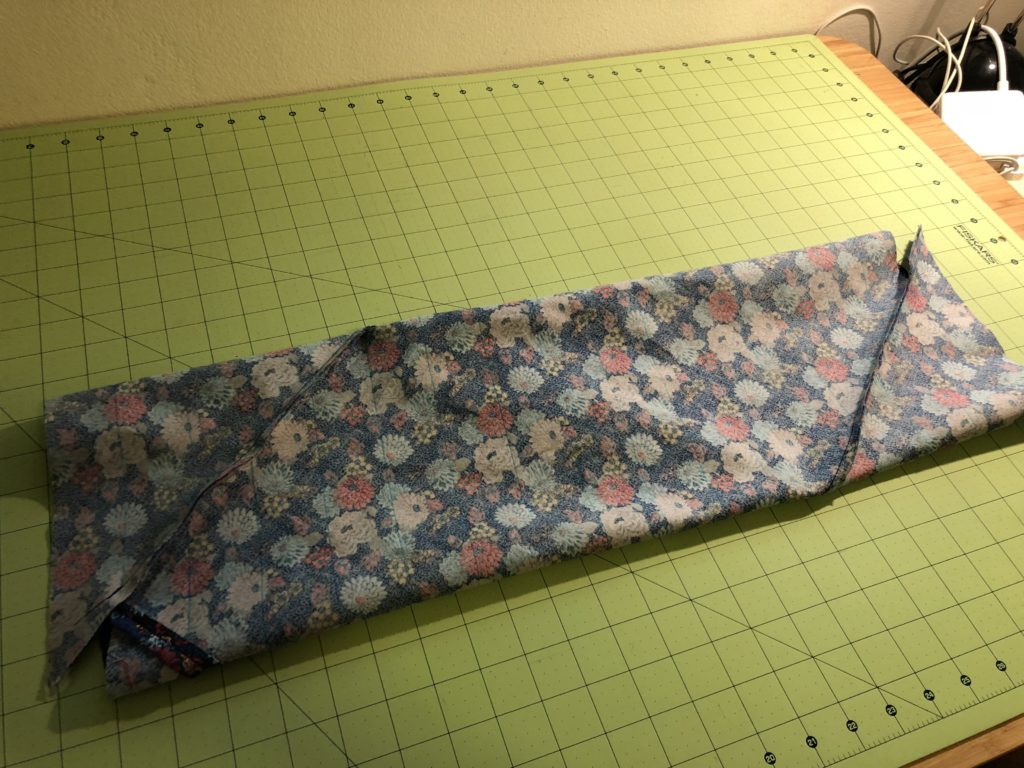
The last step is the fun part – start at one end and just cut along your drawn line! You’ll go around and around the tube in a spiral, with a lovely pile of bias tape accumulating beside you. This piece of fabric turned into a bias strip 7 yards (6 meters) long! Here’s a time lapse video of me cutting mine.
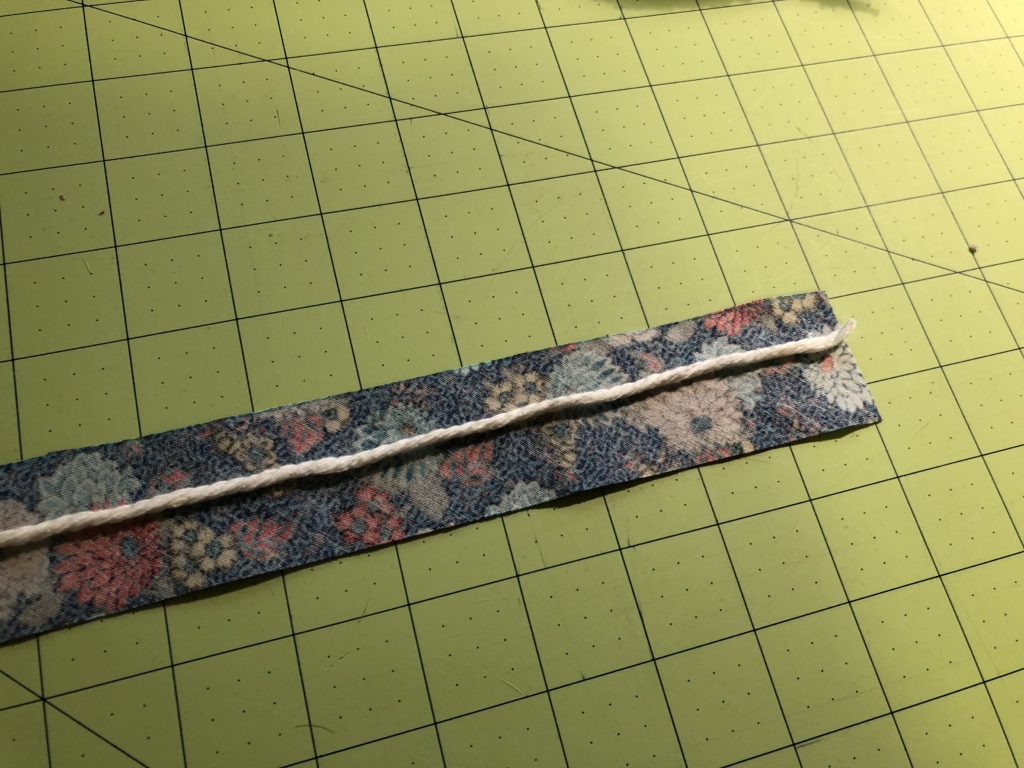
And that’s it! I gave mine a final iron and pressed open any remaining seams. Now it was time to finally make the piping. I was going to use it around the top and bottom of my waistband, so I worked out roughly how much cord I’d need and cut off that much (plus a couple inches for safety). Then you just lay your cording down on in the middle of the wrong side of your lovely bias tape.
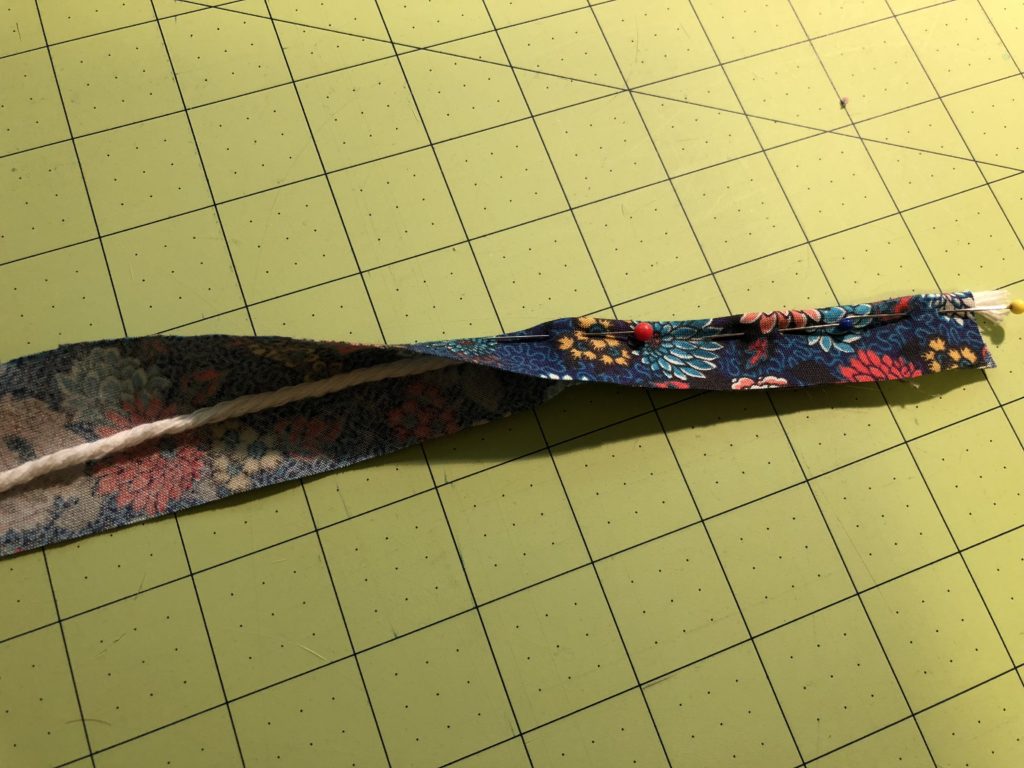
Then you fold it over to sandwich the cord and place pins along the length as close to the cord as you can.
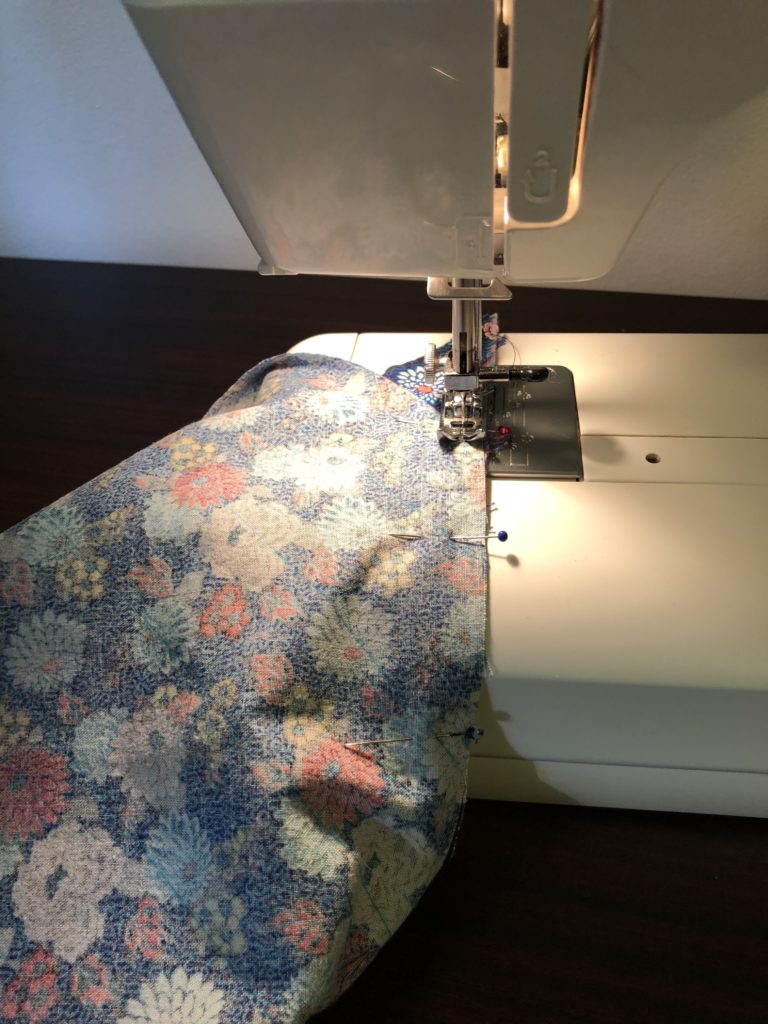
The last step is to sew along the line of pins. You should use a zipper foot for this. This is a special sewing machine foot that only has one “prong” so you can get very close to a zipper (or your bit of cord, in this case).
And that’s it! With my custom piping all finished, I was ready to use it in my sewing project. Stay tuned for that one…