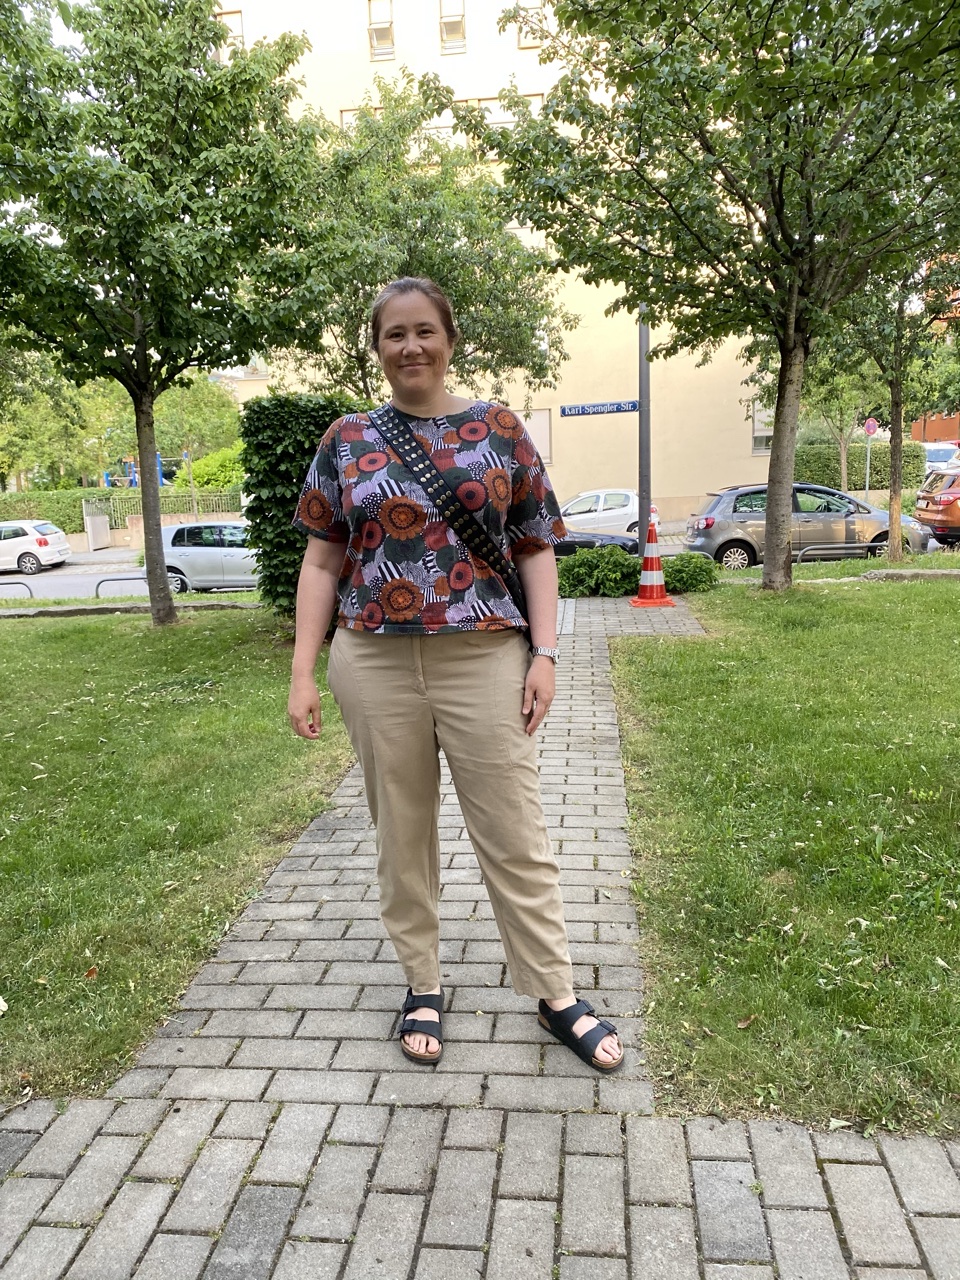
I sewed pants! 👖
For a really long time, trousers have been my Mount Everest as a sewist. I’ve sewed lots of dresses, shirts, and even shorts, but never a pair of actual trousers. I made a valiant but cursed attempt last year at a muslin for the Moji pants by Seamwork before accepting that a drawstring waist was never going to work with my shape…
Then a few months back I started to see the Darlow pants from In the Folds popping up in my Instagram feed. “No way,” I thought. Those curving seams?! These aren’t straight up-and-down pants; they have multiple curvy pieces that swoop around the legs and create volume. It seemed like jumping several levels of difficulty. The style was also slouchier and baggier than what I normally wear. But then I clicked on the #darlowpants hashtag on Instagram, and I was able to see them on different body types and in different materials, and I started to think, “…maybe??”
I bought the pattern. Back in Australia I’d purchased several meters of a soft drill-type fabric for future pants — I never remember to write down the fabric I buy — and I’d shipped it all the way here. It seemed a shame to let it go to waste. Why not give it a go?
I decided to go with View B, which is the less voluminous version and has less pattern pieces. I cut a straight Size I and printed out all the pattern pieces and assembled. Just as I was about to lay out my fabric for cutting, I realised there was one crucial modification I needed to make right from the start – lengthening the legs! The pattern is drafted for someone 5’7”, and I’m 5’10”. So I added three inches at all of the length/shorten lines. This isn’t as straightforward as on normal pants, as the curving lines mean you have to redraw some curves and then “walk the seams” to ensure they still line up. (Thankfully the designer has provided a Fit Kit which walks you through several common modifications.)
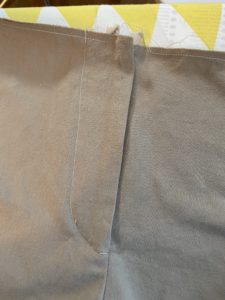
Finally it was time to cut the fabric and start sewing! The first thing you assemble are the back panels, and I had a lot of fun using my special overlocker foot and stitch to finish the raw edges. Once the panels are sewn, you then create the rear welt pockets. I decided to make them a design feature by using some scraps of paisley fabric. The pattern instructions are pretty straightforward and suggest several places where you should hand-baste just to keep everything all lined up. Everything went well until I got to Step 23, when I got confused and just couldn’t figure out how to secure the welt. I ended up emailing the designer, who helpfully sent me a video that explained everything. The key is that Piece 17 (the pocket lining) needs to be folded up under the back panel and out of the way for Step 23. Then you’re meant to fold the welt on Piece 18 and then sew along it. If you look at the photo here, you can just see a line of white stitching at the bottom of each welt. That’s where I did it WRONG. Mine isn’t securing anything; it’s actually meant to go through both layers of the paisley fabric. Oh well – I’ll get it right on the next pair! (Note: the bodgy red stitching along the top is just hand-basting to keep the pocket flat while you assemble the rest of the pants.)

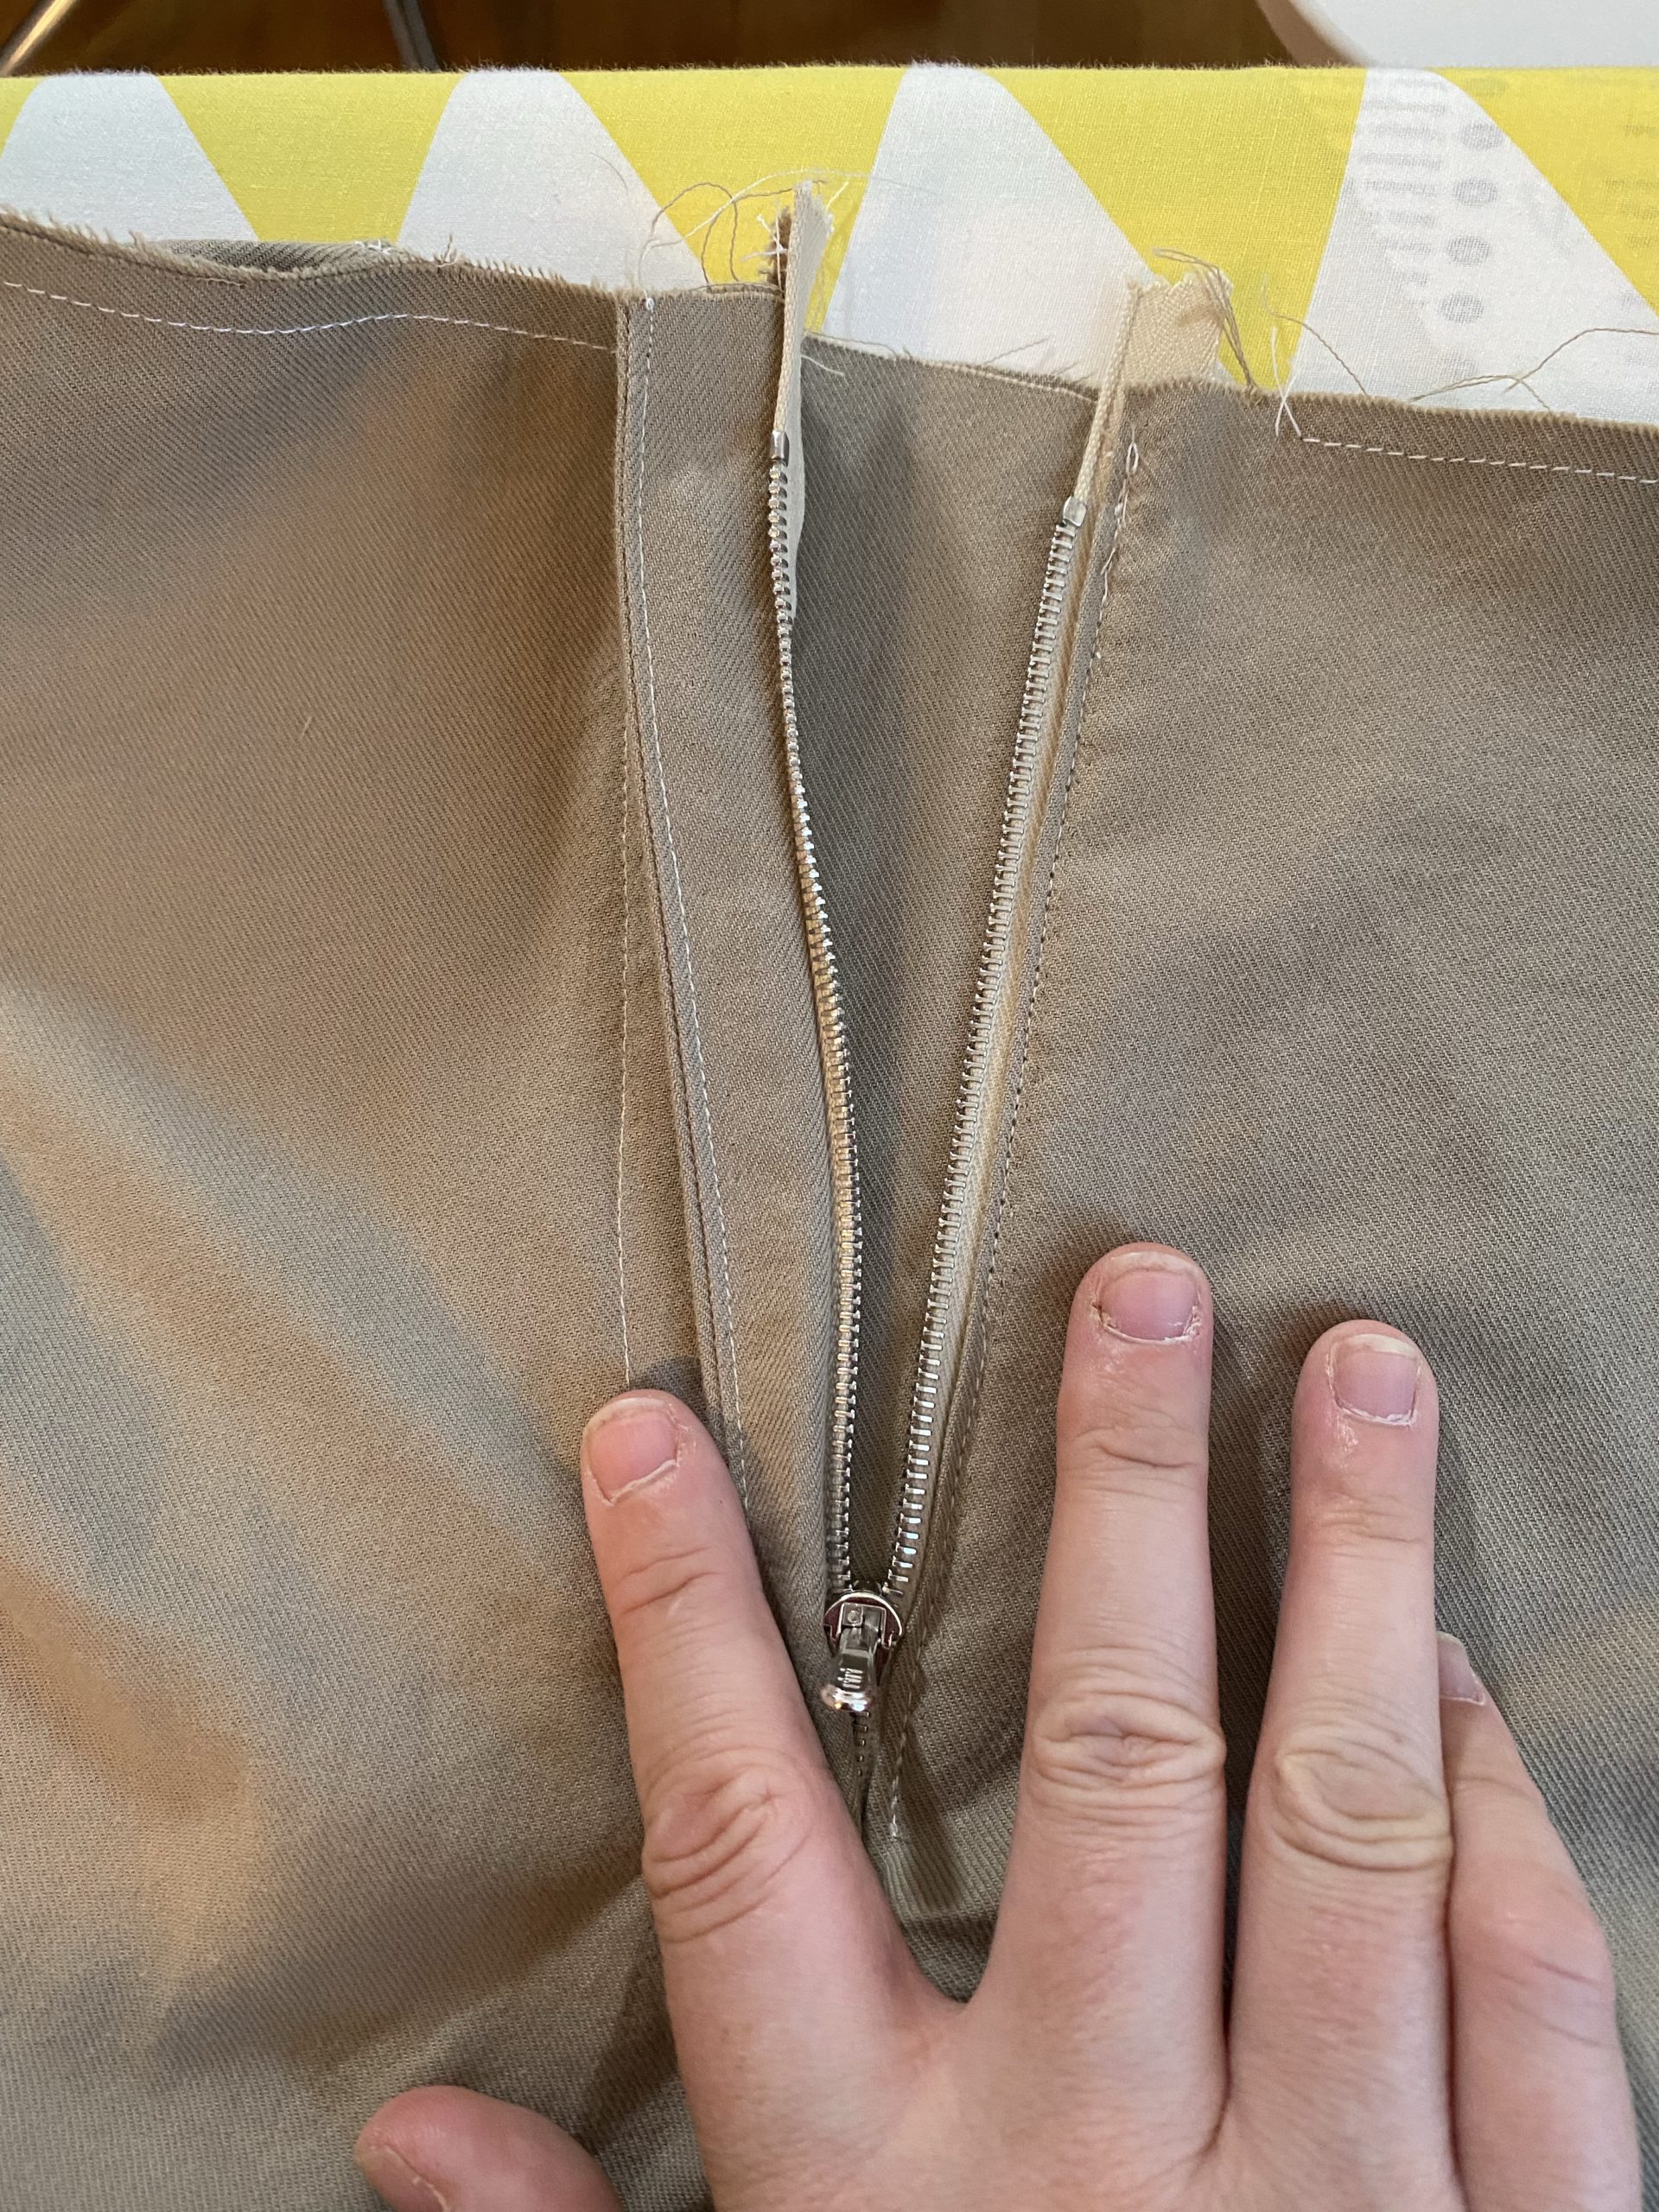
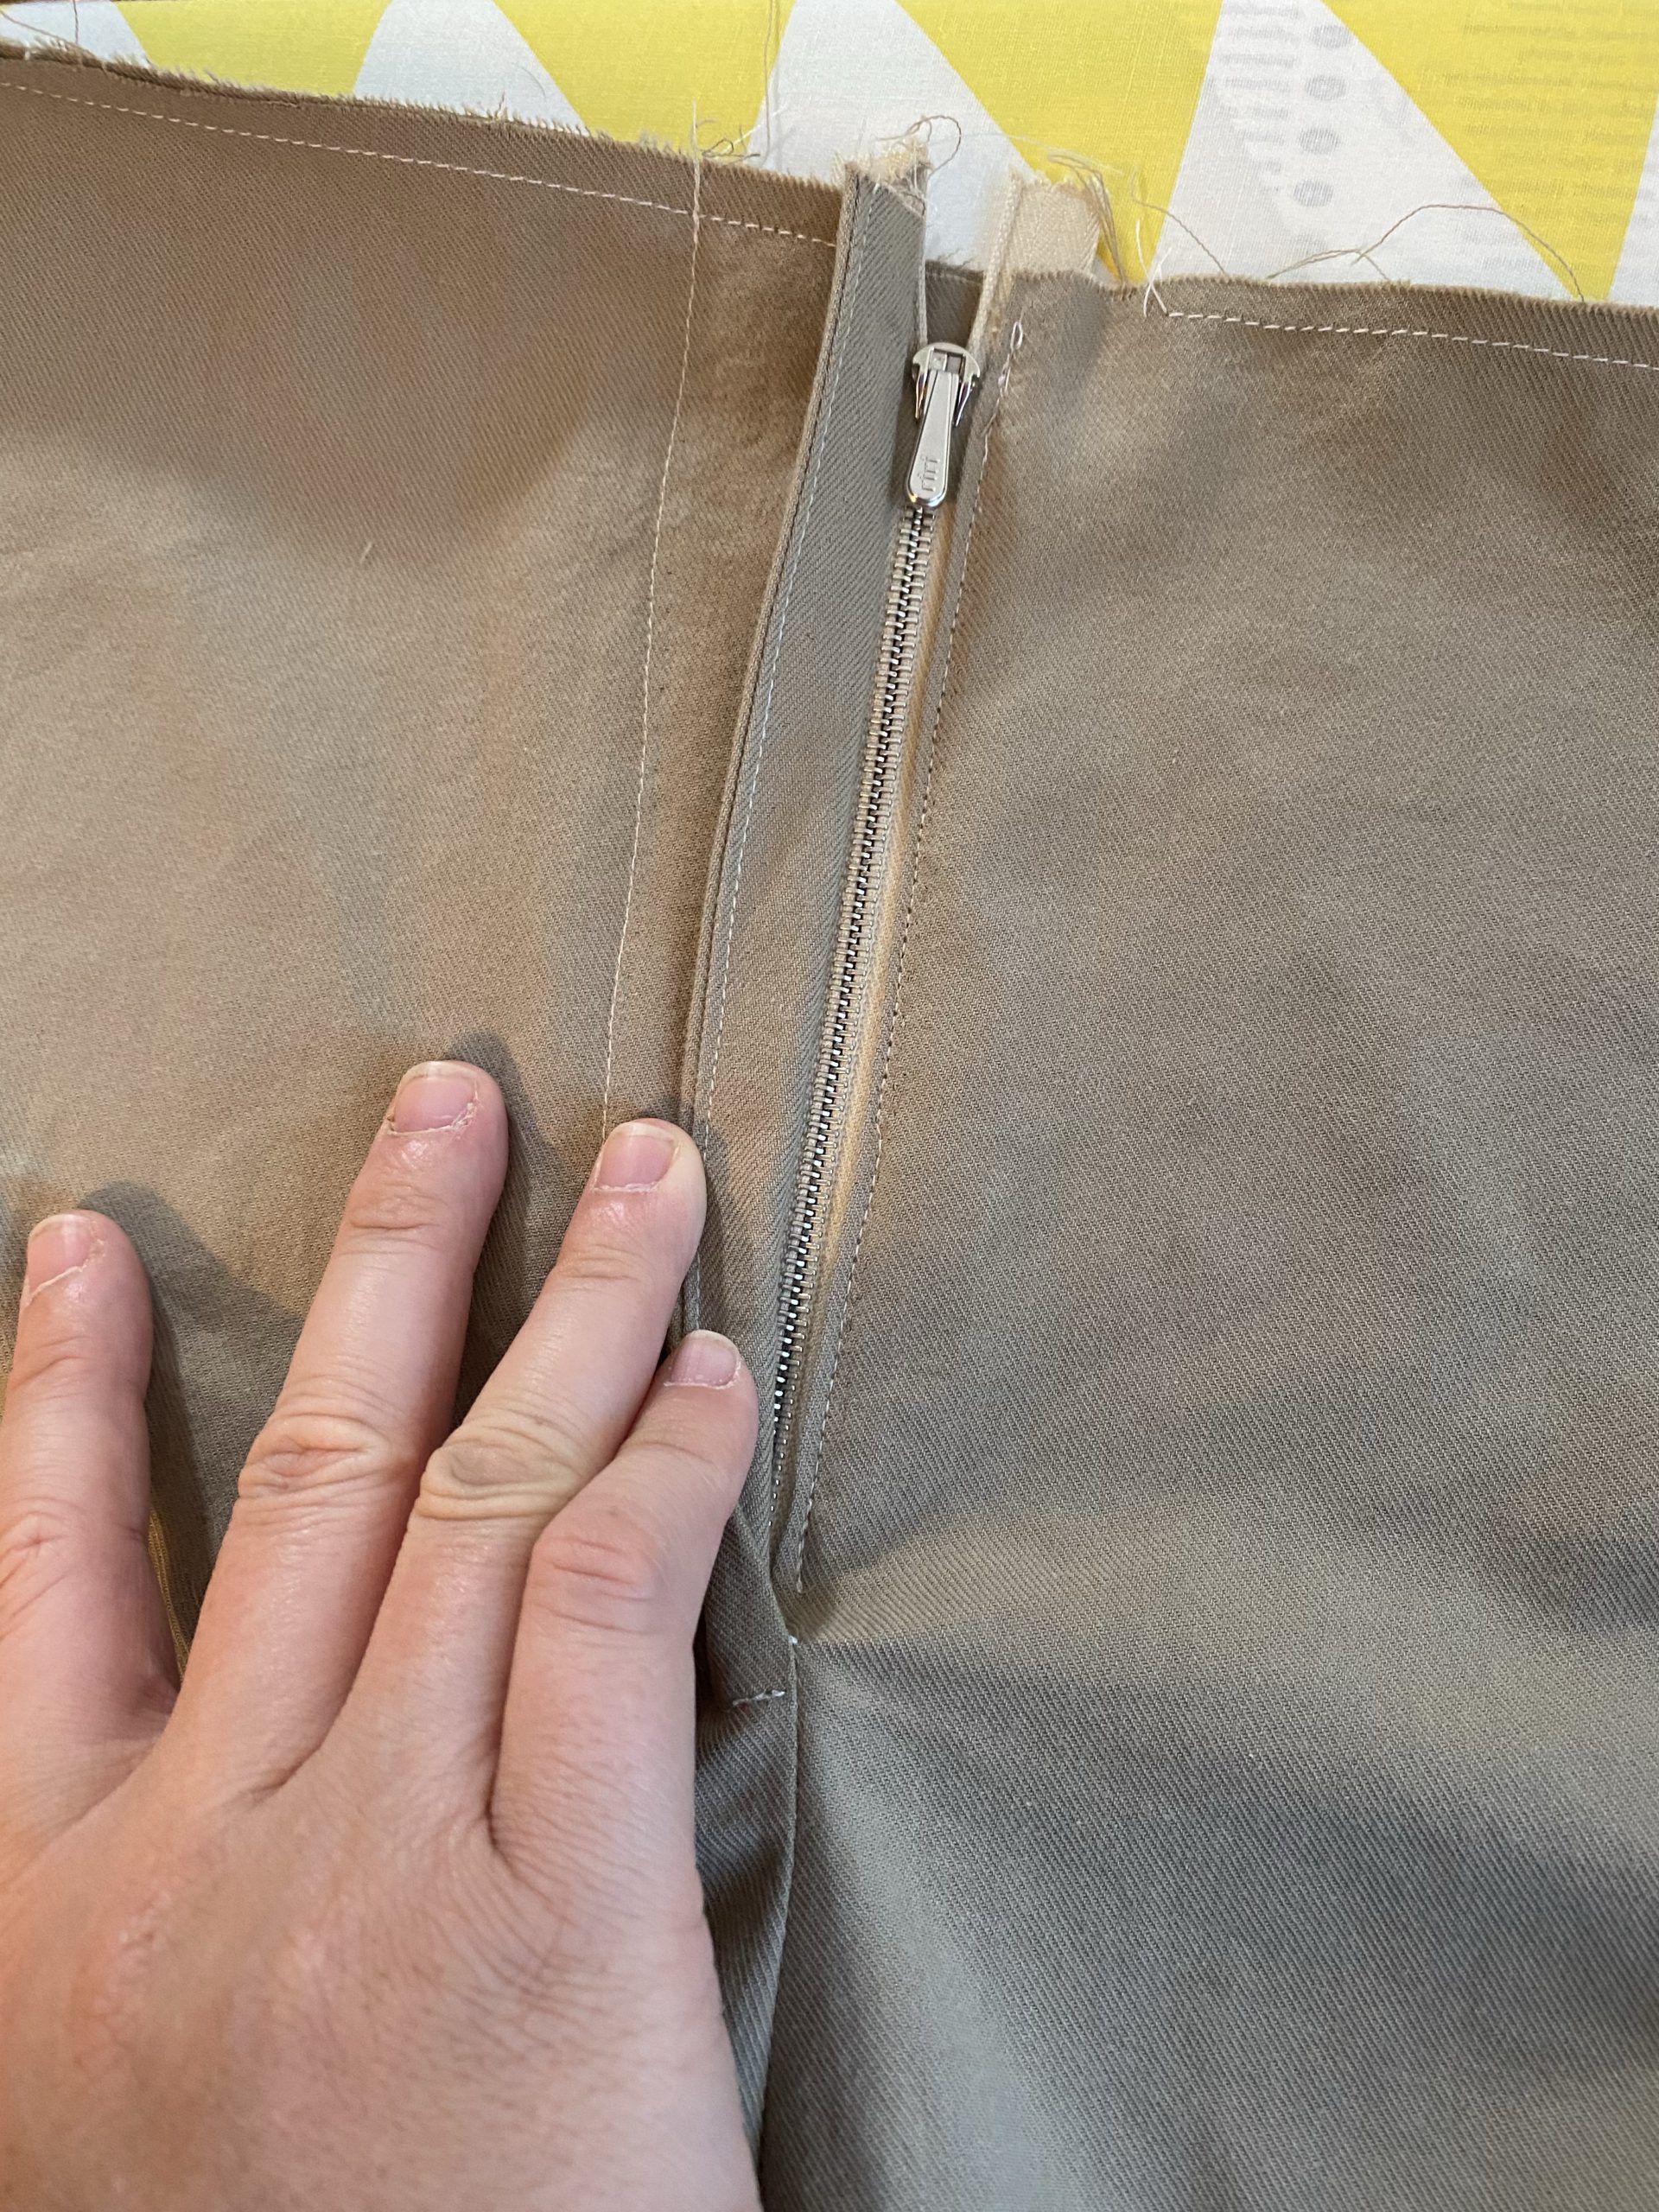
The rest of the pants assembly was pretty easy – even those big curvy bits! – and you end up inserting nice deep pockets into the side seams. Then it was time to insert the zip. I’ve sewn zippers before, but only side-seam ones. I decided that I really wanted a quality metal zip rather than futzing about with crappy nylon ones. I made a pilgrimage to a local haberdasher – which was amazing – and got everything I needed. I was nervous about inserting it, but the instructions were great and again had you baste things together to keep everything lined up. And guess what? IT LOOKS LIKE A REAL PROFESSIONAL ZIP!
The waistband assembly was pretty simple. You have the option of binding the inside edge with bias binding or enclosing it within the waistband. I had some leftover binding from a previous project so I went with that, and it actually makes it look really nice. Then I just needed to add a buttonhole, sew on a button, and also sew on a trouser hook for the tab. Here’s what it looks like on the inside…
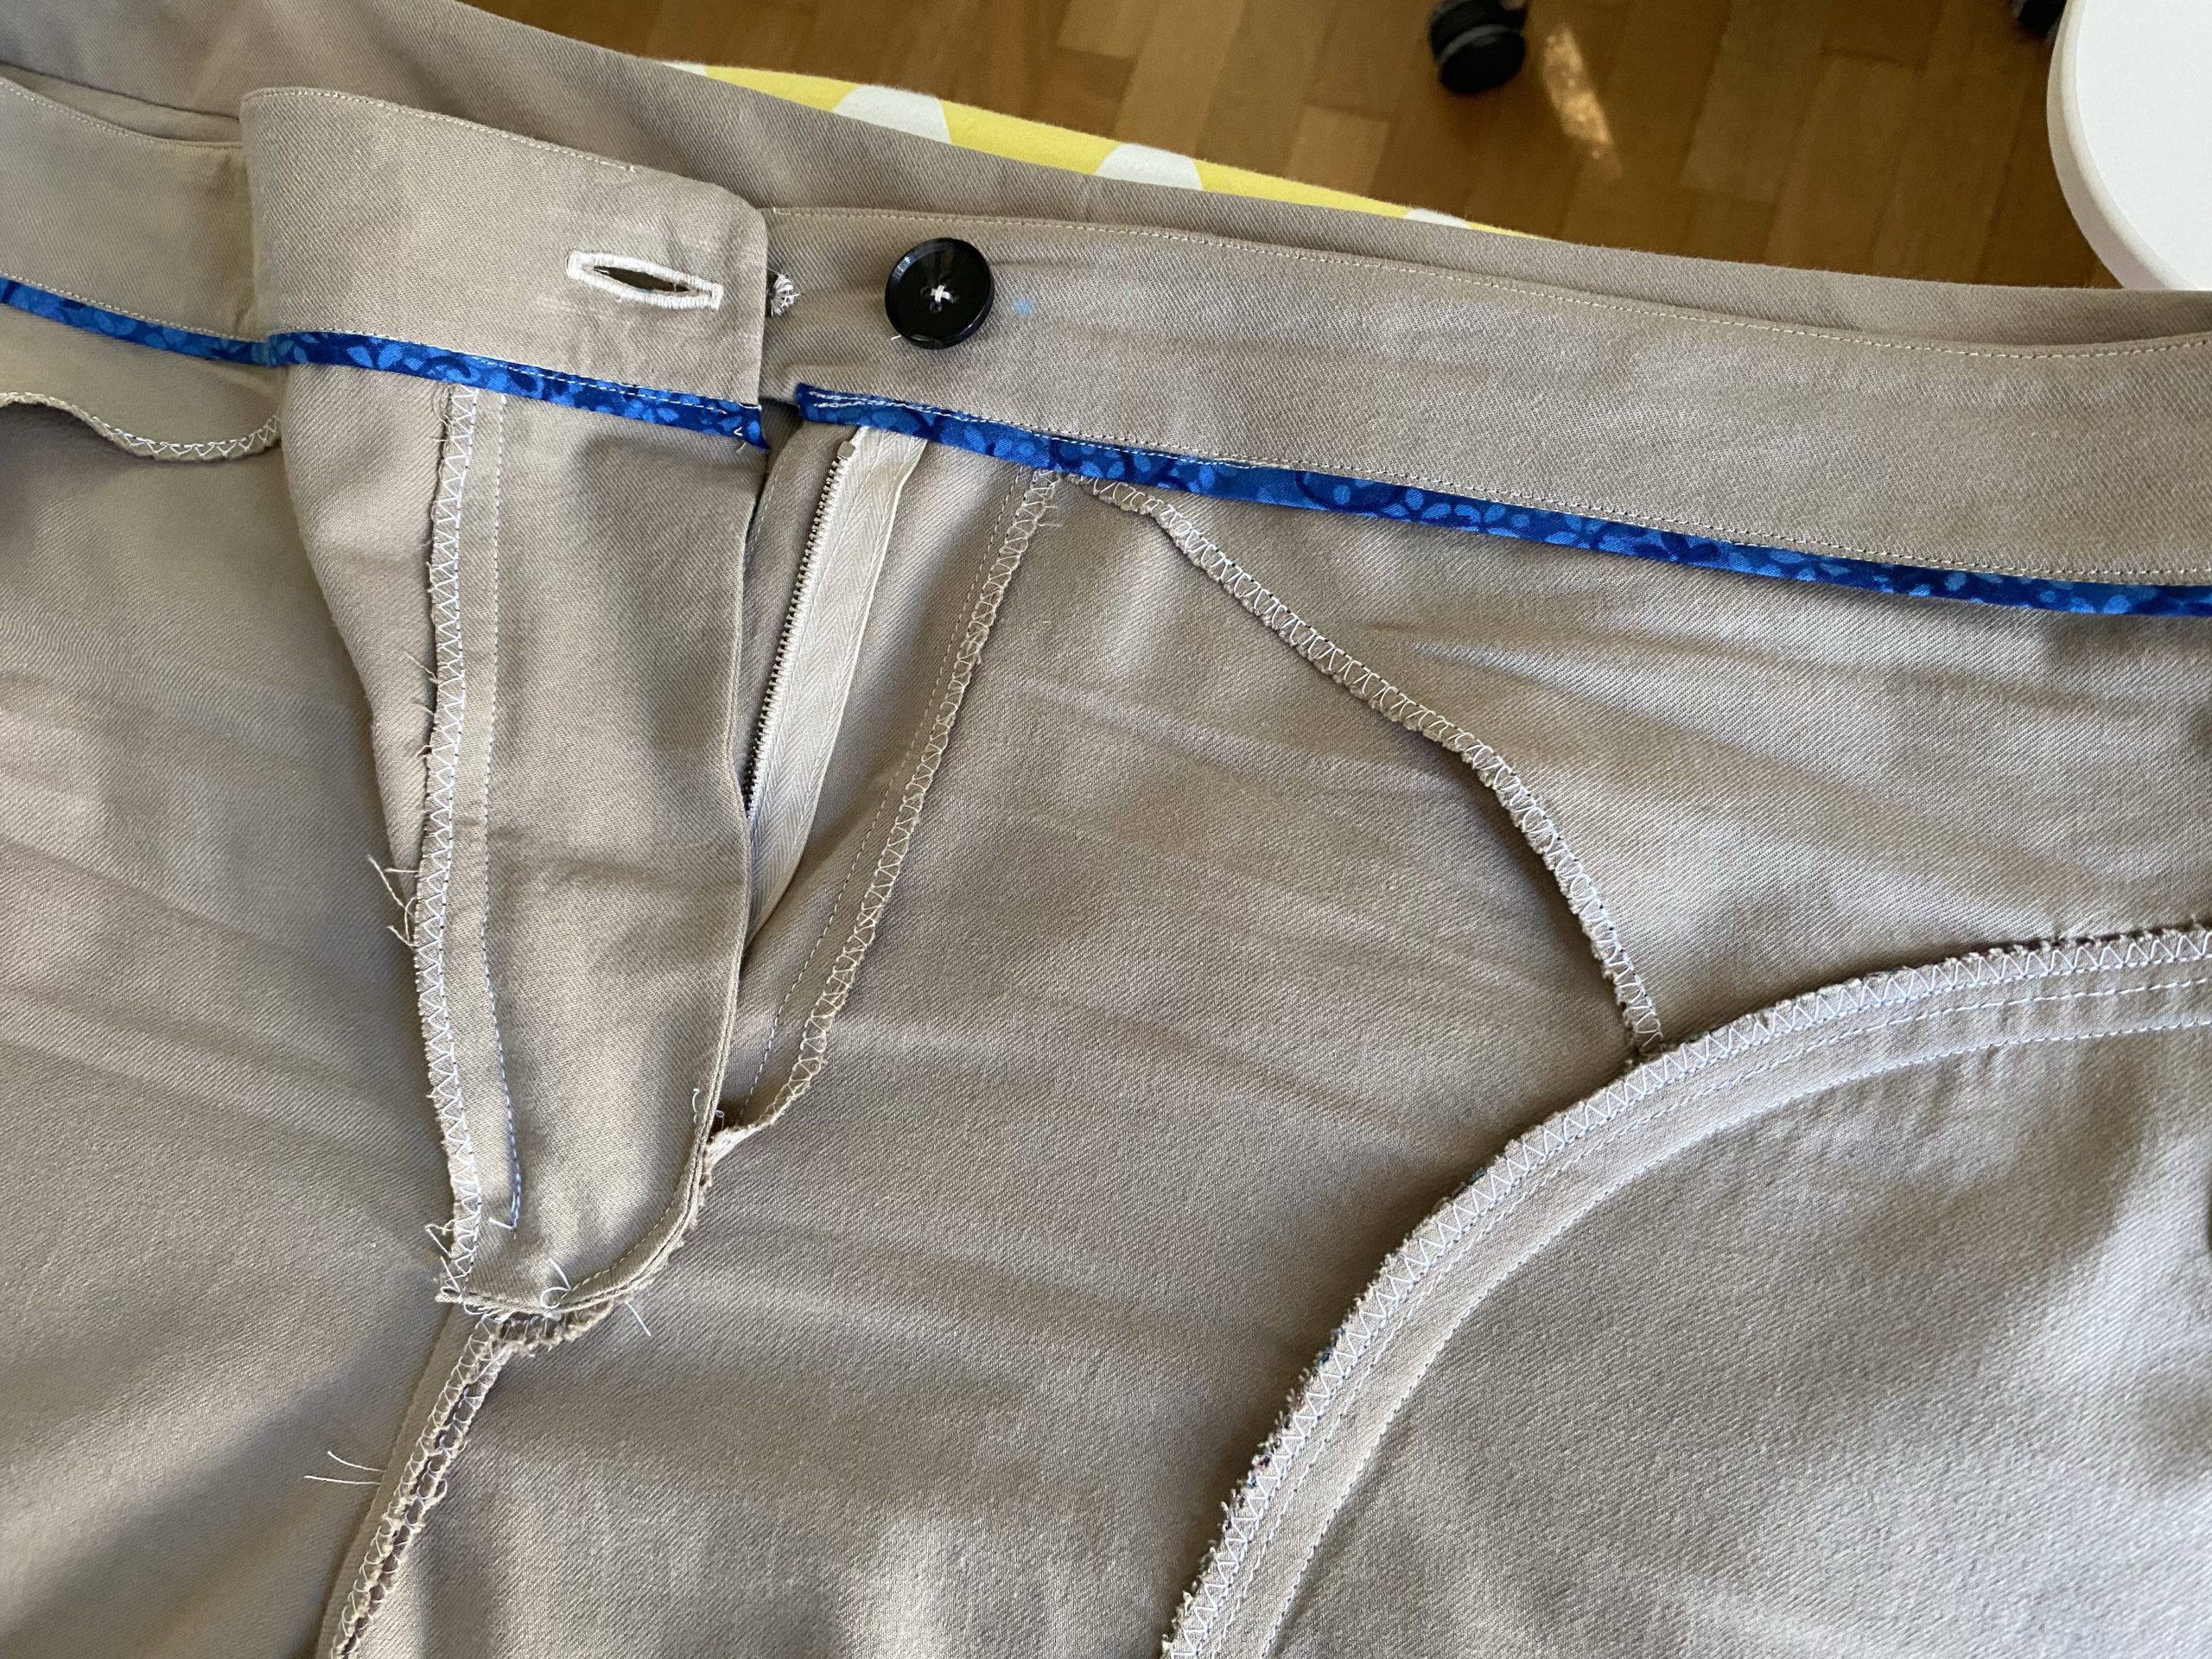
And here are the welt pockets from the inside as well.

The final step was to finish and sew on the hem facings to the legs. And then they were DONE!
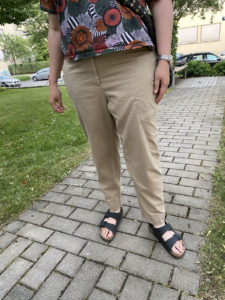
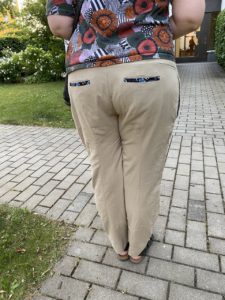
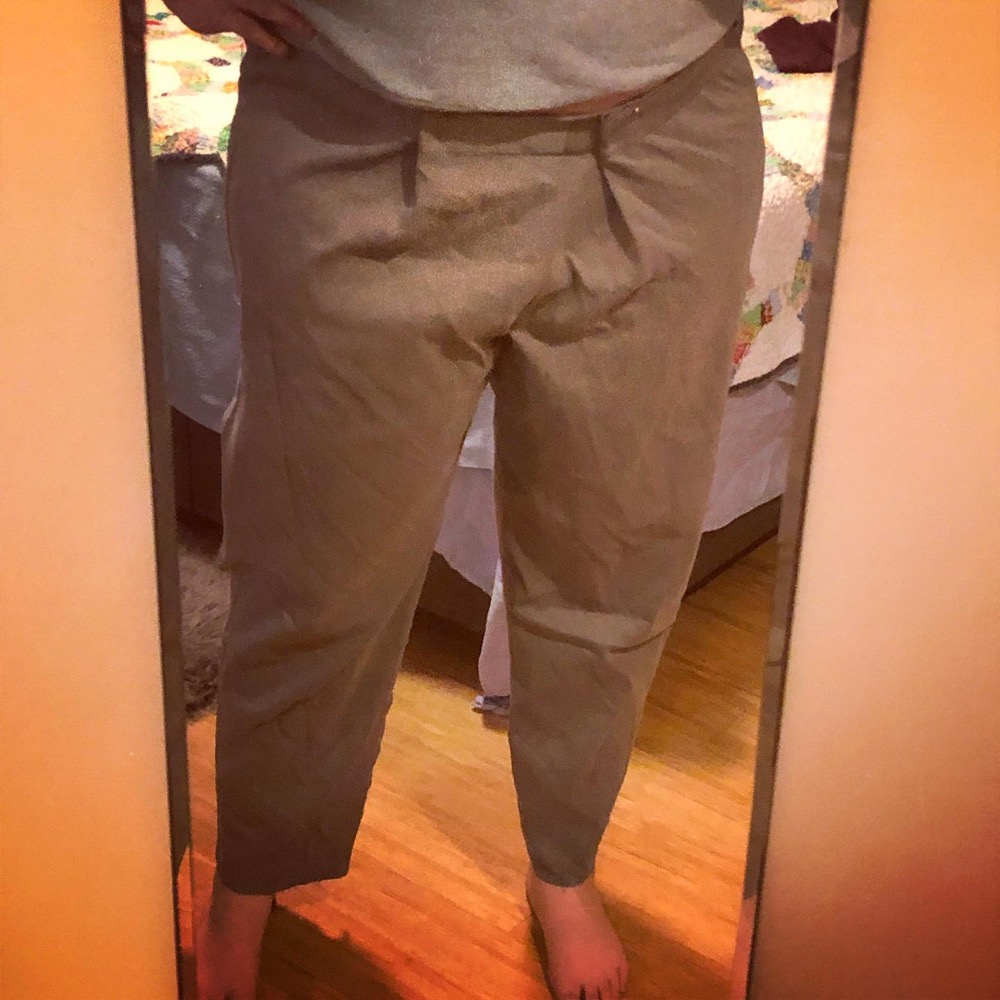
As a wearable muslin, I’m pretty happy with these! I think the three inches I added to the length was just right. There are definitely some fitting issues remaining though. You can’t tell in the photo, but I think I actually need to go down a size in the waist (but leave the size through the hip) – they’re actually quite loose around my middle. (And since there are no belt loops, you can’t really cinch it up.) I also think I need to add a bit more room to the seat, possibly by extending the back crotch point. But still – entirely wearable PANTS! I’m looking forward to making the next pair even better. 🙂
Comments
One response to “Darlow Pants”
Amazing! Really interesting walk through, thank you.