Category: Photo Post

Images and videos that I’ve taken on-the-go

  • My First Sweater

    My SweaterIt’s done! It’s slightly wonky and the fit is weird in places, but it’s wearable. (I think I’ll be able to block out some of the weirdness when I wash it. I should’ve done that first, but I was too excited to wear it.) The pattern is called “Sweet” and it’s from The Knitter’s Bible by Kate Buller. The wool is Jo Sharp DK 100% wool in “Plum”. The ruffle looks hard but – other than having to cast on 500 stitches – it was suprisingly easy to knit. The actual hardest part was sewing everything together at the end. I suck at that. The seams are a little bulky and non-symmetrical, which accounts for most of the fitting problems. I’m definitely going to knit my next sweater in the round so I don’t have to worry about that stuff. But it’s kinda cute, right?

    (Edited to add: Yeah, ignore my glazed expression in the photo. It was 7:30 am and I’d overslept, so I’m a bit out of it.)

  • Scarves Galore

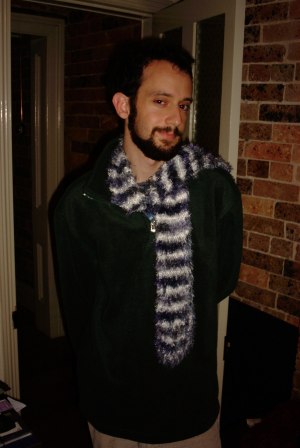
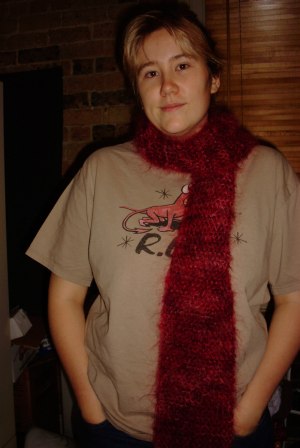
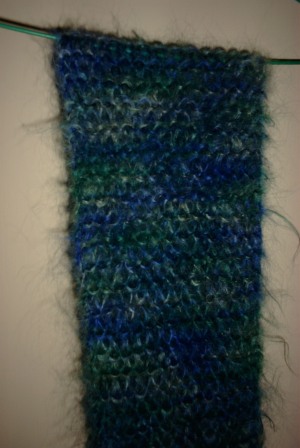
    The Easter Crafting Marathon continues. I’ve finally finished my red mohair scarf, which you can see below. The other two are scarves I’ve made in the last couple weeks.

    Snookums and the Rock Star Scarf Me and the Red Mohair Scarf Blue-green Mohair Scarf

    First you have Snookums modelling my “Rock Star Scarf”, which is knitted out of Faux Fur. It’s this crazy yarn with lots of little hairs sticking off it that actually looks like fur once you knit it up. (Let me warn my fellow knitters: It was insanely difficult to work with. You can’t see any of the stitches so if you drop one, you have to start all over.) The second and third scarves are both made of mohair, which is incredibly soft and fuzzy and beautiful. I did the blue-green one first as a gift for my Dad’s wife Cindy, and I liked it so much I got the red to do my own. Pretty nice, huh? They’re both about six feet long and six inches wide. I can’t wait to wear mine outside (if it ever stops raining)…

  • Hello Kitty Underpants

    Hello Kitty Underpants

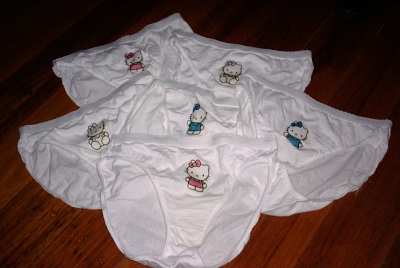
    Behold, my underpants.
    Okay, I’d like to start off by filling you single (and gay) guys in on a little secret: all girls have “granny pants”. These are the nice comfy cotton underpants we wear when we’re sick or out of laundry. No, they’re not sexy at all. Last Christmas my Mom sent me a nice pack of new plain white granny pants (as Moms are wont to do). They’re functional, though huge, and though I haven’t worn them yet, I’m not about to let them go to waste. They could be a little bit cuter though. That’s why I decided to try to liven them up a bit with some of this iron-on transfer paper (considering that I get a pretty nice staff discount). I wasn’t sure about a design until I came across a set of Hello Kitty brushes for Illustrator last week. With that, the plan was made.

    The transfer paper was actually really easy to use. As I understand it, it’s coated in a kind of waxy stuff that melts when you iron it, thus coming off the paper and trapping the ink onto your shirt. That’s why you’ve got to trim pretty good around the image, because even where there’s no color you still get a layer of stuff. The design itself feels a little stiff right now, so I’m not sure how comfortable it’d be to wear a great big design. I don’t know how well they’ll hold up in the wash either, but quite frankly it’s not too big a worry. They’re only underpants. 🙂

    (Hmm. Given that I officially got “on” the Net when I started college in 1995, it’s taken me about eight years to put my undergarments online. Geez, I’m like a porn star now or something.)

  • Record Bowls

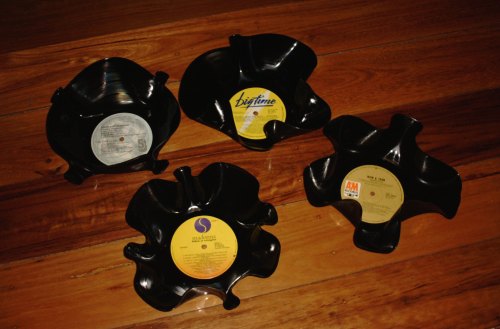
    Record Bowls

    Well, that’s some progress. Starting from the bottom and going clockwise, that’s Madonna’s “Like a Virgin”, Culture Club’s “Colour by Numbers”, Stryper’s “To Hell With the Devil”, and the Carpenters’ “Now and Then”. I basically followed the Get Crafty instructions, and I really can’t stress how friggin’ easy this is. They recommend an oven temperature of 200F, but my oven wouldn’t even go that low. I just turned it down as low as possible. Put a bowl upside-down on a cookie sheet, whack the record on top, and set it in the oven for about five minutes. Pull it out (use a hotpad or you’ll burn yourself like me!), whip off the flimsy record, and shove it down inside another bowl to mold it. They don’t give off toxic fumes or anything, and they don’t get melty enough that you see fingerprints. (In fact, I think mine are somehow shinier now than they were before.) You’ve only got a few seconds to work with ’em though, so be quick. I went for a couple different shapes here. (It’s not possible to get them perfectly round, so don’t even try.) I think I’m going to glue some marbles to the bottom to act as legs and use a piece of tape to cover up the hole. Voila! Ultra trendy potato chip bowls. I’m so selling these at the Glebe Markets this year.

  • Oscar the Sock Monkey

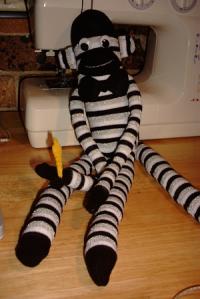
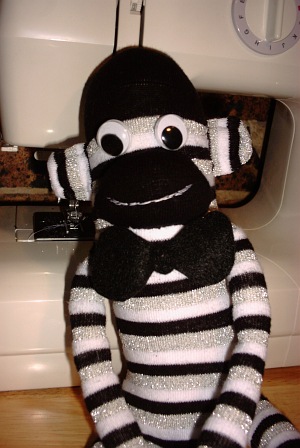
    My Oscar Contest has officially stopped accepting new entries, so I figured I’d better show you all what you’re playing for. Meet Oscar the Sock Monkey! As you can see he’s all dressed up in black tie and silver sparkles. He’s got googly eyes and a big grin, and he’s even got his own little Academy Award!

    As the response to the contest was about ten times what I was expecting – 144 entries? Who the heck are all you people? – I’m also providing regular sock monkeys for second and third place. The Awards start at 5:30 PM Pacific time Sunday, which means 12:30 PM Monday afternoon here. As I’ll be at work all day at the draconian, no-Internet unnamed printer company, you’ll have to wait til I get home for the results to be tallied. Basically, plan on the winner being named about five hours after the Awards start. Good luck everyone!

  • Seen today at the Newtown shopping centre…

    Where else do you think you buy them?

    Well, where else do you think you buy them? 🙂

  • Cordury Jeans Bag

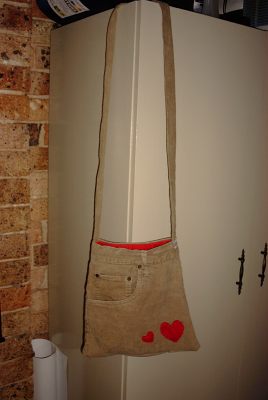
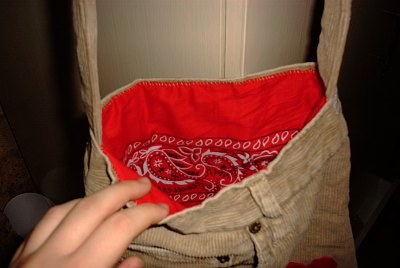
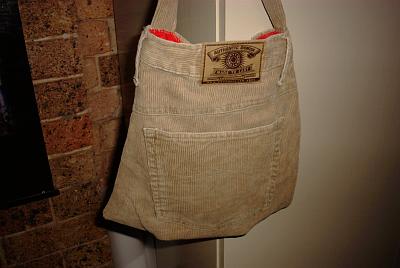
    I’ve been obsessed with bags lately. (It offends my feminist pride to admit I carry a purse.) I keep accumulating them because I can never find the ideal one. I got a suede one recently that’s damn near perfect, but every time I carry the thing it rains. Anyhoo, last night on the train home I had a flash of inspiration – why not use one of my now giant (courtesy of the diet) pairs of corduroys to make a bag? The result is before you. It’s lined with a red bandanna and I appliqued felt hearts to the front. Isn’t it cute?

    I’d seen several people on Glitter recommending the “chop off the legs and sew up the crotch” method of making a jeans purse. When I spread out my cords, though, I had to give up on that idea. I mean, they’re huge. I can’t believe my bum was that big. It wouldn’t be a purse; it’d be a duffel bag. So I decided to go halfway. I cut off the legs and then cut it in half vertically near the zipper. Then I spent a good half hour messing around with pins and basting to try and decide how to sew the thing up. Eventually I just said “screw it” and sewed a semi-straight line down the side. Then it came time for the bottom…

    The bottom was the hardest part. See, jeans kinda “pooch” out more in the back to accommodate your bum. So I had more fabric on the back side than on the front. The solution, I eventually figured out, was to put a couple of darts (i.e. folds) in the back piece to make it work out. You can kinda see ’em on the picture of the back. Again, I just kinda eyeballed everything, but it came out looking much better than anticipated.

    Next was the strap, which I made from one of the legs. I like a long strap, so I slit a leg lengthwise and sewed the lengths together to make one really long piece of fabric. Then it was just a matter of folding it together so the seams didn’t show and running a line of stitching along the edge. (I’m happy to report that my little Janome sewing machine handled layers of corduroy very well. My only problem was that occasionally it was a tight fit getting everything under the presser foot. There’s probably a way to lift it up higher though that I just don’t know of.) I sewed the straps to the inside of the waistband, trying out my zig-zag stitch for the first time. I figured there was no way to hide the sewing, so I might as well make it look intentional. 🙂

    Looking inside the bag at this point, I realized I needed a lining. The front pocket was still hanging in there, and the seams and stuff just looked really messy. I had some bandannas in my fabric stash so I grabbed a red one and fashioned a pocket of similar size to my bag. (Because my bag is kinda trapezoidal in shape, I sewed the lining rectangular at first and then progressively angled in new seams at the top til the opening fit the waistband.) The I just stitched it in place inside the waistband.

    Lastly I decided it needed a little decoration, so I pulled out a piece of felt and cut out some hearts. Then I just sewed them to the front panel (being sure not to go all the way through). They’re just tacked on, so they should be easy to remove if I want to change it in the future.

    The whole time I was making this, I kept imagining that I’d ruined my pants (not that I could wear them anymore anyway) and that the end result would look ridiculous. But when the Snook got home and complimented me on it, I realized that it actually kinda works. I like the fact that it still has pockets and stuff for my mobile and train tickets. It’s yet another product for my eventual craft stand! 🙂

  • Beading

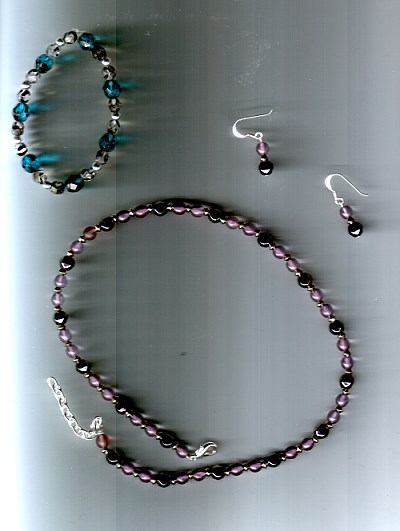
    Beaded Jewelry

    Last week I went to an “Introduction to Jewelry Making” workshop at the Bead Company near my house. I made the necklace, bracelet, and earrings pictured here. It was pretty much straight stringing; nothing as complicated as I’d already done with the flower necklace. But I learned how to use wire and crimps to make sturdier jewelry with nicer clasps. The necklace and earrings both use crystal-cut hematite and pink glass beads, while the bracelet is made up of funky cut glass and shiny silver spacers. I had a lot of fun at the Glebe Markets today checking out the price that similar stuff was going for. I saw earrings exactly like mine for $20! I can now make the same pair for $2. I’m never going to overpay people for stuff I can make myself again.

  • Snookums and the Art of Zen

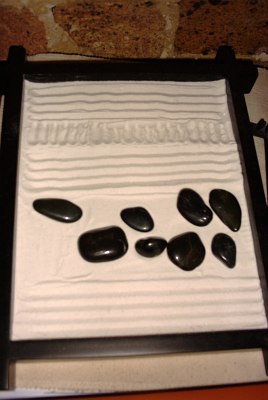
    Zen Garden

    We recently cleaned up our office and uncovered the long-forgotten zen garden. Here’s what the Snook created. Any interpretations? Personally, I find it interesting that the rocks are “unbalanced” and seem bunched up on one side. Also note that he’s “buried” the rocks beneath layers of straight lines. So perhaps this “unbalanced” side is something that’s contained and buried deep within.

    Or maybe he just likes making straight lines with the little rake. *shrug* I dunno.

  • Flower Necklace

    Beaded flower necklace

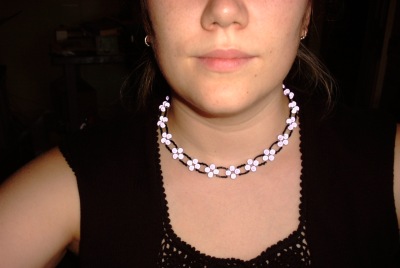
    Look what I made! I was feeling so crappy when I was home sick Monday that I decided to make myself something pretty to compensate. I started flipping through a bead magazine that Ma Snook recently sent me. There I found instructions to make this great “flower” necklace. I’m a sucker for these things, but I always feel ripped off when I pay some craft fair hippie ten bucks for one. It didn’t look too hard so I decided to give it a shot. I nipped round the corner to pick up the supplies and then plopped myself down on the couch. I wasn’t sure how it would turn out, but the end result is just gorgeous (if I do say so myself). The actual construction time was, like, 90 minutes, but that was with me watching Friends, Malcolm, and Millionaire at the same time. In other words, this is a super easy project even if you’re a total beginner.
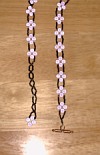
    The necklace closureTechnically the pattern is for a choker, but I can’t stand chokers. So I made mine a little bit longer, and since the beads weren’t too big it lays pretty flat on my chest. In the instructions below I’ll tell you where you can lengthen yours if you want. To the right you can see the back closure. It uses a “T-bar” which you then slip through one of the loops on the other side, which means it’s adjustable.

    Okay, supplies. You need two types of beeds: teeny little “seed” beads (the black ones in my necklace), and bigger beads to use for the petals (the purple ones). Seed beads are those itty-bitty little round ones that you buy in bulk. My shop was actually out of black ones, so instead the ones I used are little chopped tubular ones. You really can’t tell the difference, so just get what’s available. The smallest amount my shop sells is 25 grams, which was way more than enough to do, like, five necklaces. I’d estimate you need a very small handful (and even that will probably leave some left over).

    For the bigger beads, you can use whatever you want. Mine are called “Mysterious Beads” and each one is about the size of a small pea. Just keep in mind that they’re going to be clustered in groups of four, so the bigger beads you get the chunkier your necklace will be. Anything vaguely round will do. (The magazine shows examples with faceted glass crystals and freshwater pearls.) You need 88 of them to make the basic choker, but I just bought 100 since it was cheaper that way. I ended up using some of the extras to lengthen it, too.

    Other than the beads, you need beading cord. You could probably get away with using fishing line, but I’d avoid sewing thread if possible (I don’t think it’s strong enough). Whatever you get, it needs to be extra-fine because it has to go through some beads twice. You also need a beading needle. My seed beads were too tiny for a sewing needle, so I had to get a special one. It’s basically just two pieces of thin wire connected at the ends (to create a very long “eye” for your cord). They should have some near where you buy the seed beads. You also need the “T-bar”, which is the metal rod with a ring on it that you connect to one end of the necklace. If you can’t find one you can probably make do with a normal necklace ring clasp (it just won’t look as pretty at the back). Lastly, you need a bit of clear nail polish. But hey, everybody’s got that, right?

    Instructions:

    1. Pull out a length of about 3 yards of beading cord. Yep, that’s like nine feet. You basically start in the middle though and entwine the two ends as you go, so trust me, the length is necessary. Thread your needle on one end.
    2. String on four of your bigger beads and slide them all the way to the middle of your cord. Take the needle off and tie the two ends (yeah, they’re long, so don’t get ’em tangled!) in a “square knot”. Personally, I call it a “double knot”, if you know what I mean. This makes the little cluster at the end of the necklace without the T-bar.
    3. Thread your needle back on one end. Now, go back through the pearl that’s closest to the knot you just made (and the thread you’re holding). Basically you should have a cluster of four beads with two threads coming out opposite sides of one bead. Right? Right.
    4. Now go ahead and use your needle to string 55 seed beads on this thread. Count ’em out carefully. These will make the loops without flowers. When you’re done, take the needle off and thread it on the other thread.
    5. On this thread, string 6 seed beads. Now start counting along the length of 55 on the other thread. Take your needle and insert it back through the 7th bead pointing towards the end cluster. You’ll see that you’ve just made a loop! Tighten things up as best you can.
    6. Now you just repeat that last step 6 more times: add 6 seed beads, count 7 more along the other strand, go back through towards the start, and tighten. End by string 6 seed beads (so you’ve got some left on each strand).
    7. Remove your needle and switch it to the other strand. String 3 of your bigger beads and then 6 seed beads 21 times (i.e. 3 big, 6 little, 3 big, 6 little, etc.). Don’t worry, this will turn out way longer than your actual necklace will. By the time we’ve made the clusters though, it’ll be right. This is also the point where I decided to lengthen mine a bit, so I did the repeat 22 times. It’s up to you, really.
    8. Okay, switch the needle back to the “empty” thread. Go back through the first (loose) big bead on the other thread pointing back towards the start. String 1 more big bead, and then go through the 3rd big bead on the other thread pointing back towards the start. You’ve just made a flower cluster! (It sounds complicated, but once you’ve got the strands you’ll see how it comes together.) Now string 6 more seed beads.
    9. That last step builds each loop of the body of the necklace, so now all you have to do is repeat it. Keep doing it until you’ve gone through the last big bead on the first strand. String six seed beads.
    10. You should have six seed beads on each strand. We’re ready to finish this sucker off! First you’ve got to tighten the beadwork, which for me meant I picked it up by the two strands and kinda let gravity help. Then tie the two cords together with another square (double) knot. Now string 4 more seed beads and then go through the ring on your T-bar (or your necklace clasp). Go back down through the 4 seed beads and tighten. Tie another square (double) knot. Go back through the closest 6 seed beads and tie a single knot before the first big bead. Go through the pearl and tie another single knot. Repeat on the other side. Cross the threads through the bottom big bead and snip. Dab a little clear nail polish on your knots and let them dry.

    That’s it! Sounds complicated but really there are only a couple tricks and once you know them the rest is easy. Let me know if any of you give it a try!